TrainWeb.org Facebook Page
B&O Washington Branch Photo Tour


B&O Washington Branch
Modern day photo tour

Accompanying each photo below are:

Click a photo to see a larger view. Please send your comments and corrections to Steve.


<< Previous (east) | THIS PAGE: Patuxent Branch | Next (part 2) >>

Brief Historical Background: Patuxent Branch

Aerial 1938
Photo courtesy Johns Hopkins University
NEW! late-Aug 2020

Aerial 1938
Mile: 19.4, spur's first 1.5 Date: May 1938
Ease: B View: N (up)
Area: A IC2:
Map: Ho 20 A 8 Topographic Maps

The thick black line at photo bottom obscures where the Patuxent Branch separates from the main line of the B&O's Washington Branch. From there the branch aims north, and crosses US 1 on the east side of the oval track that in 1947 would be modified into Laurel Raceway. At the oval, the branch turns west (left) as it negotiates the zigzagging Little Patuxent River upstream. Where the river bends and forks at upper left, the railroad turns back to the north and spans the Middle Patuxent River via a bridge. Midway between US 1 and that bridge survives another bridge, one of a Bollman design, that carried railcars to Savage Mill.


Patuxent Branch

Patuxent Branch
Mile: 19.4, spur 0.0 Date: Sep 2001
Ease: B View: NE
Area: A IC2:
Map: AA 5 A 10, Ho 20 D 10 Topographic Maps

The Patuxent Branch splits from the Washington Branch at Savage, perhaps 200 feet south of the latter's bridge over the Little Patuxent River. As seen here, the branch veers left (northwest) just before the yellow CSX maintenance crane.

This tour follows the branch northwestward to its end in present-day Columbia.


Disconnected

Disconnected
Mile: 19.4, spur 0.0 Date: Oct 2005
Ease: B View: S
Area: A IC2:
Map: Ho 20 D 10 Topographic Maps

Sometime in 2005, after 115+ years of rail service, the Patuxent Branch was disconnected from the main. This view back to the former junction shows that nature is already reclaiming the right of way.

Lack of demand plus maintenance expenses were likely the primary reasons for the demise. The other photos on this page were snapped at an earlier date.

The tall signals protect mainline crossovers.


Hammond Branch Bridge

Hammond Branch Bridge
Mile: 19.4, spur 0.1 Date: Sep 2001
Ease: B View: N
Area: A IC2:
Map: Ho 20 D 10 Topographic Maps

Just when I thought I had seen everything Central Maryland's historic rails had to offer, I discovered this gem of a timber supported bridge tucked away in a hidden location.

Shortly after splitting from the current main line, the Patuxent Branch rails must negotiate a high passage over the Hammond Branch stream. To my great surprise, this is accomplished by the timber bridge seen here, the only timber bridge I've found for any CSX trackage in the region.

The center section of the bridge is made of steel, and the number 1 is painted at the north (west) end. The condition of the timbers are too good for this to be the original structure from the 1800s.


Comp Bar

Comp Bar
Mile: 19.4, spur 0.1 Date: Sep 2001
Ease: B View: W
Area: A IC2:
Map: Ho 20 D 10 Topographic Maps

This area had many interesting artifacts, including old comp bars, or compromise rail joints, like this one. Comp bars, sometimes called fishplates, are used to connect segmented rail of differing sizes.

Reader Mike Brown said:

    "The '85A' on the lower right hand side of the photo, designates the rail side of 85 pounds per yard. The 'A' designates the cross-section. On the lower left, is '100RB' denoting 100 pounds per yard 'RB' cross-section. The 'RJCo' denotes the manufacturer 'The Railway Joint Company'. This device is called a compromise rail joint. 'Fishplates' are actually different and definitely UK terminology."


Rail Date Stamp

Rail Date Stamp
Mile: 19.4, spur 0.1 Date: Sep 2001
Ease: C+ View: SE
Area: B IC2:
Map: Ho 20 D 10 Topographic Maps

A closeup image of the rail's date stamp at the northwest shore of the bridge reveals "96 IIIIIII" that translates to a forging date of July 1896.

Records indicate B&O's Patuxent Branch was opened in the late 1880s. Why would the rails be replaced within about 10 years? The possible answer is, according to USGS maps, the spur originally separated from the main line on the north side of the Little Patuxent River, then quickly crossed over it to the south bank.

Perhaps the Little Patuxent bridge washed out in the 1890s, and rather than rebuild it, the railroad decided to move the starting point of the spur from the north bank to the south bank. This move instead necessitated a bridge over the Hammond Branch, which is a smaller stream than the Little Patuxent.


Deteriorating

Deteriorating
Mile: 19.4, spur 0.1 Date: Aug 2013
Ease: B View: S
Area: A IC2:
Map: Ho 20 D 10 Topographic Maps

After abandonment of the spur, CSX pulled up the rail hardware and left the bridge to slowly deteriorate. The bridge was removed soon after this photo.


MOW Equipment

MOW Equipment
Mile: 19.4, spur 0.3 Date: Sep 2001
Ease: C View: N
Area: B IC2:
Map: Ho 20 D 10 Topographic Maps

Prior to the abandoment, a short distance farther up the branch, assorted CSX Maintenance-of-Way equipment had rested for a weekend on a spur next to a trucking facility within the Savage Industrial Park.


Sperling

Sperling
Mile: 19.4, spur 0.3 Date: Sep 2001
Ease: C View: N
Area: B IC2:
Map: Ho 20 D 10 Topographic Maps

More MOW equipment. This is a tie plugging machine made by Sperling Railway Services. The number 200102 probably indicates this is the second TPM acquired by CSX during the year 2001.

Sperling's web site said, "We are manufacturers of innovative maintenance of way machinery, railroad signs, and accessories. Machinery includes a Quadrill 4-spindle dual head tie drill, a one-man rail gang base gauger, a diesel powered personnel carrier equipped with hydraulic tool circuit, and a single quick-change drill/screw spike driver."

Reader Chad Sperling wrote to describe the equipment:


Old Track

Old Track
Mile: 19.4, spur 0.4 Date: Sep 2001
Ease: C View: N
Area: B IC2:
Map: Ho 20 D 9 Topographic Maps

From the appearance of these old tracks bending unevenly into the distance heading toward US 1, all that MOW equipment would seem to have come to the right place! Actually, that equipment was probably just being stored until needed.


Savage

Savage
Mile: 19.4, spur 0.7 Date: Aug 2000
Ease: A View: S
Area: B IC2:
Map: Ho 20 C 8 Topographic Maps

For about 20 years the Patuxent Branch had ended here at Poist's liquid petroleum store, easily seen on the east side of US 1 while driving past. Every so often, CSX negotiated the old tracks to deliver a tanker car like this one (GATX 91861) to the facility.

In this photo, with the northbound lanes of US 1 at our back, you can glimpse the remaining tracks in the distant shadows between the tanker car and the utility pole.


US 1
NEW! late-Aug 2020

US 1
Mile: 19.4, spur 0.7 Date: Oct 2005
Ease: A View: N
Area: B IC2:
Map: Ho 20 C 8 Topographic Maps

The branch had crossed US 1 at grade where you see the horizontal patch within the pavement ahead. Old photos reveal US 1 was twinned by adding fresh southbound lanes during the 1950s.

Not seen oo the left is the site of Freestate Raceway, a harness racing track that in 1979 evolved from Laurel Raceway, but which then endured only 11 more years. Now a shopping center occupies the location.

Link: similar view with train 1948


Track Relic

Track Relic
Mile: 19.4, spur 0.8 Date: Sep 2001
Ease: A View: NW
Area: B+ IC2:
Map: Ho 20 C 8 Topographic Maps

West of US 1, until the mid-1980s the Patuxent Branch's tracks had continued northwest along the south bank of Little Patuxent River toward Savage Mill. This photo from a parking lot on the west side of US 1 shows the track remains of what was likely a siding to serve the building at right. Meanwhile, I believe the Branch continued along the path delineated by the overhead telephone lines at left (confirmed by reader Charley Wingate).


Aerial 1970
Photo courtesy Library of Congress
NEW! Sep 2020

Aerial 1970
Mile: 19.4, spur 1.0 Date: ~1970
Ease: View: W
Area: IC2:
Map: Ho 20 C 8 Topographic Maps

About a mile from the main line, the branch reaches Savage Mill, its original goal, via one of B&O's signature Bollman truss bridges. This aerial shows the spiderwebby bridge relative to the mill complex a year or so before the tropical storm named Agnes would wash away many bridges.

Records indicate the "Savage Rail Road Company" formed by the owners of Savage Mill constructed the first rail bridge in this vicinity circa 1840. Their bridge was washed away by flooding during 1847, and likely rebuilt. It was not until around 1890 that the still-extant Bollman bridge was placed here.

Link: source photo


Savage Mill

Savage Mill
Mile: 19.4, spur 1.0 Date: Sep 2000
Ease: A View: NW
Area: A IC2: 393
Map: Ho 20 B 8 Topographic Maps

This Bollman bridge not only survived the floods of the 1970s but also real estate development in the area. It is the last extant railroad Bollman bridge anywhere, and is shown here in 2000 adorned by red, white and blue bunting for its dedication as a National Historic Landmark.

In 1849 Wendell Bollman designed some of the first iron bridges in the world. B&O, tired of building expensive stone bridges, asked him to create a railroad version of his bridge. At the time, steel cables had not yet been invented, so Bollman's bridge was constructed with a large number of solid strips of iron. Records indicate that this particular bridge was moved here from another location on B&O.


Bollman Bridge

Bollman Bridge
Mile: 19.4, spur 1.0 Date: Apr 1999
Ease: A View: N
Area: A IC2:
Map: Ho 20 B 8 Topographic Maps

The signpost reads "Bollman Iron Truss Bridge - 1869 - Spanning the Little Patuxent River is the sole surviving example of the bridging system invented 1850 by Wendel Bollman, Baltimore Engineer. It was the first system entirely of iron used by the Baltimore and Ohio Railroad and the first in America. Through 1873 the company built about 100 such bridges."

This bridge may have been originally installed where the Washington Branch (now CSX Capital Sub) spans the Little Patuxent River. The year it was disassembled, transported, then reassembled here is not certain, but was likely between 1885 and 1905 while other improvements were being made to the branch.

Link: Bollman history


Drop Bins
NEW! late-Aug 2020

Drop Bins
Mile: 19.4, spur 1.1 Date: Sep 2000
Ease: A View: W
Area: A IC2:
Map: Ho 20 B 8 Topographic Maps

link belt Bulk materials delivered to the mill, such as sand and coal, dropped into these bins from the railcars above via gravity.

During its later years in railroad use, locomotives did not venture over the bridge due to concerns about its strength. Instead, railcars were pushed over the bridge, where the mill's Link Belt cabling system could pull the cars closer when needed.

Link: Link Belt capstan winch


Decorated
Updated late-Aug 2020

Decorated
Mile: 19.4, spur 1.1 Date: Dec 2013
Ease: A View: SW
Area: A IC2:
Map: Ho 20 B 8 Topographic Maps

looking south 2013 For the first time in anyone's memory, for the 2013 holidays the bridge was decorated with lights. This was not the first time Christmas has come to Savage Mill.

After the mill closed in 1947, its buildings briefly served as Santa Heim, Merrieland, a Christmas ornament factory and holiday destination. B&O operated free holiday train service from Washington and Baltimore, and on the property Santa Heim ran its own small train rides for children. Santa Heim overspent and went bankrupt after less than 3 years, selling to a family that still oversees the mill to house small businesses.

Links: Santa Heim, Santa in Savage 1948


NHL Ceremony
Updated late-Aug 2020

NHL Ceremony
Mile: 19.4, spur 1.1 Date: Sep 2000
Ease: A View: SE
Area: A IC2:
Map: Ho 20 B 7 Topographic Maps

HH Harwood speaking On September 16, 2000 Savage's Bollman bridge was bestowed with a National Historic Landmark designation, the highest level of such recognition. Among the speakers at the ceremony seen here were James Robey (Howard County Executive), and Herbert Harwood, noted B&O historian and author of the Impossible Challenge books referenced within this virtual tour.

Link: National Historic Landmark Nomination document


Lift

Lift
Mile: 19.4, spur 1.1 Date: Aug 2018
Ease: A View: N
Area: A IC2:
Map: Ho 20 B 7 Topographic Maps

Tracks coming off the Bollman bridge continued a short distance north to the east side of Savage Mill. A boxcar or two would be pushed adjacent to the building and into an elevator that could lift them to various levels above the mill's ground floor.


Levels

Levels
Mile: 19.4, spur 1.2 Date: Aug 2018
Ease: A- View: SW
Area: A IC2:
Map: Ho 20 B 7 Topographic Maps

Sliding doors on each floor could be opened to permit direct unloading and loading of a lifted boxcar. Though perhaps unused since the 1940s, the machinery, gears, and cabling survive.


Rails

Rails
Mile: 19.4, spur 1.1 Date: Aug 2018
Ease: A- View: W
Area: A IC2:
Map: Ho 20 B 7 Topographic Maps

A separate short siding curves west to run between the south side of the mill and river.


Bins
Updated late-Aug 2020

Bins
Mile: 19.4, spur 1.2 Date: Aug 2018
Ease: A- View: S
Area: A IC2:
Map: Ho 20 B 7 Topographic Maps

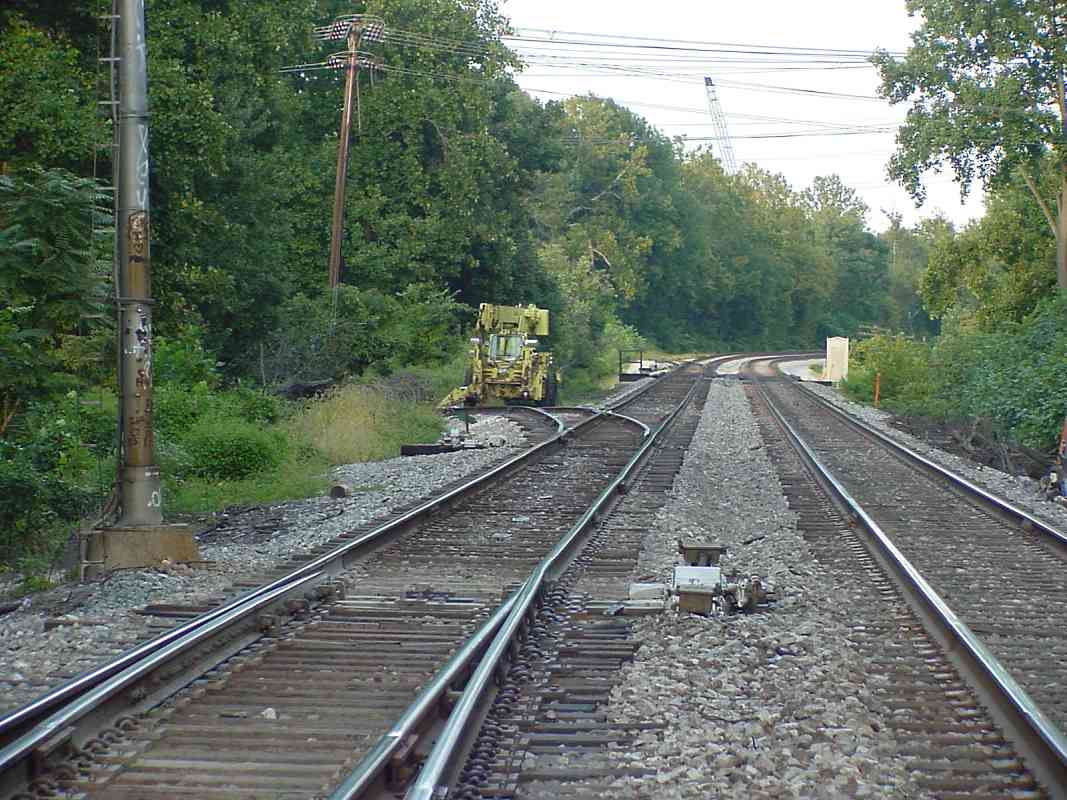
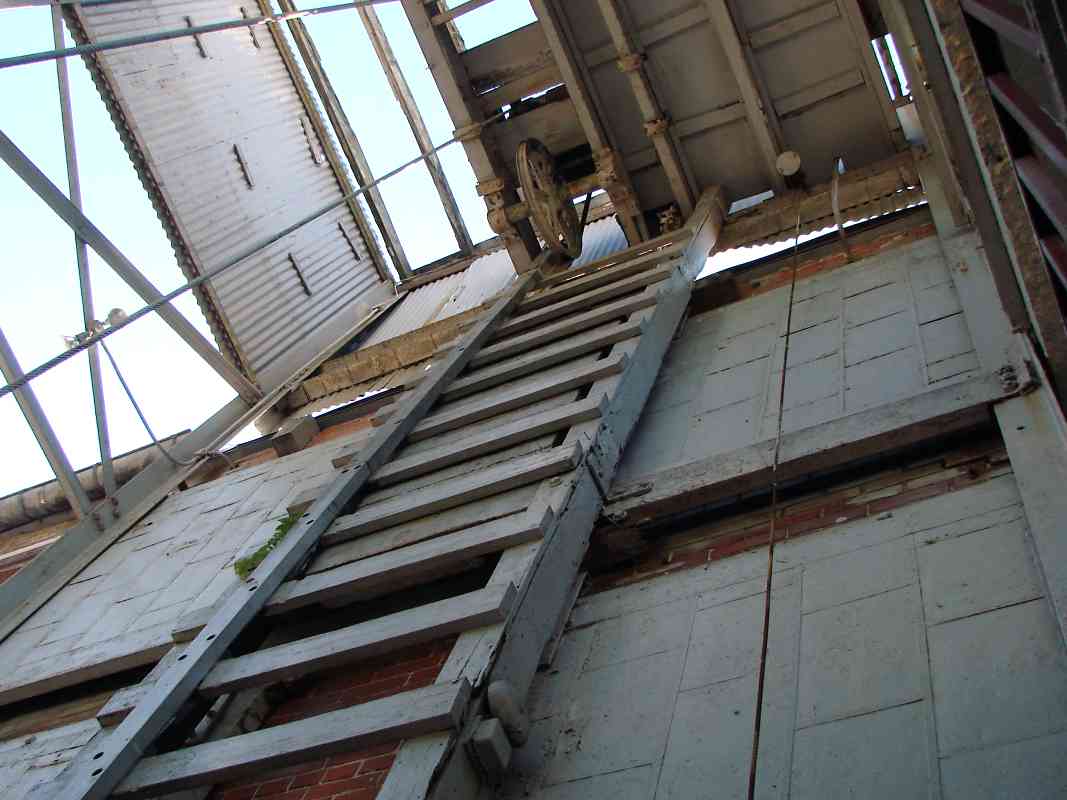
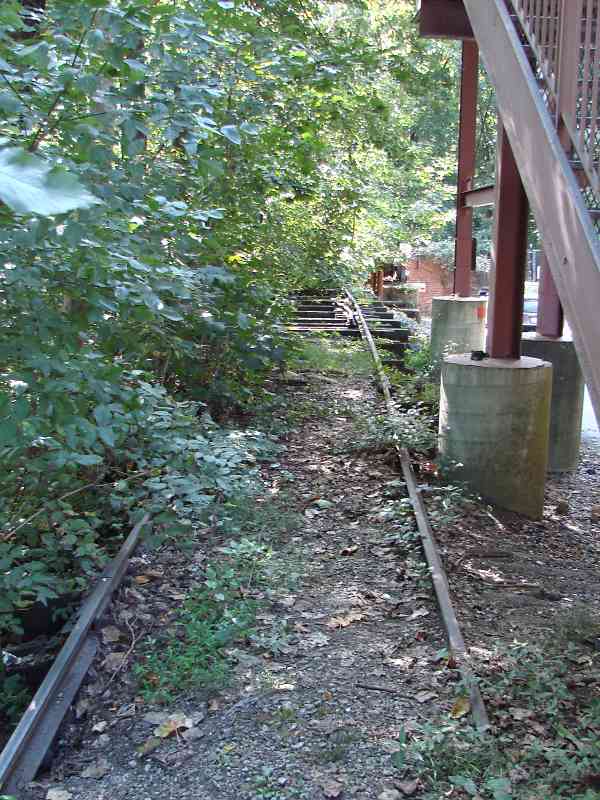
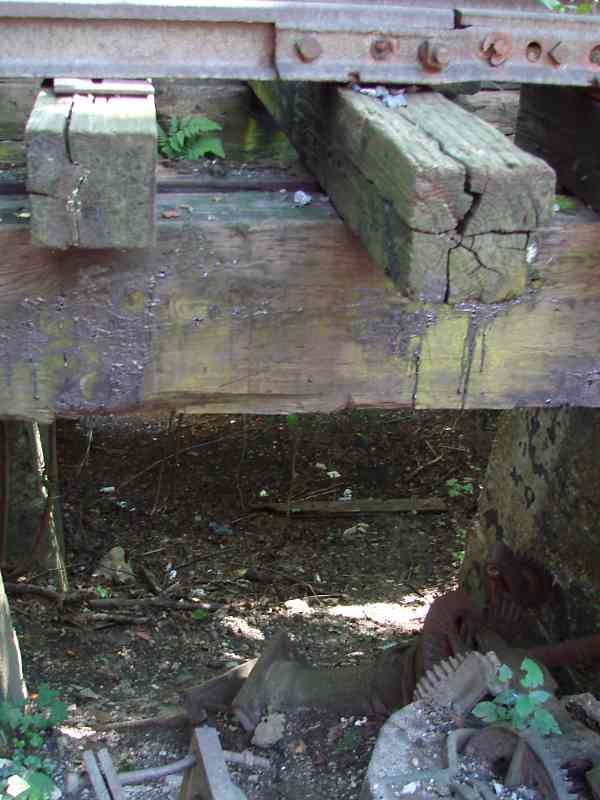
Bins below the rails facilitated unloading of coal by gravity to the mill's steam 1999 electricty 1999 power plant. As manufacturing increased, water proved insufficient to power the mill, so steam power was installed around 1880, which is likely when this siding was added.

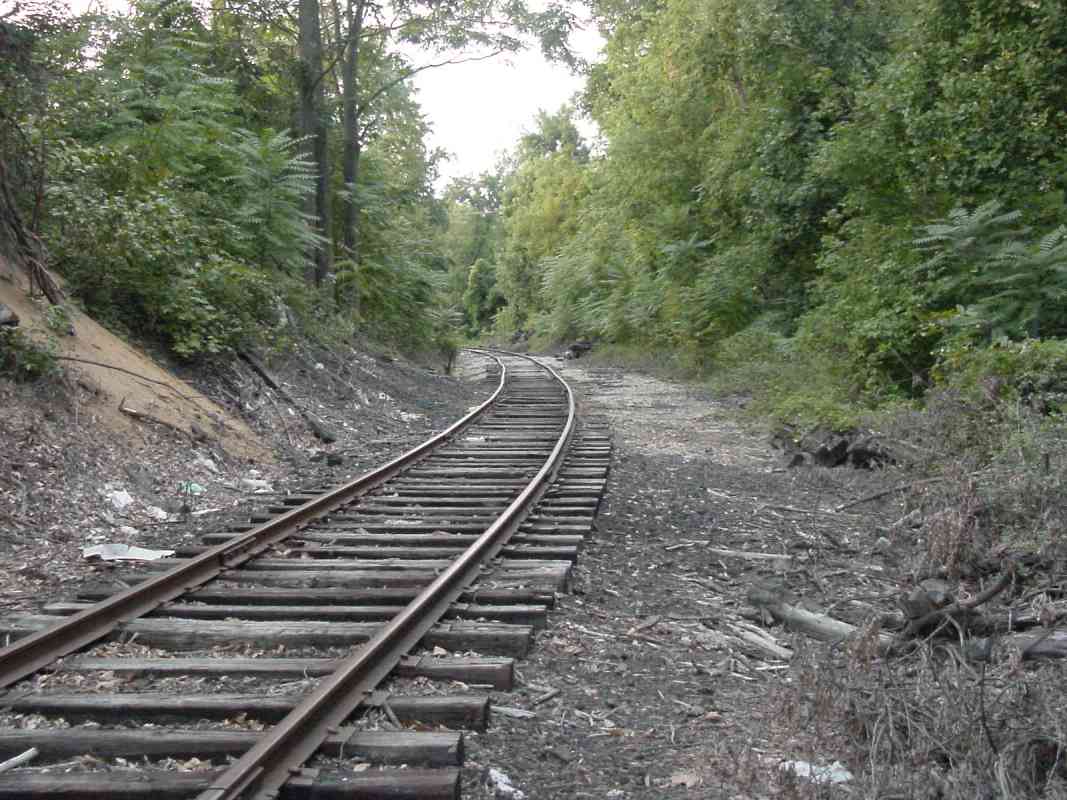
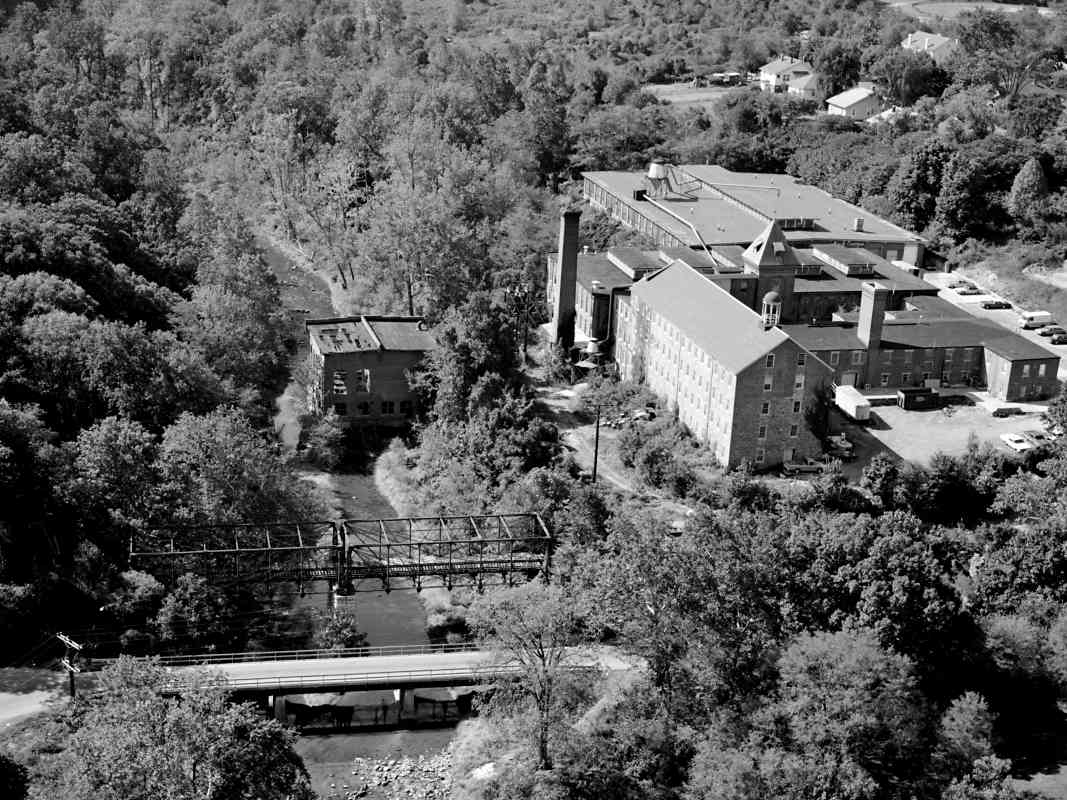
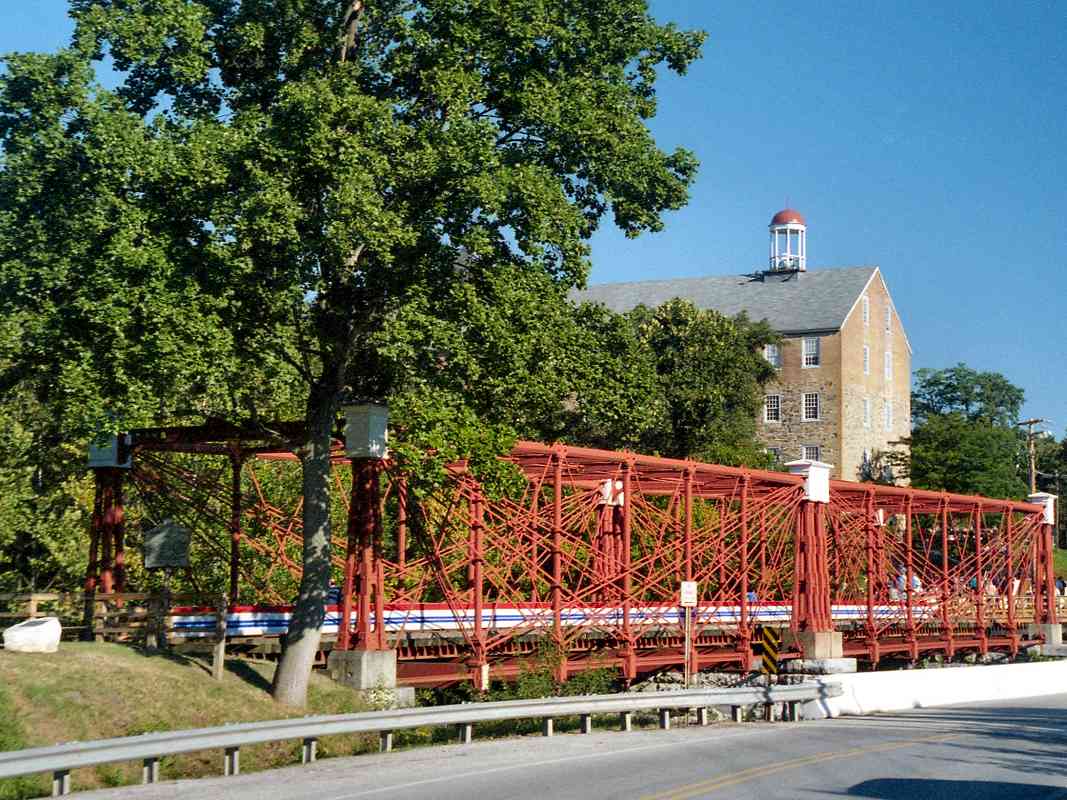
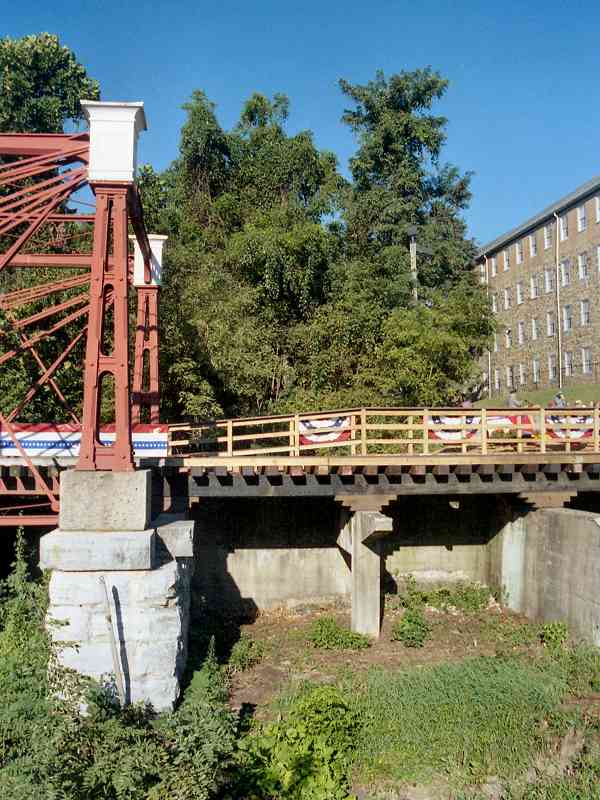
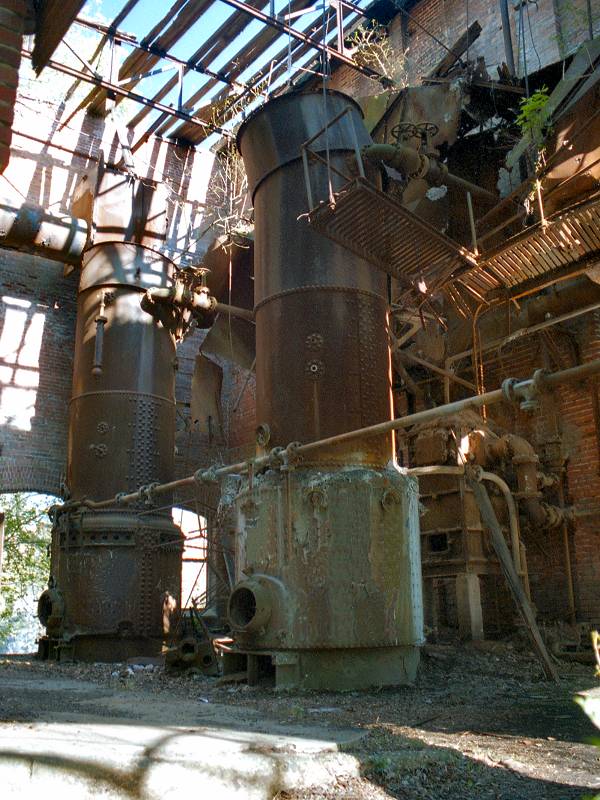
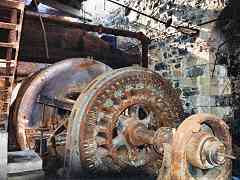
The power plant was located between these bins and the river. It first generated steam, and later electricity that was shared with, or probably sold to, employees who lived in nearby homes owned by the mill company. 
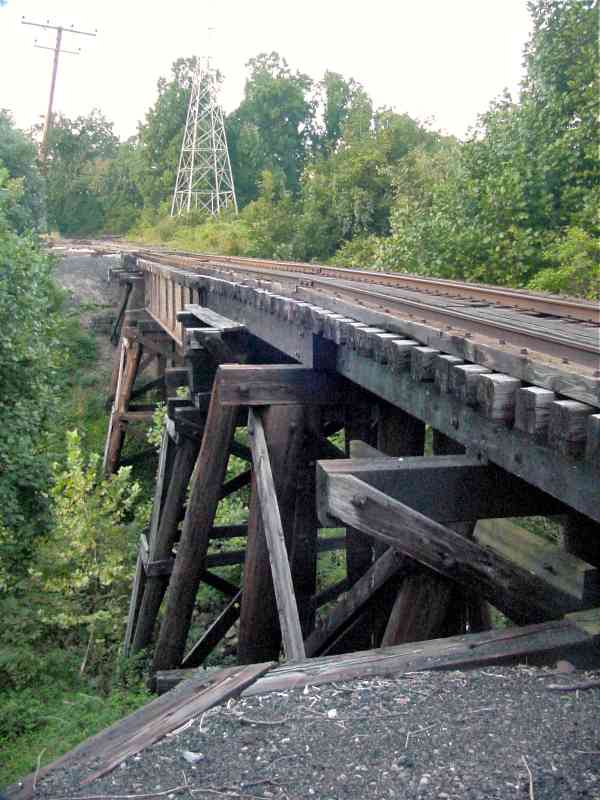
The photos at left and right were snapped in 1999 before disused power plant remnants were removed. Savage Mill, indeed the whole Patuxent Branch, is a time capsule of sorts.


Winch

Winch
Mile: 19.4, spur 1.2 Date: Aug 2018
Ease: A- View: W
Area: A IC2:
Map: Ho 20 B 7 Topographic Maps

Coal hoppers were pulled onto the siding by this electric Link Belt winch and its now-rusty cabling.

Part 2 of this tour follows the Patuxent Branch's 1902 extension.


<< Previous (east) | THIS PAGE: Patuxent Branch | Next (part 2) >>

Or, return to main page

Copyright Notice