TrainWeb.org Facebook Page
B&O Washington Branch Photo Tour


B&O Washington Branch
Modern day photo tour

Accompanying each photo below are:

Click a photo to see a larger view. Please send your comments and corrections to Steve.


Brief Historical Background: Route 100 Industrial Park Pick Up

Overview
Photo courtesy Google

Overview
Mile: 14.9 (center) Date: Oct 2019
Ease: View: N (up)
Area: T+:
Map: AA 5, Ho 20 Topographic Maps

For reference, the divided highway at upper left is Interstate 95. At top right is the Route 100 Industrial Park that is north of Dorsey, Maryland; at bottom left is CSX's Jessup Yard. Railcars are switched between the two with some regularity, traveling a one-way distance of a little over 3 miles.

The green line that runs almost between those two locations marks the Howard - Anne Arundel county border which, except for the upper right, is also the railroad line, and the route followed by this page. We begin near the "Jessup Station Park & Ride".


Idle

Idle
Mile: 15.8 Date: Dec 2020
Ease: A View: SW
Area: B T+: 0m
Map: AA 5 G 4, Ho 20 K 5 Topographic Maps

The view from Maryland 175 is obstructed but lets us see a pair of engines idling. Let's stop at Jessup Station for a better view.


Medium Clear

Medium Clear
Mile: 15.7 Date: Dec 2020
Ease: A- View: SW
Area: B T+: 2m
Map: AA 5 G 4, Ho 20 K 5 Topographic Maps

green As seen from Jessup Station, the signals are all red on the left (Track 2), but those on the right for Track 1 are showing some green, more specifically, Rule 1283, Medium Clear.

A westbound must be on the way.

Link: CSX signal aspects


CSX 836

CSX 836
Mile: 15.7 Date: Dec 2020
Ease: A- View: NE
Area: B T+: 3m
Map: AA 5 G 4, Ho 20 K 5 Topographic Maps

Soon a short mixed freight rolls into view, tugged by CSX 836...


CSX 3307

CSX 3307
Mile: 15.7 Date: Dec 2020
Ease: A- View: SW
Area: B T+: 4m
Map: AA 5 G 4, Ho 20 K 5 Topographic Maps

... with an assist from CSX 3307.


Switching

Switching
Mile: 15.7 Date: Dec 2020
Ease: A- View: SW
Area: B T+: 4m
Map: AA 5 G 4, Ho 20 K 5 Topographic Maps

West of the station it switches to Track 2...


Bye

Bye
Mile: 15.7 Date: Dec 2020
Ease: A- View: SW
Area: B T+: 5m
Map: AA 5 G 4, Ho 20 K 5 Topographic Maps

... and continues past an idling CSX 4300.


Quiet

Quiet
Mile: 15.7 Date: Dec 2020
Ease: A- View: SW
Area: B T+: 7m
Map: AA 5 G 4, Ho 20 K 5 Topographic Maps

Since the duo is not immediately moving on, let us do so, with the goal of investigating the other train in view. Had you noticed the green trash cars in the CSX 836 photo above?


Green Cars

Green Cars
Mile: 15.7 Date: Dec 2020
Ease: A- View: NE
Area: B T+: 2m
Map: AA 5 G 4, Ho 20 K 5 Topographic Maps

Here's an earlier view with deeper zoom. Waste Management's green cars are on Track 2 in the distance.


CSX 5373

CSX 5373
Mile: 13.5 Date: Dec 2020
Ease: A View: SW
Area: B T+: 15m
Map: AA 1 A 13, Ho 17 C 13 Topographic Maps

Upon moving the camera northeast a few miles, we find that the head end of the trash train is waiting at the Dorsey interlocking.


Restricting

Restricting
Mile: 13.4 Date: Dec 2020
Ease: A View: NE
Area: B T+: 16m
Map: AA 1 A 13, Ho 17 C 13 Topographic Maps

It has a red over red (Stop, Rule 1284), but the other track's yellow over red means Approach (Rule 1285). Beyond Dorsey Station, another signal is showing lunar (bluish white) used to express Restricting (Rule 1290). Restricting means the operator needs to proceed slowly enough to be able to stop the train upon sighting an obstruction.

I agree: the lamp color differences are not large. Indications had been much clearer with the B&O's CPL signals that conveyed instructions via two lamps. Alas, CSX chose to replace them with this style of signal. That's Maryland 100 crossing overhead at Dorsey Station.


CPLs

CPLs
Mile: 13.0 Date: Feb 2011
Ease: A- View: S
Area: B T+:
Map: Ho 17 E 12, AA 1 B 12 Topographic Maps

stop 
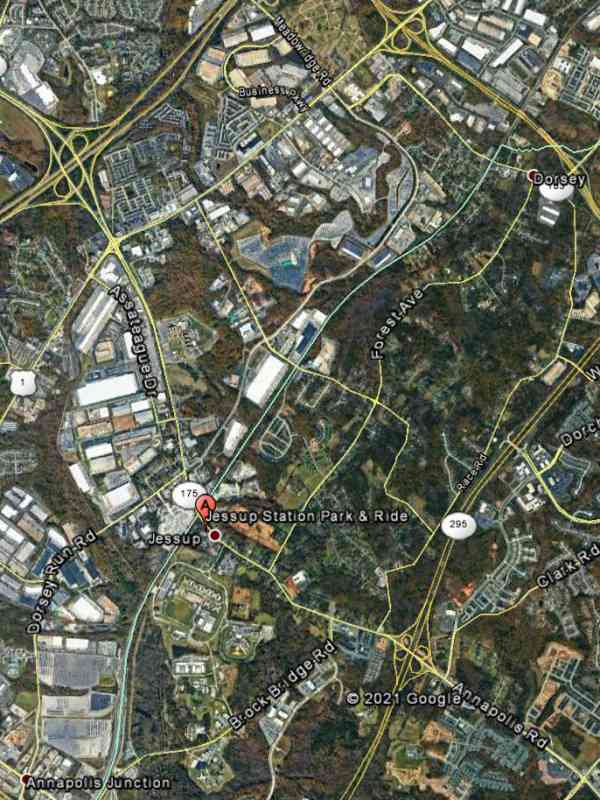
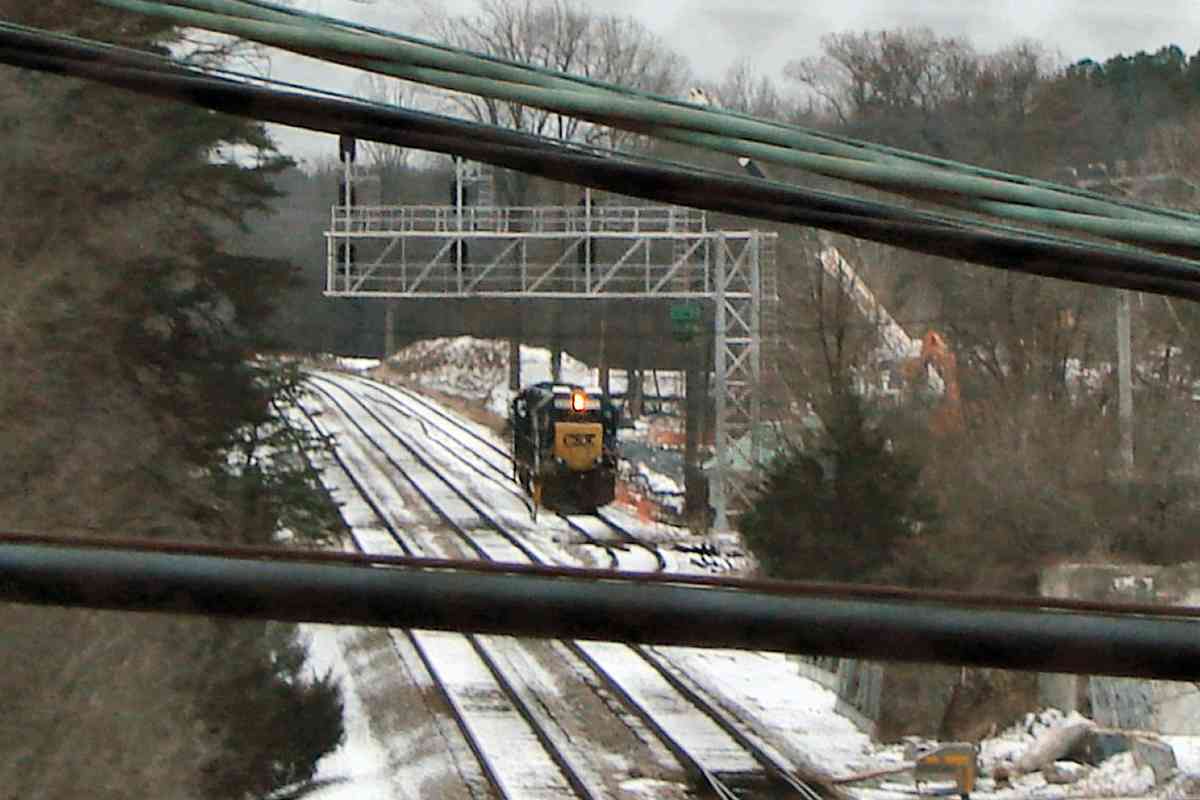
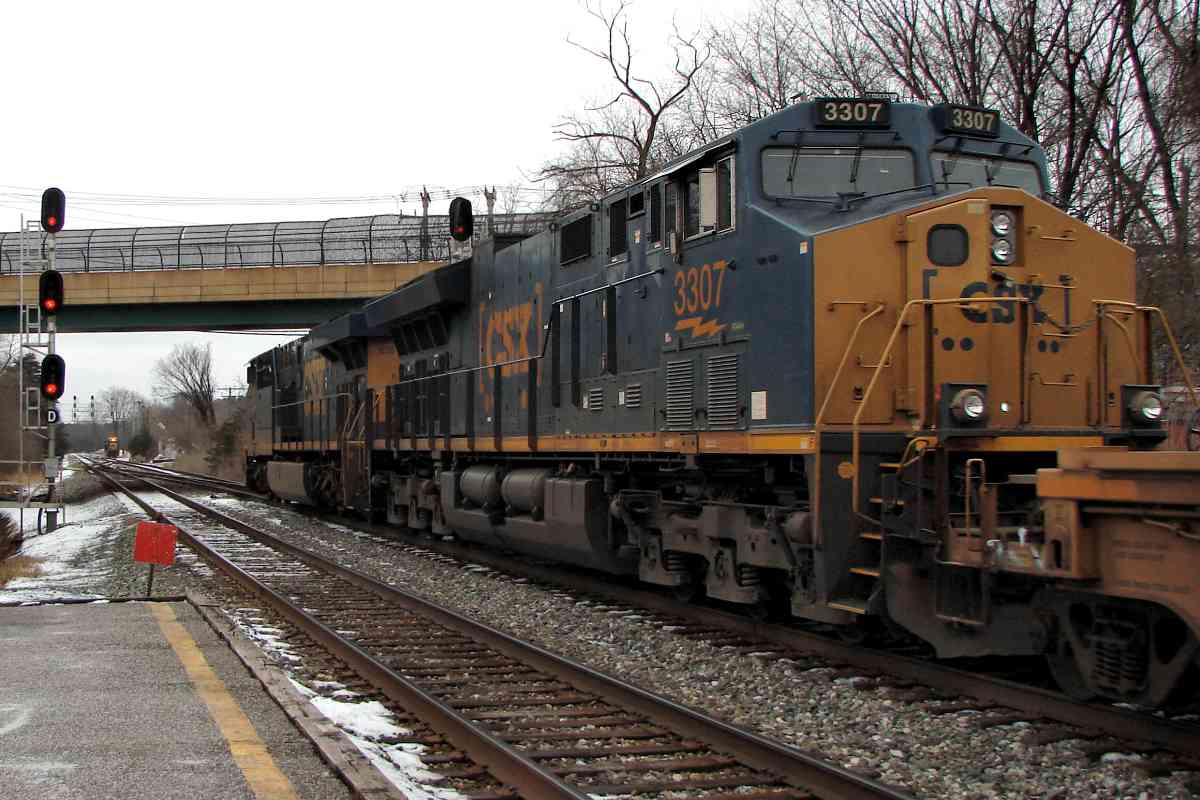
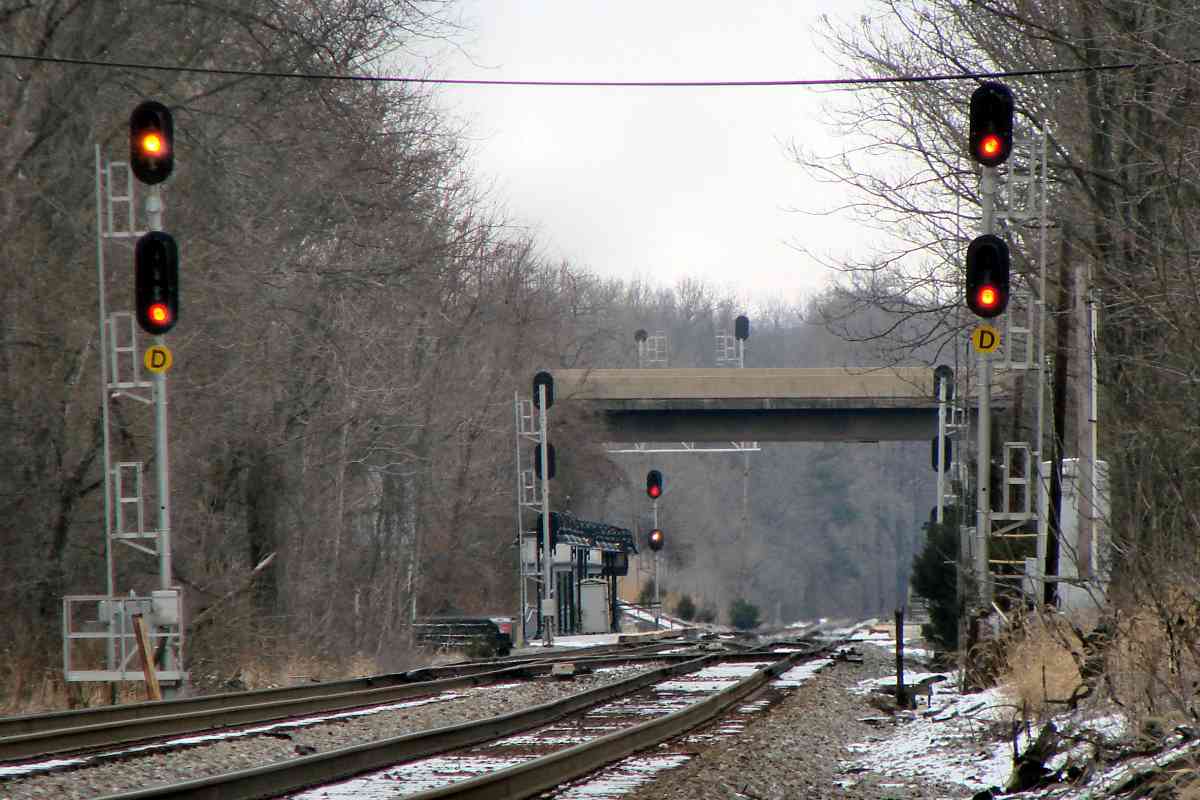
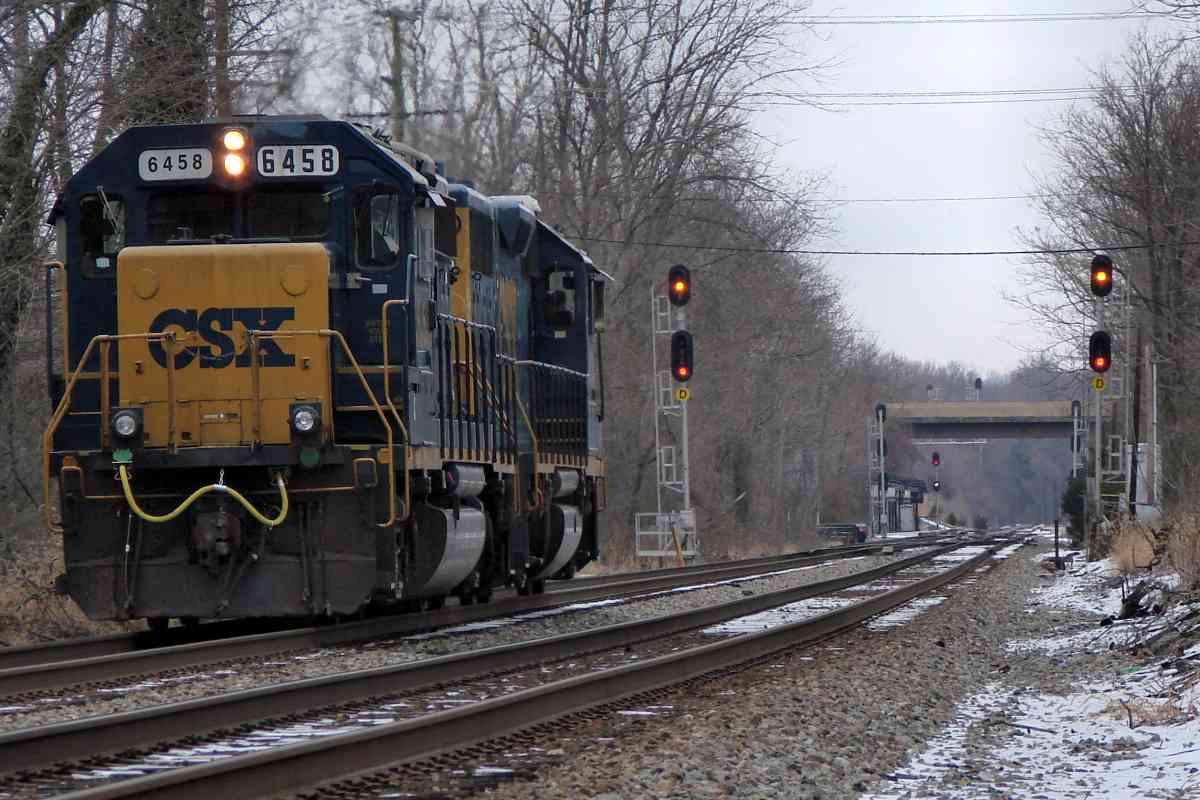
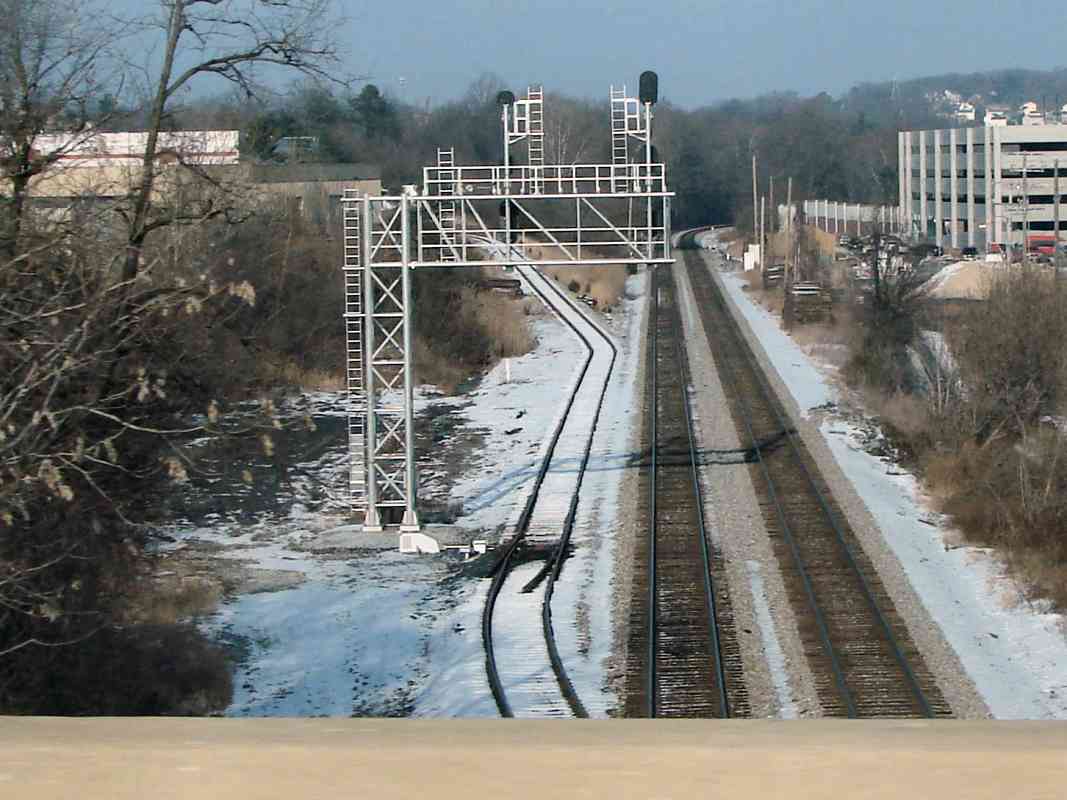
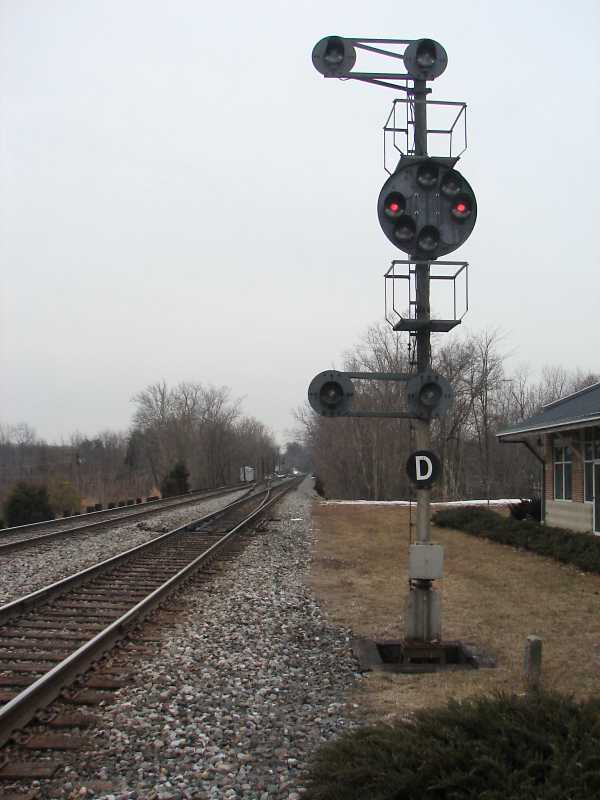
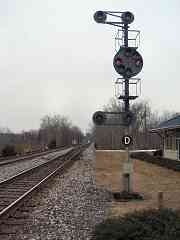
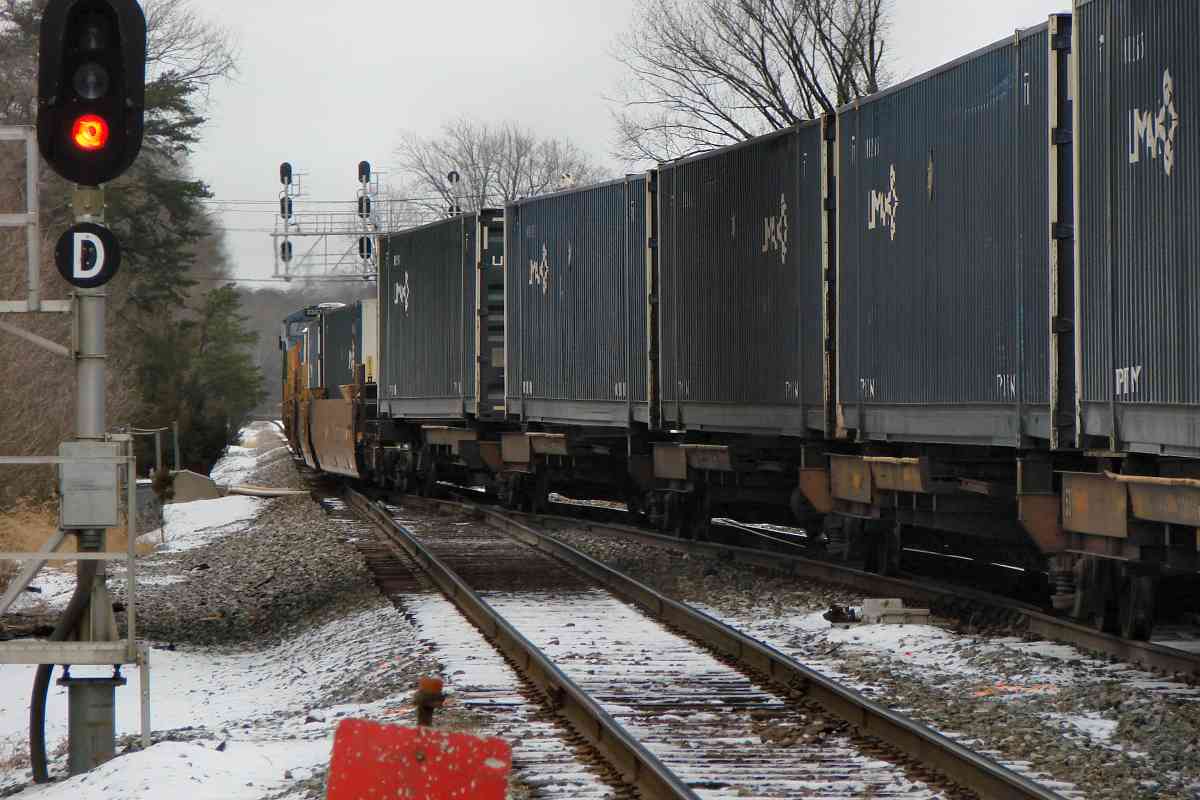
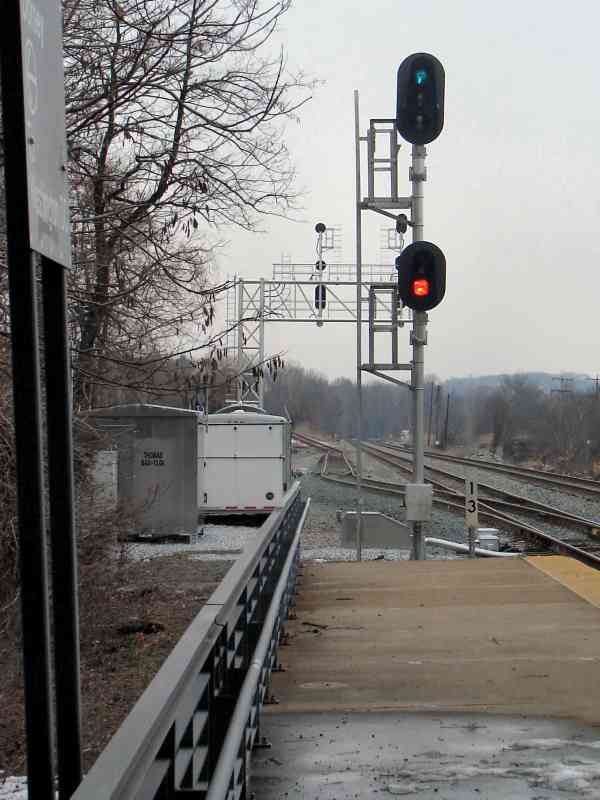
As seen from Dorsey Station, this is the same Dorsey interlocking, but looking the opposite direction at a time when the color-position light signals (CPLs) were still on duty.

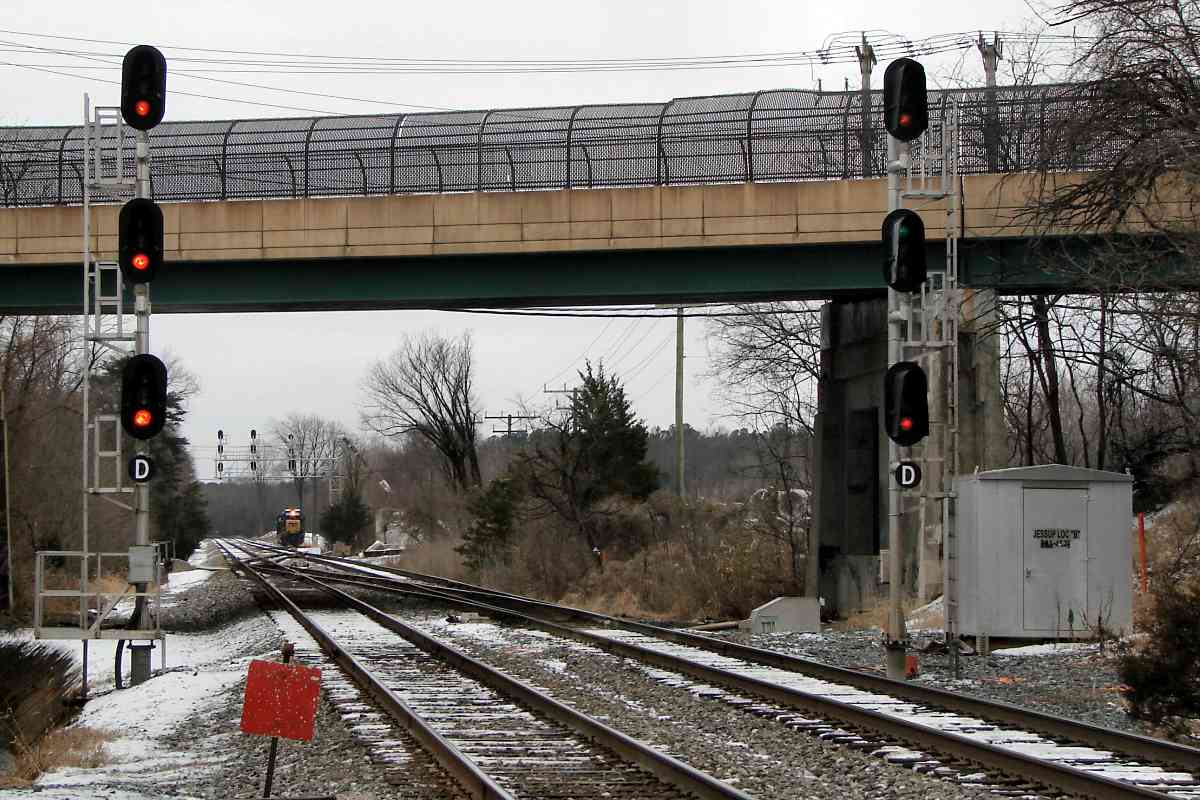
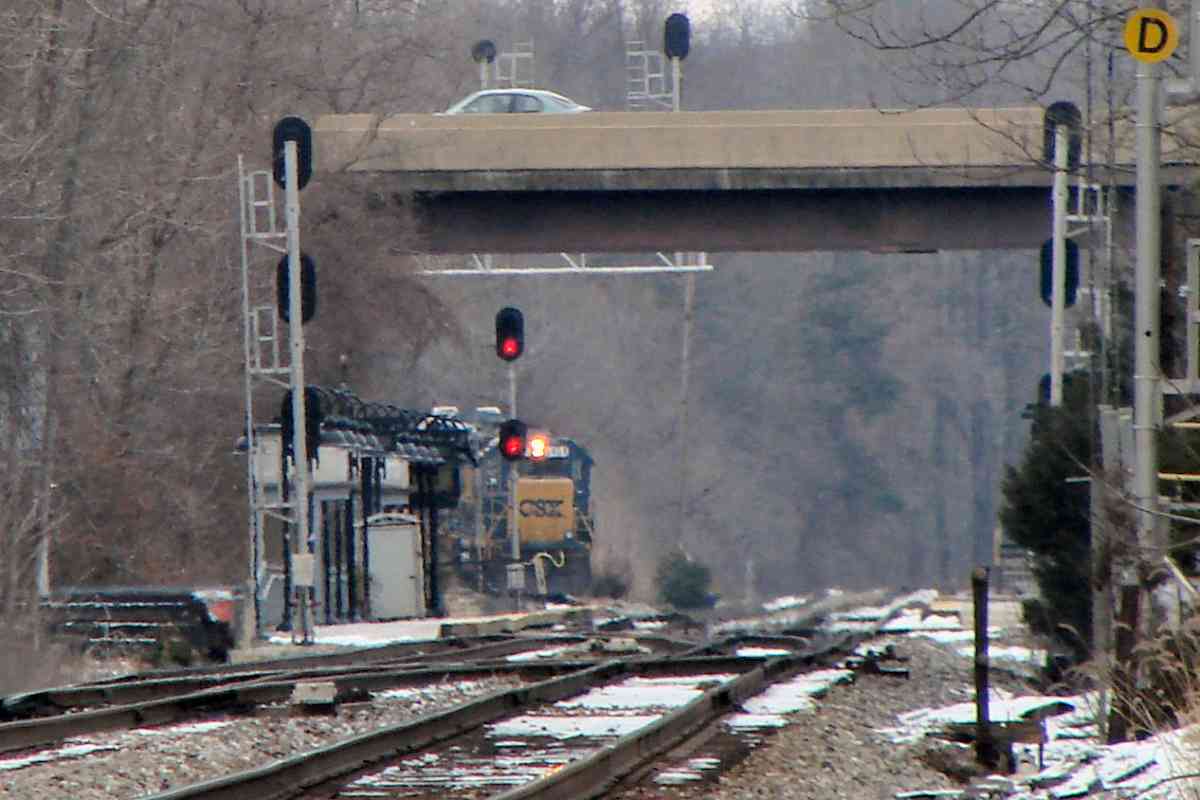
With CPLs, even if you could not discern the color, the angle of the imaginary line connecting the illuminated pair conveyed the basic instruction (go in the main photo, and stop in the photo at right). Details were supplied by the lamps above and below the central disk.

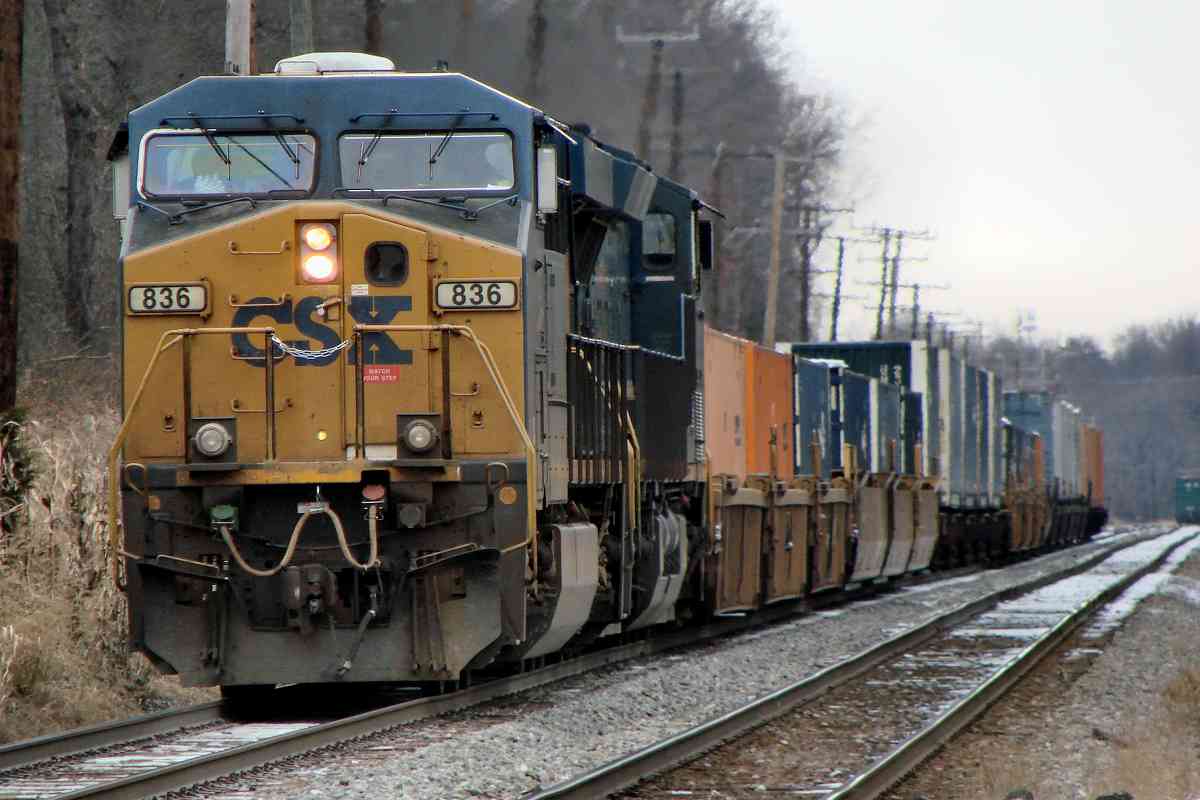
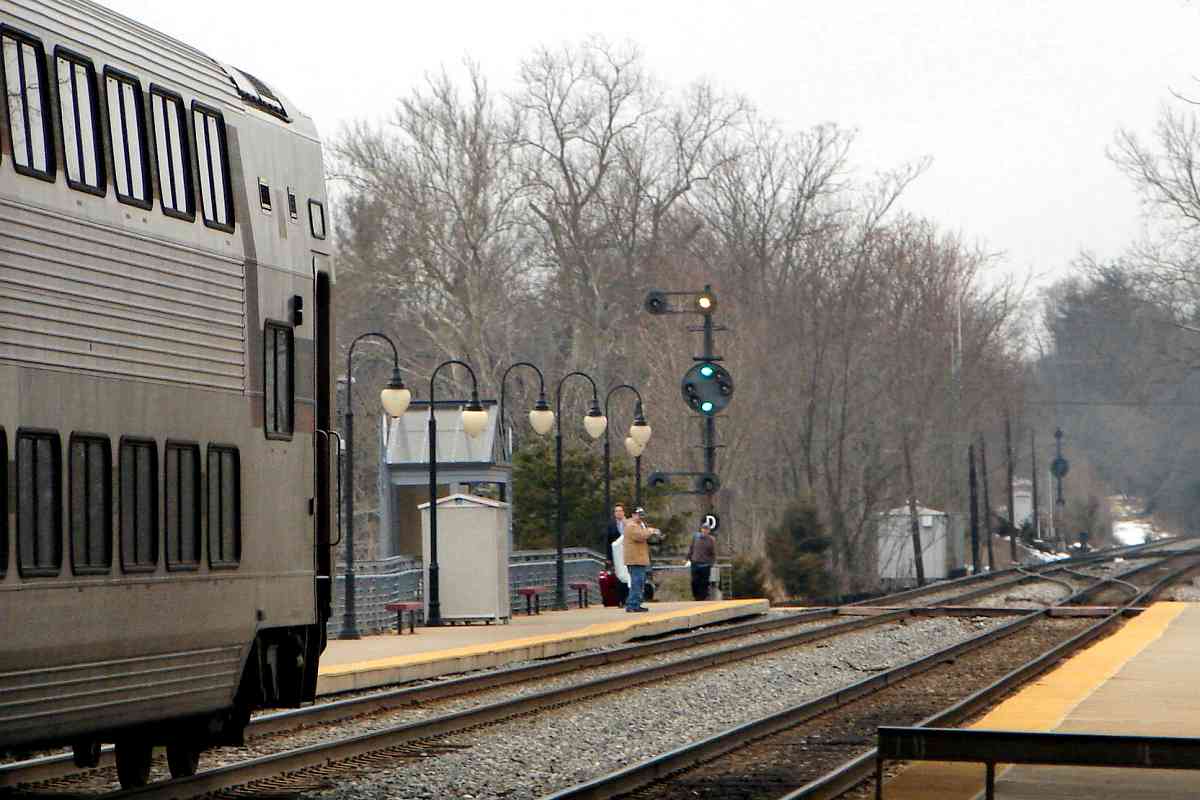
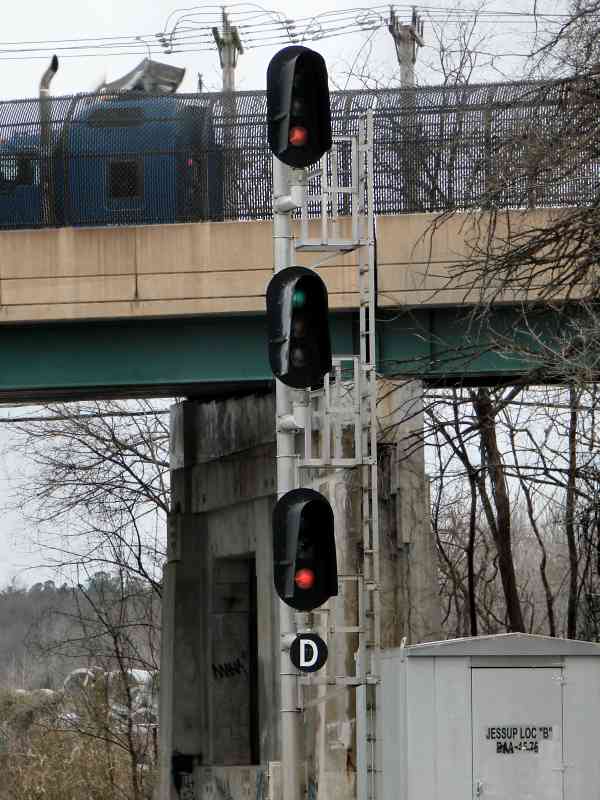
Most signal diplays tell the operator two things: the speed at which to operate here, and the speed ahead. Since many trains are heavy and require a long time to stop, the "speed ahead" information lets the operator know how to prepare for the next signal, one that might express a slower speed, or even to stop.

With large LED displays becoming common, if I were redesigning the system I would show the speed here and the speed ahead as simple numeric values, perhaps with various colors. For example, 20-0 would tell the operator speed 20 here, be prepared to stop (speed 0) at the next signal. Special situations could be represented by letters. For example, 10-X would mean speed 10 here, entering unsignalled territory next. Full stop would be shown as a red 0-0 which, coincidentally, would resemble the two red lamps of a B&O CPL signal. Other special instructions could be represented by blinking, underlines, a box around the digits, or similar.


Surprise

Surprise
Mile: 13.4 Date: Dec 2020
Ease: A View: SW
Area: B T+: 20m
Map: AA 1 A 13, Ho 17 C 13 Topographic Maps

Hey, look, those engines idling at Jessup have found their way here. The red diagonal approach sign means a temporary stop sign (red square) is ahead, such as one near track or signal maintenance. Perhaps you had noticed the red square stop sign in the Jessup Station photos above.


CSX 6458

CSX 6458
Mile: 13.4 Date: Dec 2020
Ease: A View: NE
Area: B+ T+: 20m
Map: AA 1 A 13, Ho 17 C 13 Topographic Maps

With CSX 6458 trailing, the duo is bound for the Route 100 Industrial Park. The lunar aspect in the distance reminds the operator the train will be entering unsignalled trackage. CSX 6458, model GP40-2, had been B&O 4444.

Link: B&O 4444


Climb

Climb
Mile: 13.4 Date: Dec 2020
Ease: A View: NE
Area: B T+: 23m
Map: AA 1 A 13, Ho 17 C 13 Topographic Maps

Lunar goes all red as the duo climbs the steep hill into the industrial park.


CSX 5438

CSX 5438
Mile: 13.4 Date: Dec 2020
Ease: A View: NE
Area: B T+: 23m
Map: AA 1 A 13, Ho 17 C 13 Topographic Maps

Next, track 2 gets a green, and the trash train resumes its trip. For the sake of train operators, if there are any stinky trash cars in the consist they're usually placed at the end.


From Route 100

From Route 100
Mile: 13.0 Date: Jan 2019
Ease: A View: NE
Area: B T+: 36m
Map: Ho 17 E 12, AA 1 B 12 Topographic Maps

At T:36 we reached the Route 100 bridge over the tracks, but that photo turned out poorly, so this is one from a prior year. The fortuitously-matching snow helps highlight the spur into the industrial park on the left. The next four photos also date from earlier, and are used for illustration purposes.


Thomas

Thomas
Mile: 13.0 Date: Feb 2011
Ease: A- View: NE
Area: B T+:
Map: Ho 17 E 12, AA 1 B 12 Topographic Maps

Dorsey Station's platform provides a better view of the spur into the Route 100 Industrial Park. CSX labels this location Thomas.


Aerial
Photo courtesy Google

Aerial
Mile: 12.8 Date: Oct 2019
Ease: View: N (up)
Area: T+:
Map: Ho 17 D 11, AA 1 B 11 Topographic Maps

The track arrangement within the park limits options for engine placement. For example, the hoppers between the buildings at the bottom cannot be pulled back to the main (the SW/NE line at right) because there is no way to place the pair of engines in front of the hoppers without decoupling the engines. This is illustrated by the following two photos.


Hoppers

Hoppers
Mile: 13.0, spur 0.7 Date: Jan 2019
Ease: A View: E
Area: B T+:
Map: Ho 17 D 11, AA 1 B 11 Topographic Maps

If you noticed these are not the same engines as before, I'm impressed. This and the next photo are from a different move, one during January 2019.

CSX 6419 and CSX 2235 can pull the hoppers out, but...


Forward First

Forward First
Mile: 13.0, spur 0.7 Date: Jan 2019
Ease: A View: NW
Area: B T+:
Map: Ho 17 D 11, AA 1 B 11 Topographic Maps

... the track configuration forces the engines to continue across San Tomas Road, pause while a track switch is flipped, and then reverse to push the covered hoppers out to the main line.

The two engines could be decoupled from each other, then some back and forth maneuvering done to shuffle both in front of the cars, but that's rarely done here since the process is time consuming, the consist short, and the trip to Jessup Yard but a few miles.

By the way, you won't find many trees closer to active tracks than some of these.


Outbound

Outbound
Mile: 13.0, spur 0.3 Date: Dec 2020
Ease: A View: W
Area: B T+: 44m
Map: Ho 17 E 11, AA 1 B 11 Topographic Maps

Now back to December 2020... this time the duo we've been following from Jessup is not pushing cars, but pulling them, which means this pickup happened elsewhere within the industrial park.


Santa Barbara Court

Santa Barbara Court
Mile: 13.0, spur 0.3 Date: Dec 2020
Ease: A View: NW
Area: B T+: 52m
Map: Ho 17 E 11, AA 1 B 11 Topographic Maps

Here they lead the cars across Santa Barbara Court...


Downhill

Downhill
Mile: 13.0, spur 0.3 Date: Dec 2020
Ease: A View: SE
Area: B T+: 54m
Map: Ho 17 E 11, AA 1 B 11 Topographic Maps

... and head back to the main line, with the engines leading down the hill.


To Jessup Yard

To Jessup Yard
Mile: 15.7 Date: Jan 2019
Ease: A- View: NE
Area: B T+:
Map: AA 5 G 4, Ho 20 K 5 Topographic Maps

To bookend this page, let's return to Jessup Station. On this day (snowless, sorry), hoppers like those we saw above were slowly pushed back to Jessup Yard. For such moves, a crew member is stationed on the end and remains in communication with the operator.


Thanks for following along.

Consider following this site's Route 100 Industrial Park tour.

Or, return to main page


Copyright Notice