Track
I originally built my own track from slotted wooden sleepers and aluminium bar because the commercial track was just too expensive. Rails are 3mm x 10 mm aluminium bar, bought in 2.4 metre lengths. This is what it looks like:

However, I must admit that I now use brass rail nailed on timber sleepers for my mainlines, due to problems with the sleepers falling off the Al bar rail. It is necessary to bolt the track down every 1/2m or so to ensure the sleepers don't come off over time. I have some original track 15 yrs old that has never failed, and some other bits where I'm forever putting sleepers back on every couple of years.
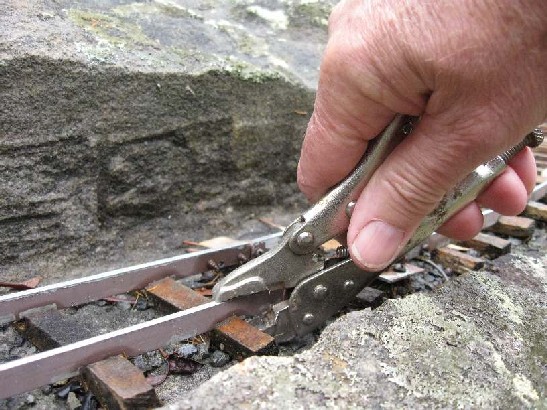 I use a pair of vice-grips to do this on in-situ track.
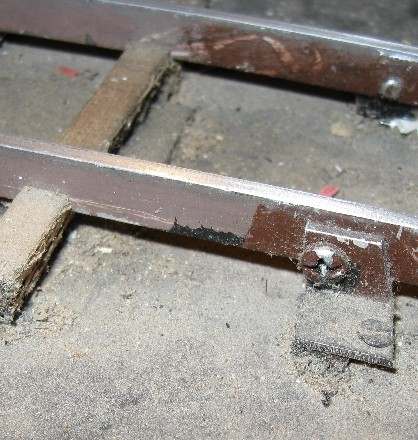
In summary, the system works really well inside and where you can bolt it down to a flat surface (I have lots of raised 'baseboards"). But it doesn't work if you just 'throw' it on the ground (as in the pic at top).
But it is a great method for storage tracks out of the weather. I'm still recycling the Al bar. As I replace it on the mainlines, it gets used in sidings.
Maintaining electrical contact with aluminium is a bit of a chore. As soon as it gets wet, it forms a non-conductive oxide which has to be 'rubbed vigourously' to remove. So generally it was necessary to clean the rails by hand before every run session. (now I use battery power, so no problems!).
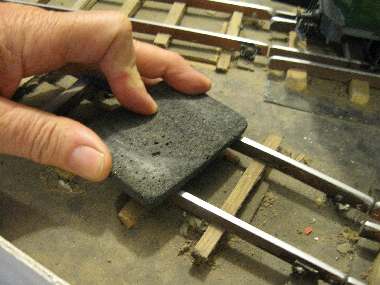 I use an electrician's 'foam type' contacts cleaning block. It's a bit flexible and is better than sandpaper. (Sydney supplier RS Industrial Products - Abrasive cleaning block stock no 692-788)
But sandpaper works OK. I lubricate both with a spray of WD40. This puts a coating on the rails which helps stop the oxide forming.
Making Aluminium 'bar' track
The original sleepers were cut from maple about 8mm x 35 mm, but I cannot get this any more so I have used the slats of treated pine that are used to make lattice work. These are about 8mm x 38mm. This is cut into 90 to 100 mm lengths and each length has the two slots cut in it to hold the rails.
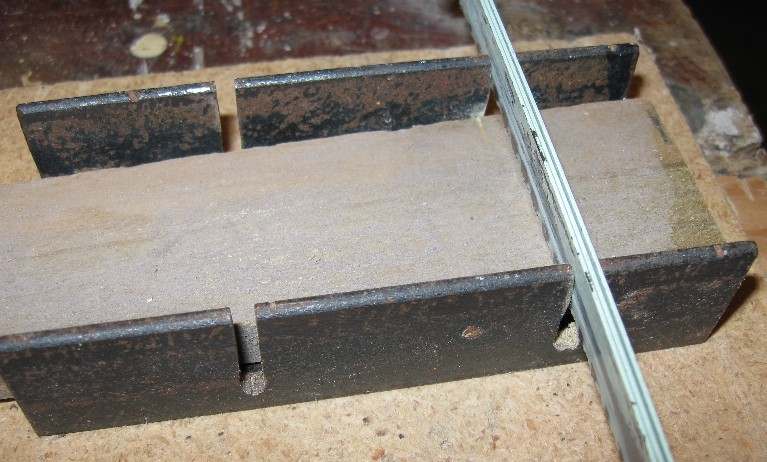 I built a jig from 1" steel angle to give the correct gauge and taped 3 hacksaw blades together to cut the 3mm wide slots about 3-4mm deep.
Once one slot is cut, a piece of Al is pushed into it and the jig slot and the other slot cut.
I built a jig from 1" steel angle to give the correct gauge and taped 3 hacksaw blades together to cut the 3mm wide slots about 3-4mm deep.
Once one slot is cut, a piece of Al is pushed into it and the jig slot and the other slot cut.
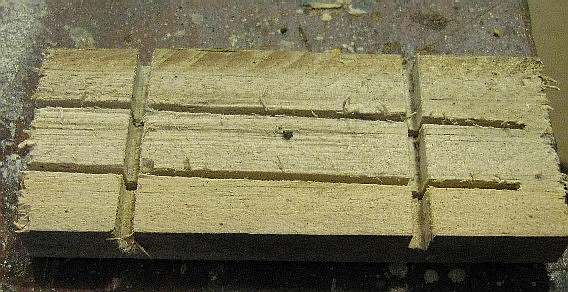 The 38mm wide piece is then cut into three lengthways to give 3 sleepers. So far I have cut over 3000 of the little devils.
The rails are a press (hammer tap) fit into the slots, and I usually squeeze a bit of BondCrete (waterproof white glue) into the slots to try and hold the rail a bit better. To make curved track, you curve the Al rails first and then attach the sleepers. You need a large flat surface to do this - my carport floor is the only place available.
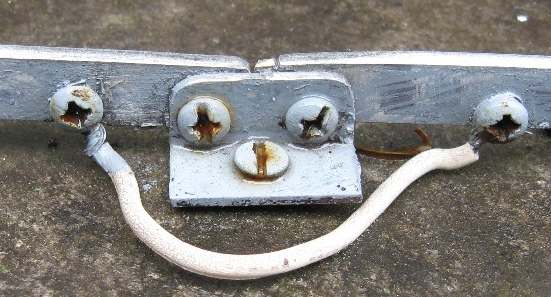 The aluminium rails are joined using nickel plated, 6G, self-tapping screws and 12x12x1mm aluminium angle 'fishplates' 25mm long. This allows the rails to be fastened down. The holes in the fishplates are oversize to allow rail movement. Every rail joint is electrically bonded using two more self-tappers and copper cable. I used a special conductive compound on the joinys called Alminox, available from electrical Contractor suppliers, but if you can't get it, smear a bit of Vaseline on the joints before screwing. I have had very few joints go high resistance in 15 years.
 Smaller (10mm) angle pieces allow the rails to be bolted down every metre or so. I often use plastic angle for this and pop-rivet them to the rail.
Making Brass track
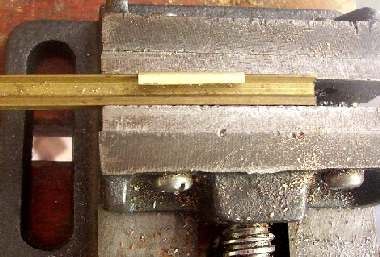
I can now purchase brass rail for only about twice the price of aluminium bar. I use treated pine sleepers (from lattice manufacturers - 38mm x 8mm).
rail supplier
This is cut into 3 lengthways to give sleepers about 11mm wide by 8mm deep and 95-100mm long. 15mm steel brads (small nails) are used, 4 per sleeper to attach the rail.
 I built a jig for marking the nail positions- just push each sleeper onto the white nails. Then I hammer the nails in with the head and 3mm protruding on top - this means about 4mm is sticking out the bottom.
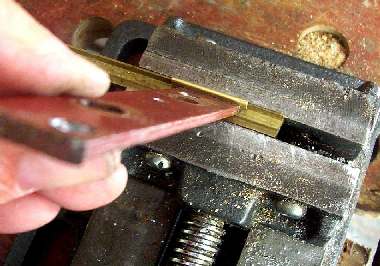
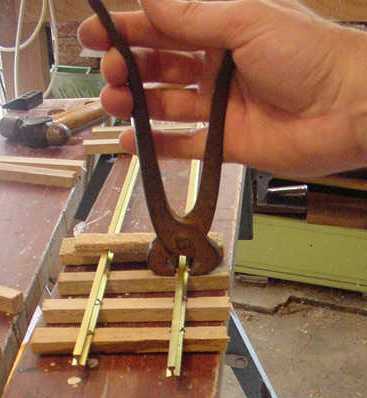 These are bent over underneath with pliers to stop them pulling up. The rails are then put in place and a pair of pincers used to bend the nail heads over the rail foot. It's easier than it sounds but a bit time consuming.
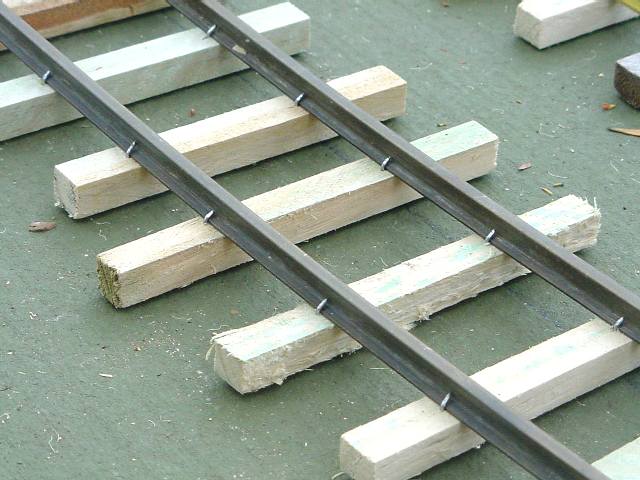 Pic of finished track. It's good calming therapy!
The rails are bent before putting the sleepers on, although slight adjustments can be made when completed. I bend all rails by hand - I have never seen the need for a rails bender. After installation I 'paint' Bondcrete over the nails to slow rusting and it really makes the track stronger.
Here's an 8 minute video of the whole process
Rail Joiners
I make my own rail joiners from 20mm or 25mm wide brass strip. A 1' piece cost about $5 and you can get about 20 joiners! Cut the strip into 13mm lengths and then bend each 13mm piece around a bit of scrap rail held in your vyce.Use a piece of scrap steel to bend it around the foot of the rail on both sides.
Making turnouts
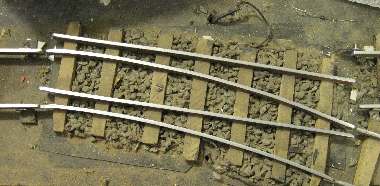
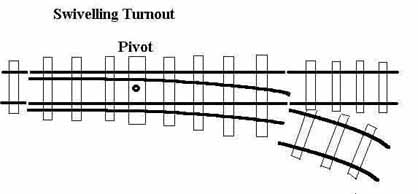
I developed my own design of 'swivelling' turnout. There is no frog but the whole thing rotates. This way it only takes an hour to make one and there is no problem with the electrics that you get with non-insulated frogs. I use these swivellers on the 'baseboard' sections as they need to be well screwed down so everything aligns.
Diverge......................................................straight
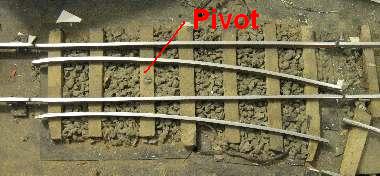
I have even made a 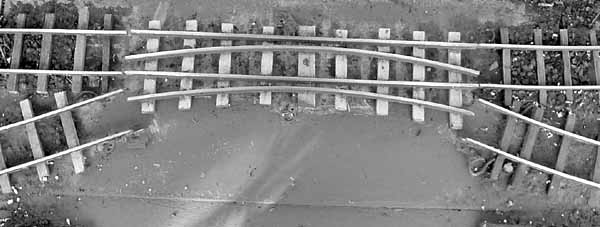 'three-way' turnout, so one turnout gives you 2 sidings off the mainline.
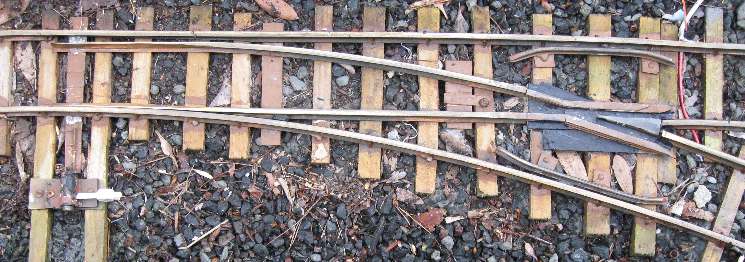
I also build my own 'normal' turnouts from brass rail, timber sleepers and styrene frog. A bench grinder and angle grinder are really useful ! but they still take a day to make. Some may question the styrene frog, but I've had one outside for 15 years now and no problems.
Leaf screens
The biggest problem with a garden railway is keeping leaves and gumnuts off the track and the heat in summer. I have covered all the station areas with 'leaf screens' which are made from shade cloth and are really effective and easily lifted off. They keep the leaves off, allow the rain to run through, the track to dry out and provide a bit of shade to keep the rails a bit cooler in summer.
Top of Page


 Last Updated Aug 18, 2024