


| S&TR Home |
| Indoor line |
| Whats new? |
| Links/email |
| Making track |
| Track Plan |
| Photo Index |
 |
 |
Updated Aug 24, 2024 |
The Claymine Branch is a tiny (8'x 8') indoor, G gauge line. Link to Claymine Branch videos on Youtube
I have had a large SaTR garden railway for 25 years now.
But maintenance was getting to be difficult.
As it was to be in my late wife's pottery studio The reason I invented for the short line would be to have a mine where clay was produced on the upper level and the railway would transport this clay to the pottery factory and brickworks on the lower level. I named the lower station, and made the backscenes, from scenes of our life together.
POTTSVILLE
An overall view of Pottsville under the shelf. The brickworks is backscene. GORGE & LAKE
CLAYMINE
I wanted a town and ‘mine’ scene for the location of “Claymine” – the source of the clay for the pottery works. I had envisaged a large quarry with some sort of loader for hopper wagons but soon realised there was not enough room on the 12” wide baseboard to do this.
So I settled for a ‘less industrial’ type of clay mines shipping mainly bags of clay. This was partly driven from finding a good candidate picture for a backscene of the mullock heaps at Lightning Ridge. (Lightning Ridge is an Outback opal mining town).
The overall view of Claymine
BACKSCENES
I wanted to cover the walls around the layout with some sort of ‘scenery’.
There are 3x2” studs protruding from the walls every 2’ or so, and three wall angles of 90 degrees.
To print this on my bubble-jet printer using A4 paper, I copied the pic into a spreadsheet (I use Libre Office). This allows you to see the page layout denoted by dotted lines on the spreadsheet. For this scene, I needed 11, landscape sheets long and 2 sheets high, so 22 sheets in all. I think I finished printing most of them twice due to ‘errors’.
I learned how to use MS Paint 3D Magic select tool to cutout pieces of pics I wanted and pasted them onto the main background. The ultimate setout and printing was done using a spreadsheet to layout the twenty, A4 sheets. As before, printing is just on plain paper, sprayed with Matte finish back and front before gluing and then clear lacquer after installation.
So I wondered if I could build a small G scale in a shed, that would use some of my existing, small (ie outdoor) locos and wagons. (45mm gauge, 1:24 scale) I wanted more than an Industrial / shunting layout - there had to be somewhere for trains to go to, and come from. Even though it is a small space (about 8' x 8') I wanted to use my existing G trains - my shorter locos and wagons - max 8" long with 4" wheelbase. The locos are all battery+RC.
Trains have a maximum length of three of my existing 8” long wagons!
I wanted more than an Industrial / shunting layout - there had to be somewhere for trains to go to, and come from. Even though it is a small space (about 8' x 8') I wanted to use my existing G trains - my shorter locos and wagons - max 8" long with 4" wheelbase. The locos are all battery+RC.
Trains have a maximum length of three of my existing 8” long wagons!
Since all locos are battery powered I used lots of plastic track from cheap 'christmas train sets' where possible – these are 2’ radius. Where I have to use curves less than 2' radius, I am making the track from brass rail (and to 46mm gauge) nailed to timber sleepers as I did outside, or LGB track.
You can see from the plan that there are two stations more or less above one another with a height difference of 10" – the plan shows them separated for clarity.
And they are joined by a steep, curving line with a semicircle of 12" radius on a 1:18 grade. The 'straighter' parts of the line are on grades between 1:11 and 1:14.
 To fit in in the space I soon realised that ‘normal’ points (turnouts) would take up too much room.
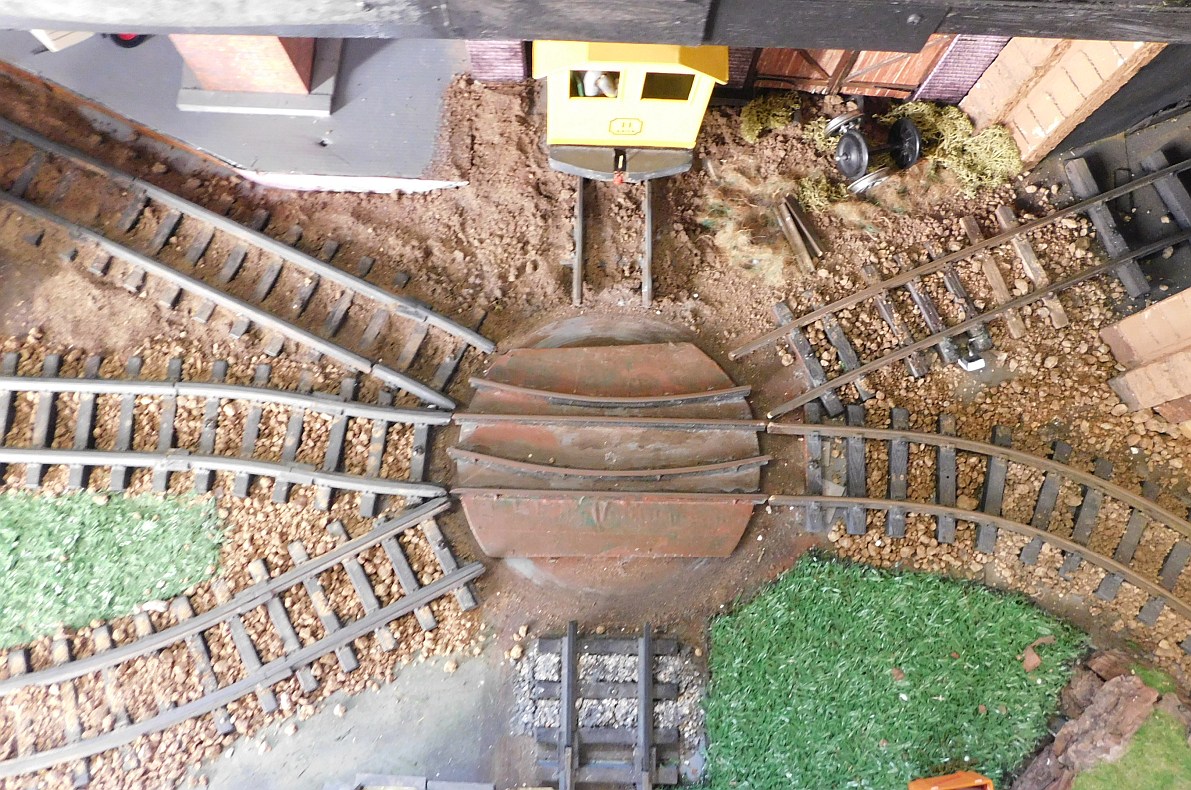
The crux of the whole small layout idea, allowing space saving, is the 'circular turnout' which I have devised.
To fit in in the space I soon realised that ‘normal’ points (turnouts) would take up too much room.
The crux of the whole small layout idea, allowing space saving, is the 'circular turnout' which I have devised.
Instead of a 'normal' turnout 30cm long and needing say 3 of them in series taking a metre or so, this circular turnout is just 20cm long and allows up to 6 lines to radiate from it. BUT it is very finicky to build and install !!
I made the two of them on 7mm thick ply using plastic RAILS (not plastic track) epoxied to the wood. They are VERY finicky to make - all 4 ends must have EXACTLY the same gauge and make EXACTLY the same angles at the perimeter. And be all the SAME length to allow it to turn without binding. Using plastic rails made it a lot easier to do these adjustments - a dremel with cutoff disk! (the plastic rails came from TrainLi USA.)
 An overall view.
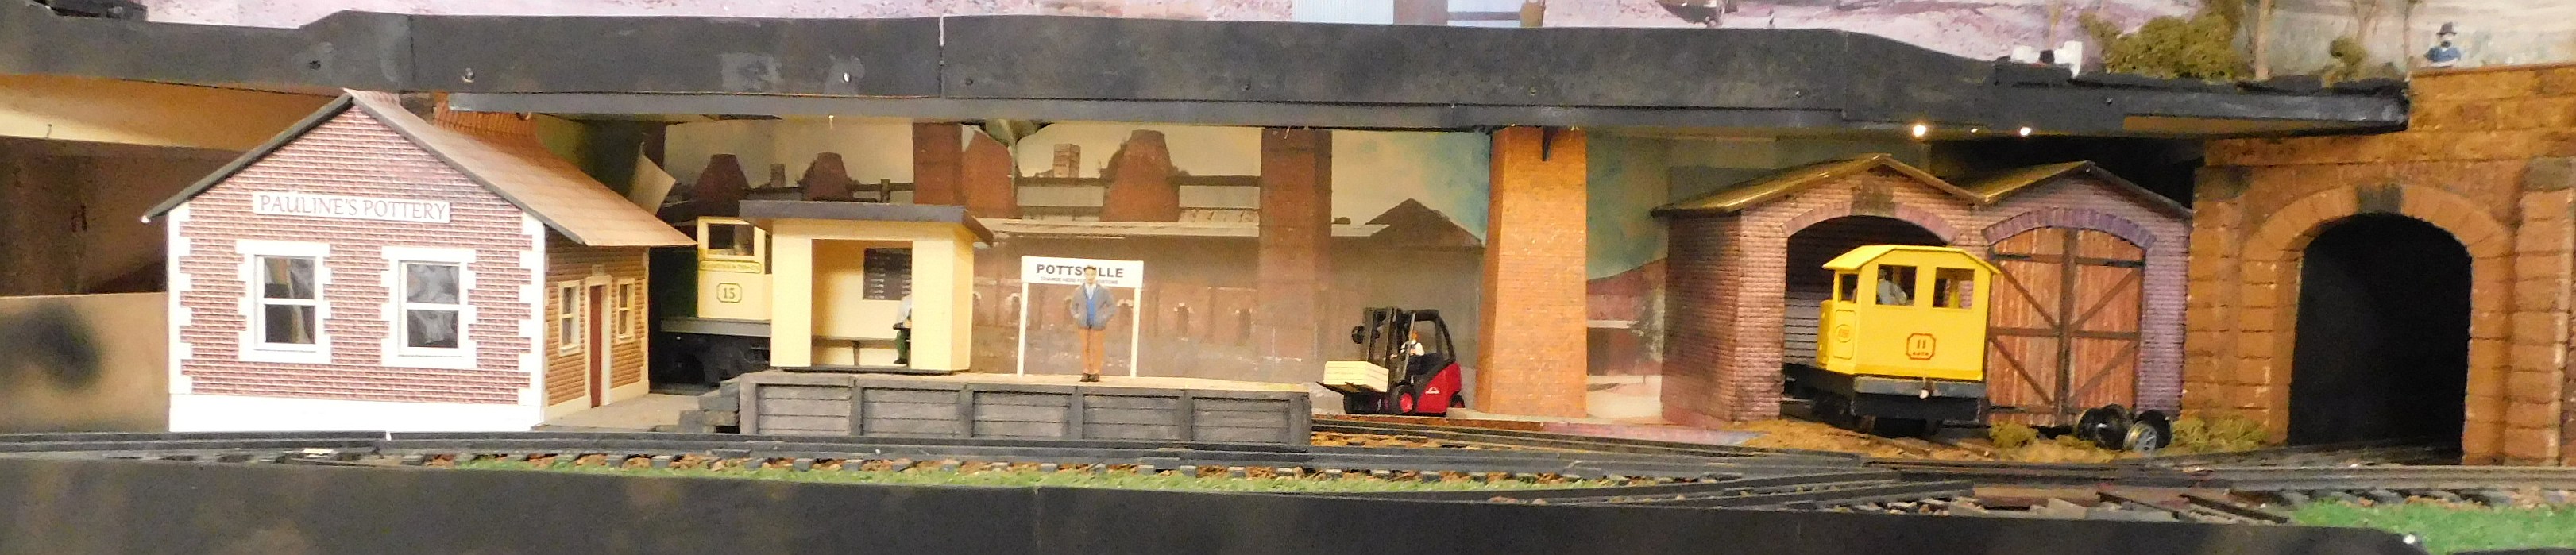
Pottsville station area on lower level, Claymine yard above. Pottsville has a building for Pauline's Pottery and the backscene represents the brickworks that uses the lower grade clay.
There is an engine shed where the yellow loco is, tucked under the baseboard above. The tunnel represents the connection to Sandstone and 'the world.
On the shelf above, Claymine 'yard' (=one siding) is where the clay in bags is loaded onto rail.
(Claymine station is out of shot to the left).
The backscene is from Lightning Ridge. The goods shed and platform are pictures on the backscene of a goods shed on the garden SaTR.
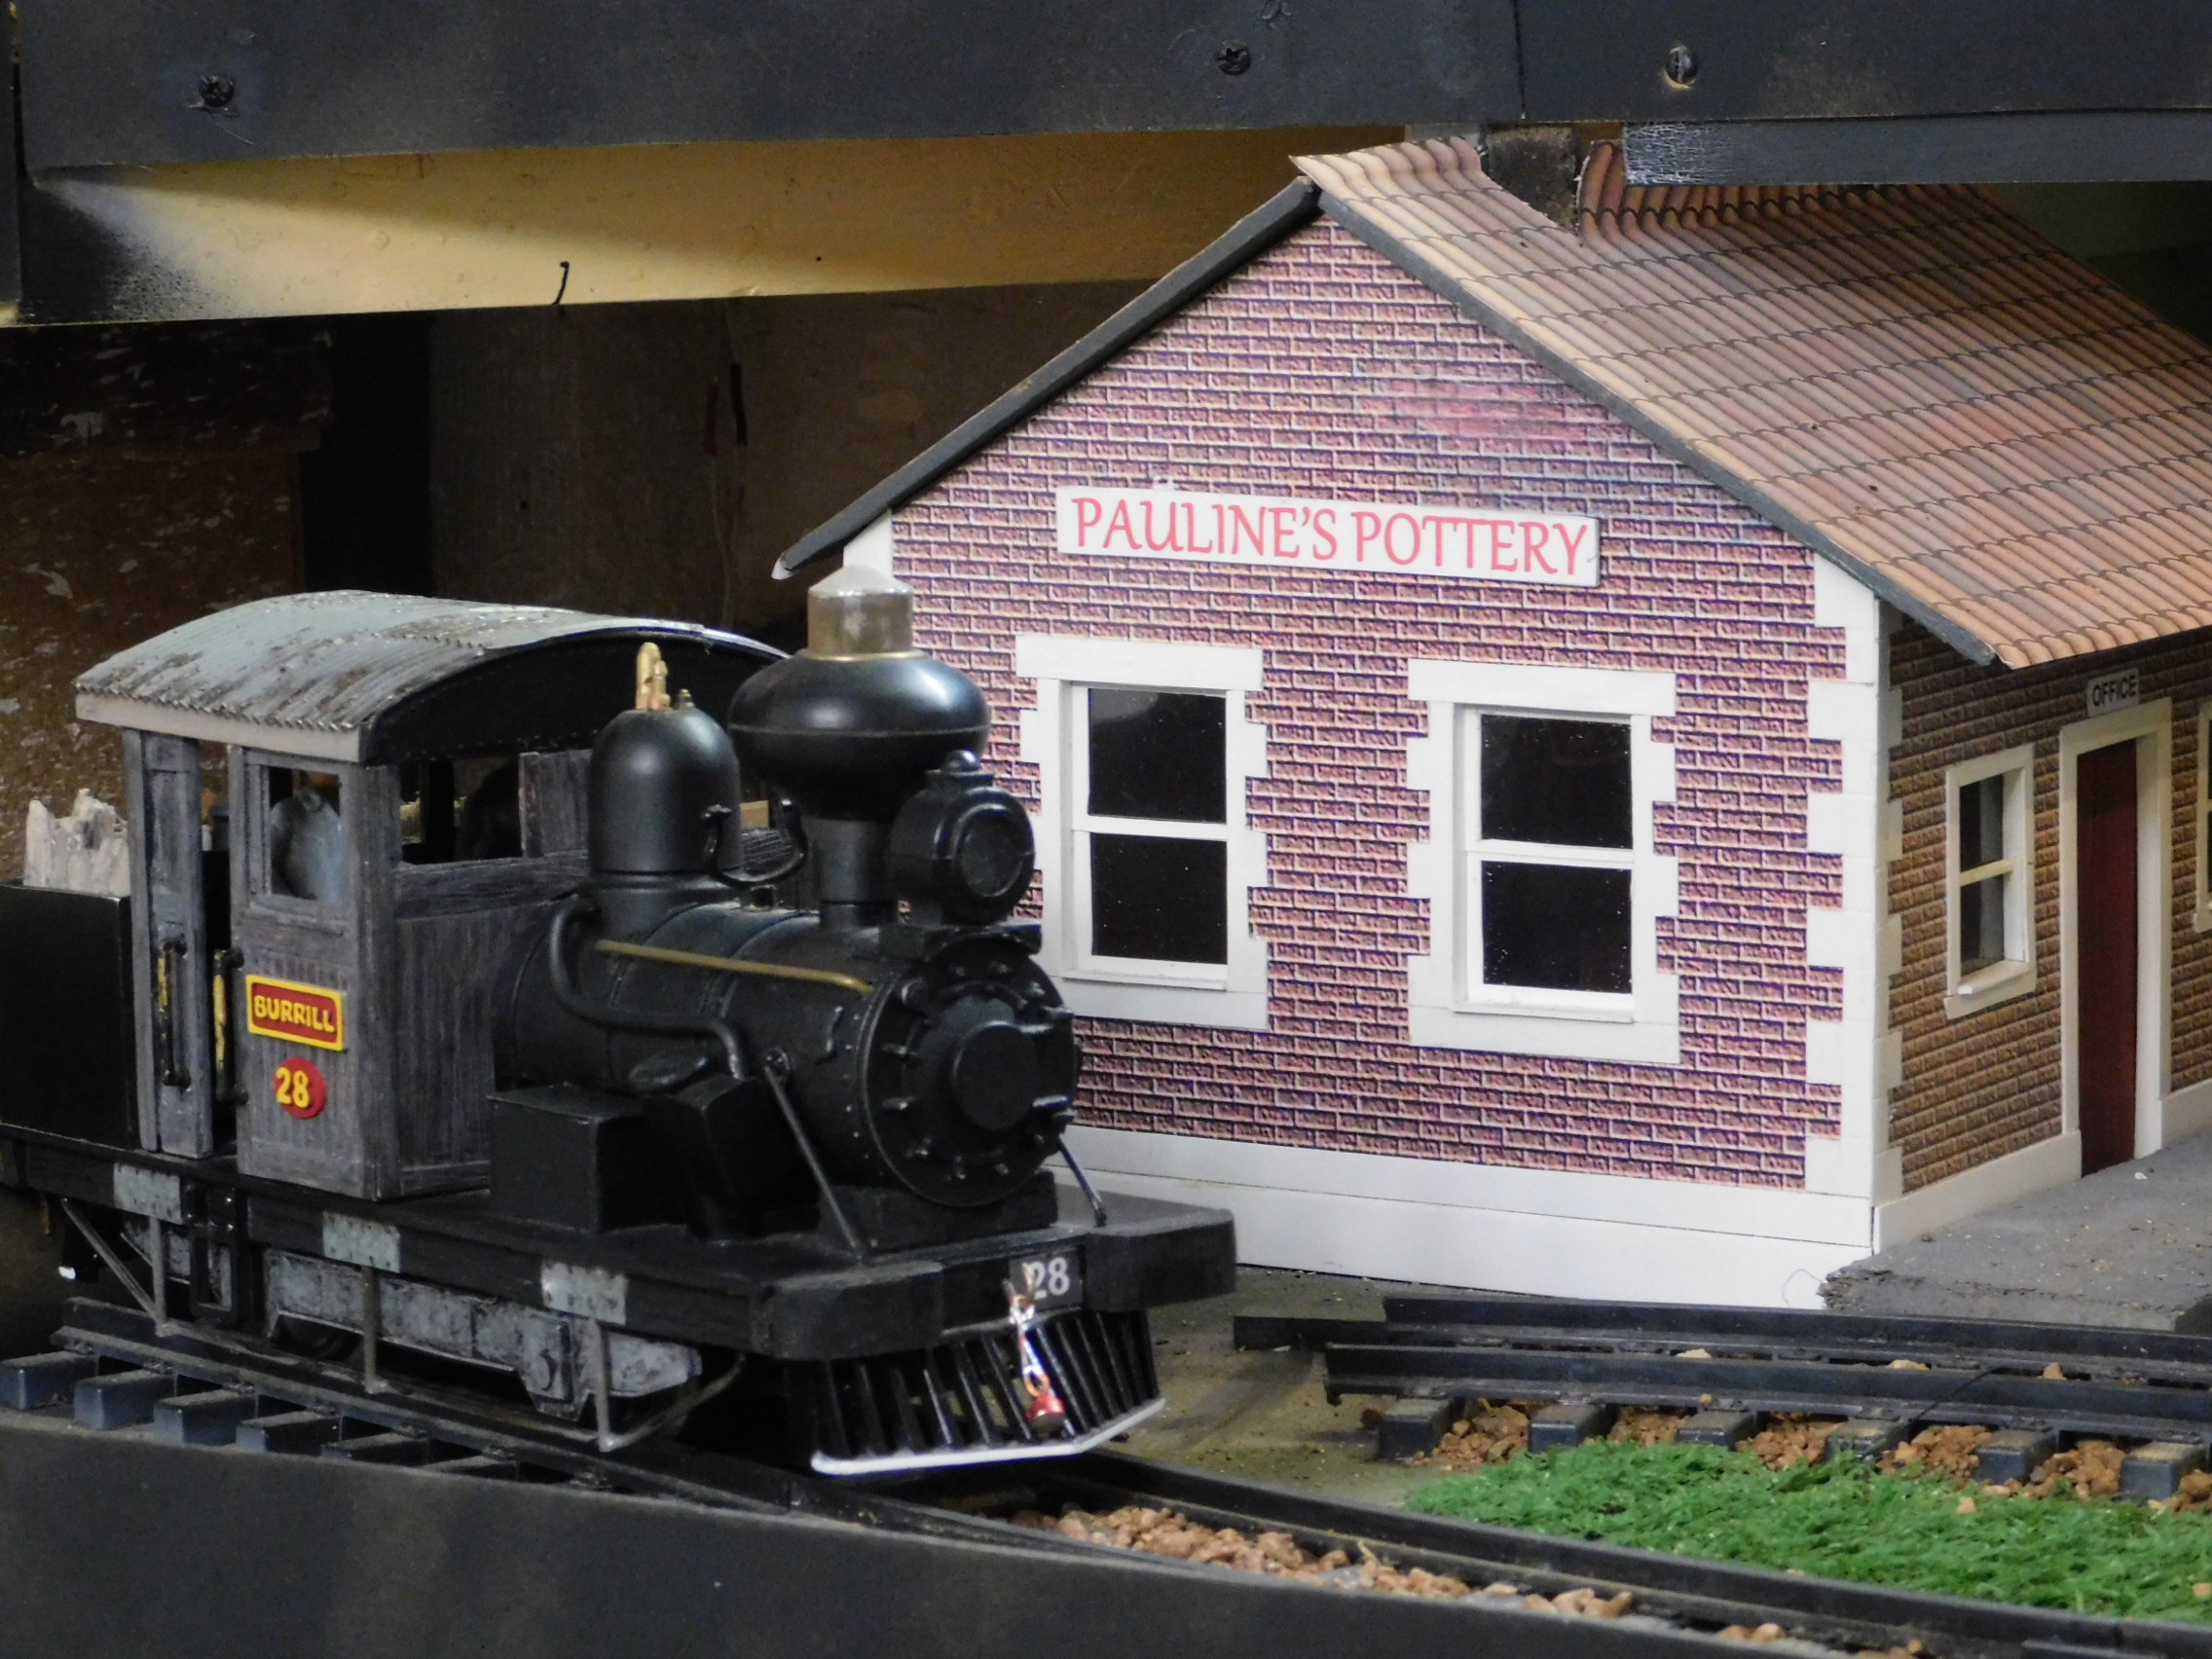 Pauline's pottery works.
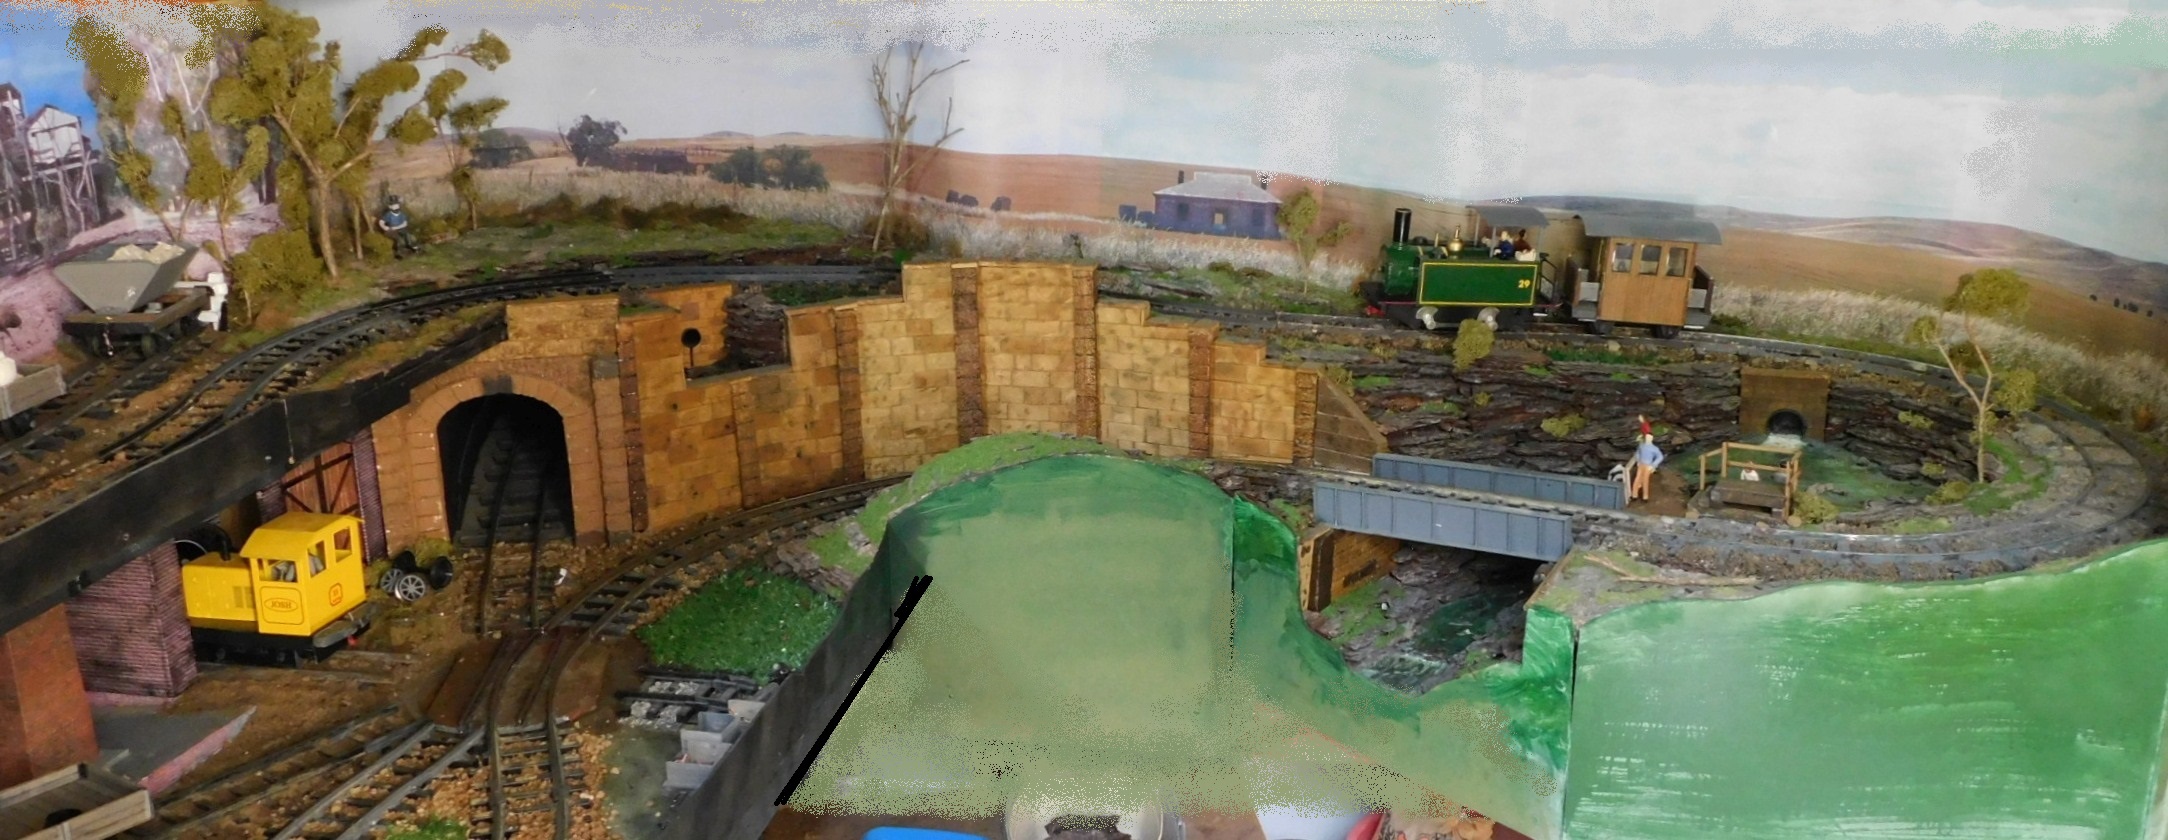
.JPG) The end wall with line connecting upper and lower levels, with the semi-circular, 1' radius curve around the 'lake'.
The rock gorge walls are made from bark chiseled from the big pine tree in my backyard. Then the tedious job of gluing layers on top of one another began. But it has worked out well (to my eyes anyhow)
The end wall with line connecting upper and lower levels, with the semi-circular, 1' radius curve around the 'lake'.
The rock gorge walls are made from bark chiseled from the big pine tree in my backyard. Then the tedious job of gluing layers on top of one another began. But it has worked out well (to my eyes anyhow)
The lake is more of a pond – only 12” across and the river more a creek as it is only 3” (ie 6’) wide.
The waterfall is PVA glue poured onto clingwrap plastic, painted with thick acrylic white. The lake and river are made using toilet paper and white glue over a timber base – thus giving ‘ripples’ in the water, then painted with acrylics and a couple of coats of clear polyeurethane (which I use on my house slate flooring)
.JPG) Claymine station on the top level. The station building is 3D as are the plaform and goods platform. The goods shed is part of the backscene. The water tower and building hides a join in the backscene transitioning from the town to country
Claymine station on the top level. The station building is 3D as are the plaform and goods platform. The goods shed is part of the backscene. The water tower and building hides a join in the backscene transitioning from the town to country
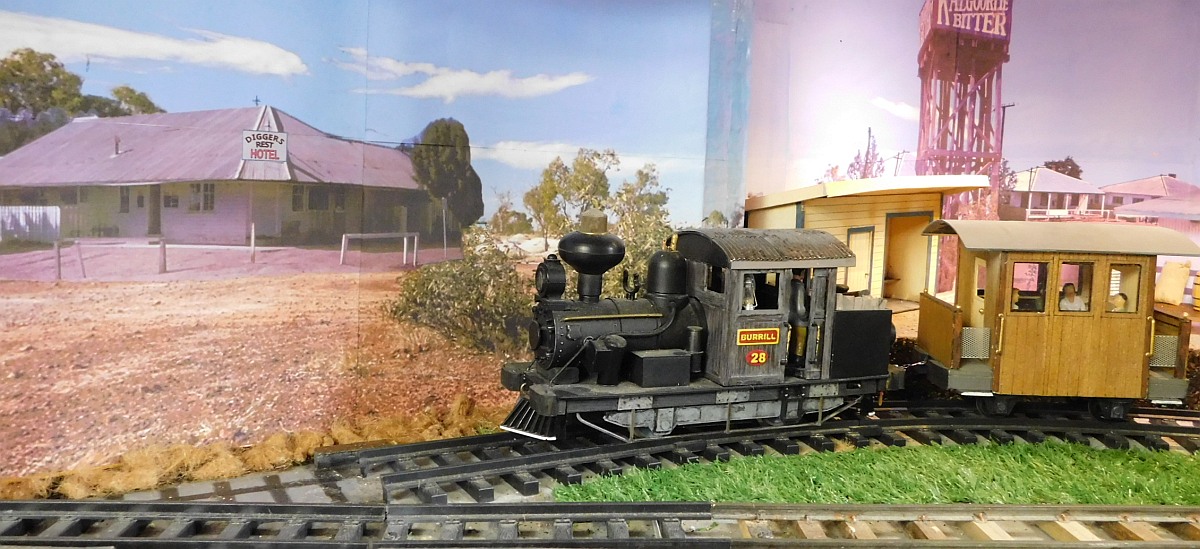 And Lightning Ridge just happened to be where Pauline and I first met. I even found a picture on the internet of The old Diggers Rest hotel where we had a few drinks on the night we met, so I have included that as well.
What could be more fitting in the shed that was her pottery studio?
And Lightning Ridge just happened to be where Pauline and I first met. I even found a picture on the internet of The old Diggers Rest hotel where we had a few drinks on the night we met, so I have included that as well.
What could be more fitting in the shed that was her pottery studio?
 I made up the whole Claymine backscene from 4 different pictures:
1. The hotel,(out of scene on left), 2. a few houses in red dirt,
3. the mullock heap pic, which was stretched, copied and flipped to make it 3 m long, and
4. the tricky one - a transition from the mullock heaps to the existing north wall farmland.(on the right) I decided to use a bushland scene for this.
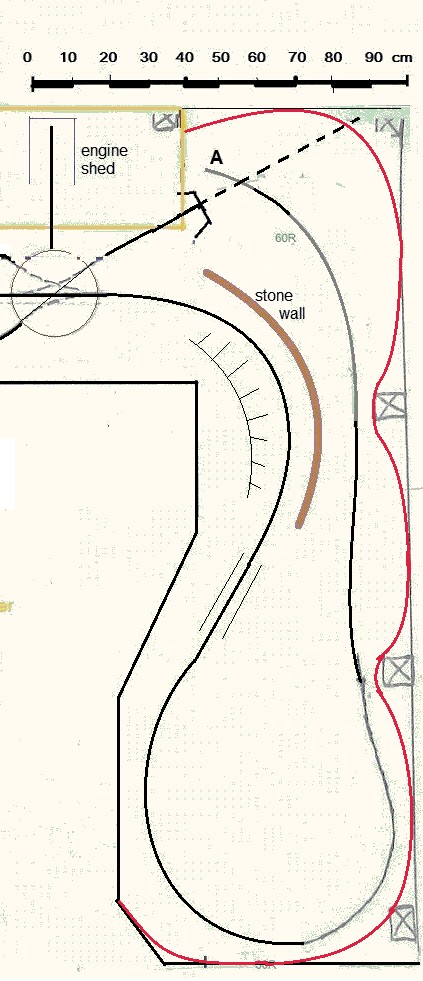
So to ‘round’ the scenes I used 3mm MDF. I curved it by pouring boiling water on it and bending to approx shape by hand, then screwing or gluing in place. It’s shown in red here:
I was lucky to find a nice panorama of Aussie ploughed fields, that I could stretch and flip-copy to be 3.2m long. It had a nice foreground of tall grass which I could blend into the real scenery.
I tried gluing each A4 sheet direct onto the curved MDF, but in difficult to reach places it was just impossible to line them up with each other.
So I tried gluing 8 landscape sheets on a piece of cardboard approx 4’ long but it was too unwieldy to then glue it to the MDF, especially around the curves.
So I finished up using 2’ x 1’-6” cardboard (1mm thick) and gluing four, A4 sheets to that and that was manageable.
I sprayed each A4 sheet with matte photo finish before gluing using PVA glue. The cardboard was then glued to the MDF with contact adhesive. Unfortunately that meant noticeable ‘vertical joint lines’ in the overall effect. So I printed 2” wide strips of the scene and pasted over the joins.
I used plaster of Paris to build up the baseboard to the grassy foreground.


