TrainWeb.org Facebook Page
BCK #43 - 2017 Updates


BUFFALO CREEK #43
ALCO HH660

Updates 2017
by Scott H.

February - March 2017

         Western New York had another unpredictable winter with very little snow but wild temperature swings and crazy winds. At our first organizational meeting in early February 2017, we discussed our goals for the year. After getting the prime mover started last July, we want to do an oil change. The "dip-stick" at the bottom of the crankcase showed full but the oil was very dark.

The Buffalo Southern Railroad has been an indispensible friend to the Society in so many ways. Looking toward becoming more independent we decided to make our own "pre-lube" pump for the lubrication system. Rick B. bought a 5 gallon per minute pump from "Northern Hydraulics™" and I connected it and a 1/2hp motor to a plywood base.

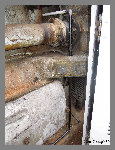
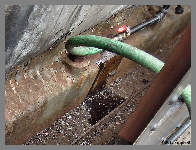
To make the "pre-lube" process easier without removing a crankcase cover, we decided to add some new extra plumbing. We pulled the 2" plug from the bottom of the crankcase and reduced it to 3/4." A 3/4" brass ball valve was added with a quick connect "MHT" end. At the other end we removed our 1/2" ball valve from the timing gear box housing and added a 1/2" union and pipe to get over to the other side of the prime mover.

Using new 1/2" black pipe, we neatly plumbed over the front of the engine, through the block of our  M&S 538 prime mover  and down to the bottom of the crankcase. The new pipe will be primed and painted with "Industrial Grey" enamel so it will look like original equipment. When we removed the plug from the crankcase, a small amount of oil was lost when we switched the fittings. We will remove the handles on the ball valves to prevent the accidental opening of the pipes and replace them when needed.

After all the plumbing was complete, we connected our shop built hydraulic pump to the new pre-lube system. Within 10 minutes we had oil dripping into the bottom of the crankcase. When we last tried to bar the engine over in the fall to clean commutator segments without pre-lubing, it would not budge. After the pre-lube, I was able to bar the crankshaft myself.

April 2017

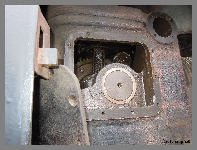
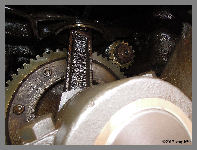
We never got a chance to test our  General Electric CP-26  compressor last year so we spent a little time making sure it would be ready this year. After removing the two crankcase inspection covers, we were pleased to see that everything was well oiled and there were no signs of water. Using a 2-1/2" socket and a 3/4" ratchet with a long extension, we were able to easily rotate the pinion gear and get fresh oil all over the bull gear.

In anticipation of installing batteries this summer, we are making insulation boards for the bottom of the battery compartments. Jim L. and I went down the tracks to install a tarp on the roof of our NYC transfer caboose. Plans are being made for an entire new roof this summer. Last week, Rick B. started scraping and wire brushing the underside of the two engine compartment roof hatches. This week he got them both primed and ready for paint.

April 24th was a perfect day for painting so Rick B. went up top to apply the finish coat of Industrial Gray enamel to the two hood hatches. In less than an hour, both hatches looked brand new. Jim Long donated a huge tarp which we installed on the other 20 feet of our NYC #19602 Caboose.

The weather continued to cooperate the rest of the week, so Jim finished priming and painting both sides of the battery compartment insulation boards. Over forty 2-1/2" drain holes were cut to match the holes in the steel compartment floor to allow water to drain from the bottom.


May 2017

On May 3rd, we were confident that freezing weather was behind us so we filled the cooling system. We ran 175 feet of hose from the ArtCraft Train depot to the locomotive and in less than an hour had filled the system, and again had no leaks. While we had all that hose out, Rick B. used his pressure washer to remove some of winters grime.

The Buffalo Southern Railroad continues to be an invaluable asset to our progress. On May 17th I had Pat C. load six used "GBC" 8 volt locomotive batteries onto my 1/2 ton truck. At 275 pounds each, the 1680 pounds of batteries really made the truck squat. Using a "strong back" plywood ramp, we slid each battery into the engineers side battery compartment. Silicone spray on the plywood and the insulation boards really helped the process.

At the end of the day we had 48 volts of power on one side of the engine. On May 22nd and 31st with fewer batteries on each load, we filled the fireman's side compartment. After the battery terminals were cleaned we had to attach ten "jumper cables." These 2 foot 2/0 gauge wires have a two hole terminal at each end which were also polished and clamped with eight battery stud nuts to the battery terminals.

With all 12 batteries connected in series we now had 96 volts of power. Since many of the units were sitting idle in the BSOR shop for quite a while, they need to be charged before we can use them to start the engine. However, we couldn't resist trying out some of our low power systems like the lights. As Rick walked back from retreiving our "blue flag" he took a photo of the rear headlight on "bright." (now a 100 watt 120 volt bulb)


June 2017

On June 5th, we charged another set of three batteries with our 24 volt charger. While that was happening, Rick and I inspected the "pressure regulator" switch for the compressor. Previous owners had removed the large ALCO electrical/pneumatic unit and repalced it with a smaller, much less complicated "Furnas" brand regulator. However, the mounting system and wiring left much to be desired. We will fabricate a proper mount and rewire the unit to prevent any problems in the future. The photo to the right shows a detailed view of the "backside" of the electrical cabinet where the pressure regulator switch is located.

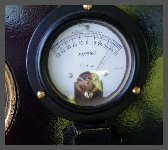
With confidence that the compressor system was good to go, we went back into the cab to give it a try. Meter readings at the battery switch showed we had 88.6 volts of power, more than enough to roll the motor over. With an easy push on the compressor relay switch, the motor after resting silent for 18 years came to life! With another system checked off our list as "good," we again connected our "pre-lube" oil pump so we could bar the engine over. This was to allow us to clean the hundreds of brass commutator segments on the three generators. The cleaner the segments are, the better the generator performs. With the prime mover oiled, we were able to rotate the crankshaft a little bit at a time to polish them with red "Scotch-Brite™" pads.

On 12th and 19th we continued to charge more sets of three batteries with our 24 volt charger. Plans were made to how to mount our compressor relay and one of the lights in the back of the electrical cabinet. We also came up with a new switch and power cord for our pre-lube pump. With a 93 volt reading at the battery switch, we could not resist a try to turn the engine over. After 15 minutes of pre-lube oiling, we barred the engine over and then gave it a try... nope, not yet. We found one battery had a much lower charge than the others in the group. We disconnected that battery and tried again but without success.
More charging of the other batteries is still required. Bob M. added a new decal to the electrical cabinet doors to remind us the open the "Battery Switch" before leaving at the end of the day.

On June 26th, we attacked one battery at a time with 12 volts to help remove the lead sulfate on the plates. The pre-lube pump now has a slick heavy duty power cord and switch. I mounted the "Furnas" compressor pressure switch on a rubber shock mount and eliminated the nylon ties that used to hold it in place. To the right is a large detailed view of the electrical cabinet. Once we have a an easy starting and running locomotive, our plans are to paint the entire interior of the cabinet.

July 2017

Frustrated with our attempts to get the prime mover started, we again turned to the BSOR for some help. On July 3rd, the railroad was on a holiday schedule so Pat Connors graciously offered to bring down ALCO RS-18u #1847 to give us a jump. With 12 batteries on board, we quickly had two 20 foot 3/0 jumper cables connected from knife switch in #1847 to the switch in #43 and a positive terminal at 64 volts.

We had already pre-lubed the engine, so as soon as we had fuel pump pressure I pushed the start button and the engine came to life! The prime mover started like it had been run yesterday, very little smoke, no leaks and it idled smooth. With the engine running we hoped to be able to charge all of the batteries at once. A big Thank you to Patrick Jr. who shot this video and of course to Pat Sr. for taking the time to come into work on a day off!

With the engine smoothly "ka-chunking" at around 400rpm, we adjusted the voltage regulator as low as it would go to 108.4 volts. This put an initial current of over 50 amps into all 12 batteries but within 1/2 hour it dropped to around 35 amps. Turning the big DC compressor on immediately put the meter over 50 amps again. When we had 100 psi in the system, we cycled the brakes, bell and horn.

We were back on the 10th to continue charging three batteries at a time with our 24 volt charger. We also investigated why the dropping resistor for the voltage regulator was getting very, very hot. As shown in the link above, previous "maintenance" on the wiring left much to be desired, Ha! We started correcting all those minor electrical wiring issues. We also found that after the compressor was run for the first time in over 17 years, we had air leaking from the compressor crankcase breather pipe, another "small" issue to deal with.

We again wish to express our sincere thanks to the Buffalo Southern Railroad management and to Chief Mechanical Officer Pat Connors for all their help as we move toward our goal of getting #43 back onto the mainline.

On the 17th we used "silver solder" to make up 4 new 10ga wire leads to the dropping resistor and thoroughly cleaned all the connections. Silver solder melts at a lot higher temperature than common solder so the heat from the resistor would no longer be a problem. A couple of other new leads were made to finish all the connections to the voltage regulator. While Bob Martin and Jim Long were preparing the interior of the engine compartment for painting, Rick Burns started working on the compressor issue.

August 2017
By Scott Hawbaker

Society member John Mech had provided us a phone book size pile of early ALCO locomotive literature a few years ago and in that stack were the detailed drawing and parts list of our CP26 compressor. Rick found that there are six 1-1/4" intake poppet valves and six 1-1/4" exhaust poppet valves that needed to be removed and cleaned. Each valve is secured with a 1-5/8" cap which needed to be removed to access each valve.

Back in the old days, the railroad would have unbolted the 200 pound compressor cabinet and lifted it with a small crane in less than an hour. We had to do the work with the cabinet in place in between all the pipes. The fine thread valve caps have not been removed for a very long time and the four on the high pressure cylinders were very difficult to turn. Kroil and PB Blaster did not help much. At best, we could only get 1/4 of a turn before the big wrench ran out of room. Fortunately, most of the low pressure cylinder caps broke free with a few whacks from our 5lb hammer and a couple of wrench resets.

September 2017

After a lot of wasted time and skinned knuckles we had to come up with a better method of moving the wrench than with the hammer. Rick suggested we use a come-along to pull where we couldn't reach. We bought a used wrench and cut it in half so it could swing in the limited space. A short chain was bolted to the end of the wrench and attached to the come-along chained to the frame inside the electrical cabinet room. With much less effort, all four of the valve caps were slowly removed a 1/4 turn each pull.

While Rick and I fought with the compressor valves, Jim L. & Bob M. continued the messy dirty job of wire brushing and priming the interior of the engine compartment. The sides are not too bad but the ceiling overhead is not easy. What they have completed looks great!

On the 12th and the 19th of September we slowly removed the last four valve caps, cleaned and replaced the valves and reinstalled the caps. Even with the come-along, we still had to reset the wrench every 1/4 of a turn due to the limited space and every cap fought us all the way. Once we cleaned the threads in the cylinder and on the cap we were able to turn them back in with just two fingers, Ha! After the last valve was finished and replaced, we aired the system up to 80 pounds in no time at all. We were thrilled that no more air was leaking from the compressor and the system stayed charged.

With perfect weather on the 25th, Rick and I reinstalled the 50 pound air filter assembly after Rick had cleaned the screen and replaced all the filter media. A large pipe union connects the pipe to the low pressure cylinder intake and a big clamp on top secures the assembly. Once that was done we went under the locomotive to assess the traction motor leads on the #2 motor. Years of wear and tear had taken its toll on the insulation and we knew long ago they would need to be repaired.

October 2017

Rick and I continued to work on the traction motor lead insulation. Rick has also kept our loaner batteries charged, connecting three at a time at 24 volts. We also added new 7/8" oil resistant hoses to our pre-lube oil pump eliminating the need to disconnect the pump each time we use it. Jim Long added new original copper washers to the fuel injector pump covers.

By the Saturday the 21st, we had the four leads on motor #2 fully insulated and connected to the generator. The Buffalo, Cattaraugus & Jamestown Scenic Railway was not running that weekend so Pat Connors and his son graciously offered to come down and give us a jump start. Pat spotted BSOR RS-18u #1847 next to ours and we connected the big 3/0 jumper cables. #1847 has a 64 volt electrical system so we connected to 8 of our onboard batteries.

But.... it was 45 degrees that morning and our 77 year old engine gave us a hard time starting. It took us three tries and on the third we "pumped the pedal."

Remember doing that when we had a carburetor on our cars? Ha! As I held the start button, Rick Burns lifted the governor control rod to add extra diesel fuel, and then with a lot of smoke the prime mover came to life! In less than a minute the engine was idling smoothly and we were ready to hopefully make our first move.

When our compressor had the air up to 90psi, Pat moved the F/R controller forward. The generator and exciter field coils clicked into place followed by the big traction motor relay. Unfortunately, nothing happened, not even sparks when a relay drops out of the circuit. Sometime in the past, the traction motors on #43 were rewired to a simple "series circuit" like all other "S" model ALCO's. Without all four motors connected, no current would go to either pair. When built, there were two separate circuits, one to the front and rear.

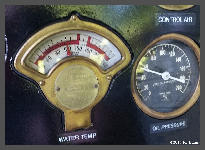
However, we were not disappointed. Everything else worked as designed. The voltage regulator kept a steady 107.6 volts going to the eleven batteries and electrical system and the compressor shut off automatically at 90psi. We took a hot oil sample to send in for analysis. No leaks were found and the water temp stayed under 150 degrees. After we burned up 13 gallons of fuel we shut her down. It was time to drain the water from the cooling system for winter.

November 2017

         November to date has been a much colder month than October with a record setting rain on more than one day. Since it was too cold and damp to paint anything on the 13th, we made a list of projects and supplies that we can work on and gather over the winter months. Our big "36th Annual Greater Buffalo Train & Toy Show" was held on the 18th and 19th, the weekend before Thanksgiving.

November 27th was warm enough for Rick B. and I to work on two fuel injectors. We were hoping that with each time we ran the prime mover, gunk and debris would clear themselves out. No so with No.1 and No.2 cylinders. Both are running cooler than the other four. We climbed on top of the engine and removed two of the valve covers to access to the "valve chest."

With a few wrenches, a 1-1/16" socket and breaker bar and two pry bars, we had both Bosch fuel injectors out in less than an hour. First we disconnected the smaller fuel over flow line and then the high pressure supply line from the injector. After the two large retaining nuts were removed we gently wiggled and lifted the injector from its port.

When the injector was removed, it was covered with oil that had seeped down from the valve chest and down to the injector ports. Pat C from the BSOR indicated this was a common problem with the M&S 538/539 engine head design. Excess oil will foul the fuel spray from the 9 very small fuel orifices and prevent the cylinder from firing. Fortunately, there is a simple "O"- Ring fix that ALCO came up with in the 50's that helps prevent the oil fouling. When the weather warms up, we'll reinstall the injectors and look forward toward our next start up in the spring.

December 2017

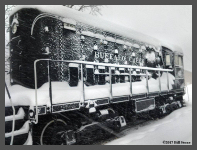
On December 9th and 10th, the Buffalo Cattaraugus & Jamestown Scenic Railway Was running their Santa Express Train Rides behind Scott Symans "Viscose #6" 0-4-0 Steam Engine.  Hamburg had received almost 6" of fresh snow by the morning and it continued all day. Bill Stone was out with his camera to photograph the Santa trips and caught #43 covered with fresh powder.

The WNYRHS greatly appreiciates all the generous donations to this project to date. However, we could still use your help! All Donations to the WNYRHS, Inc. are Tax-Deductable! If you would like to mail in a donation, send it to

WNYRHS Inc., PO Box 416, Buffalo, New York 14231-0416
or
         Click the PayPal Button to make a Secure Electronic Donation. THANK YOU!

News Updates 2018


This page was last updated: February 11th, 2018

Web Site Hosting by    TRAIN WEB

The WNYRHS, Inc. P.O. Box 416, Buffalo, NY. 14231-0416 is an independent organization and has no affiliation with any other local or national group.
The Society is a fully qualified organization under 501 (C) (3) of the Internal Revenue Code and all donations to the Society are tax deductible.
©Copyright 1999 , WNYRHS Inc. all rights reserved

  Web Design & Hosted by  - Scott H.