


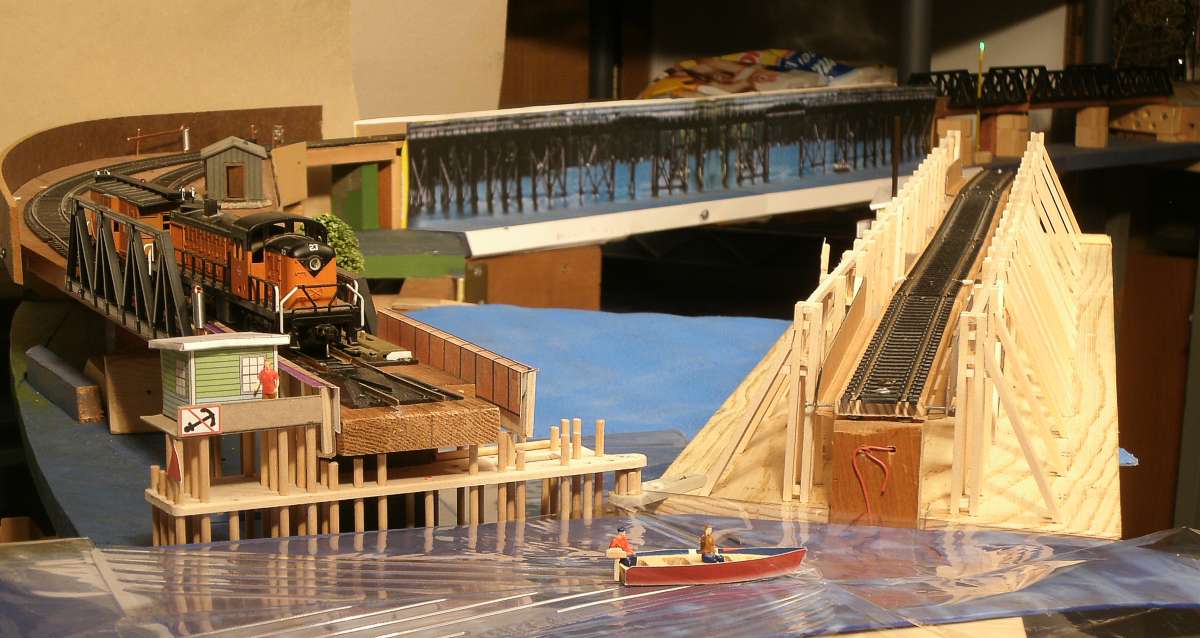
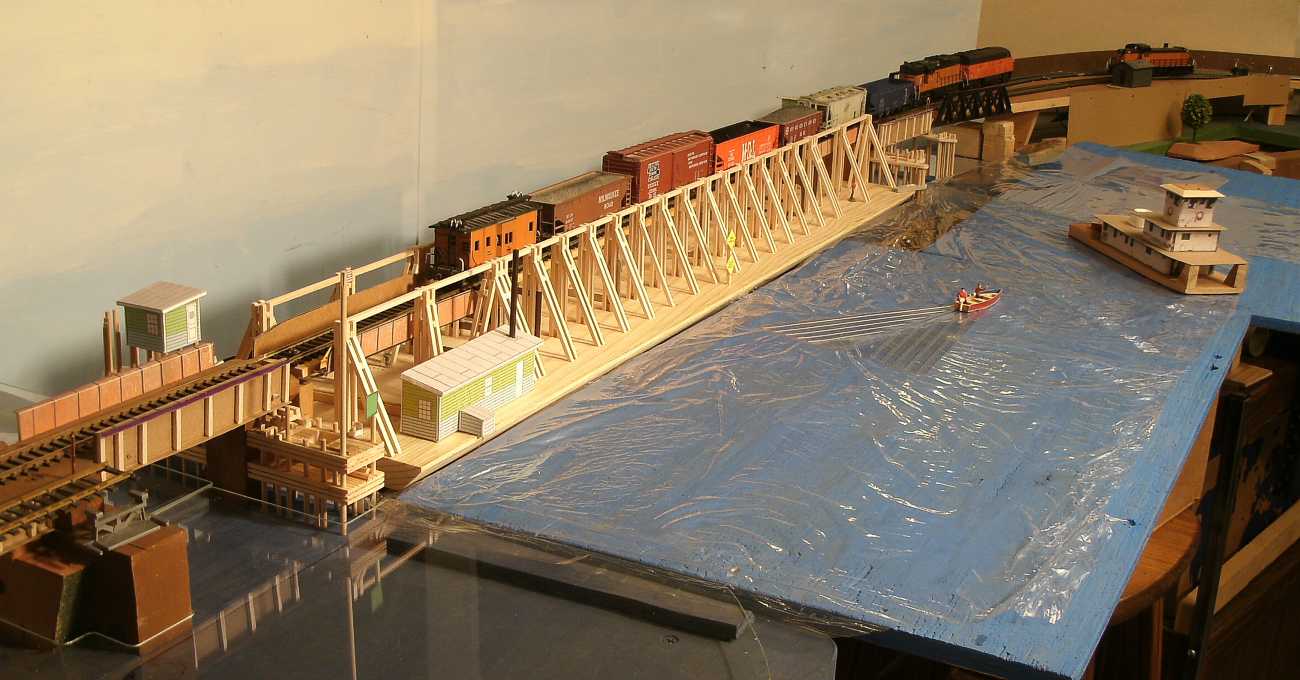
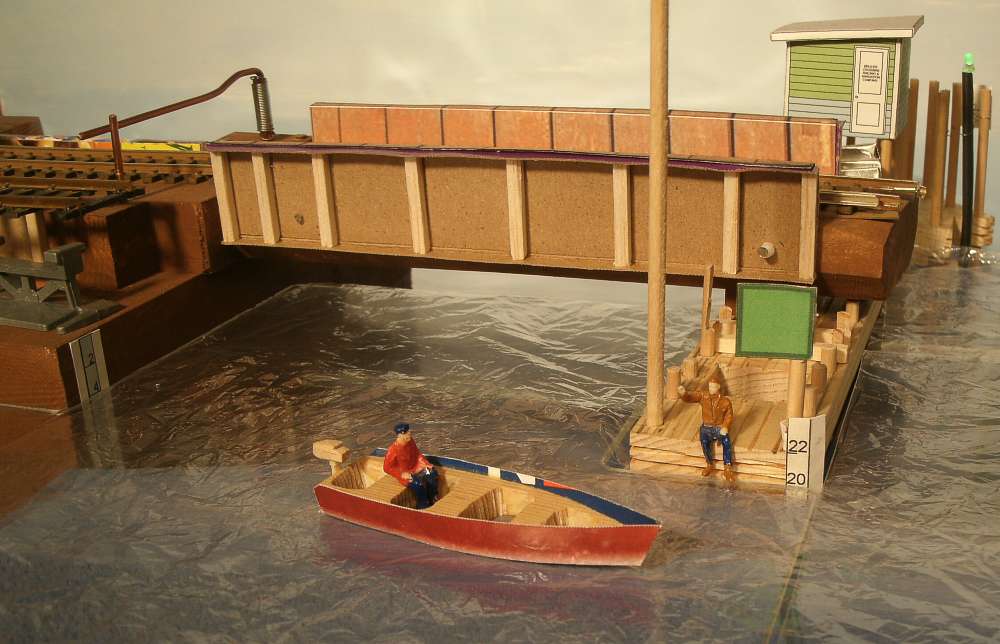
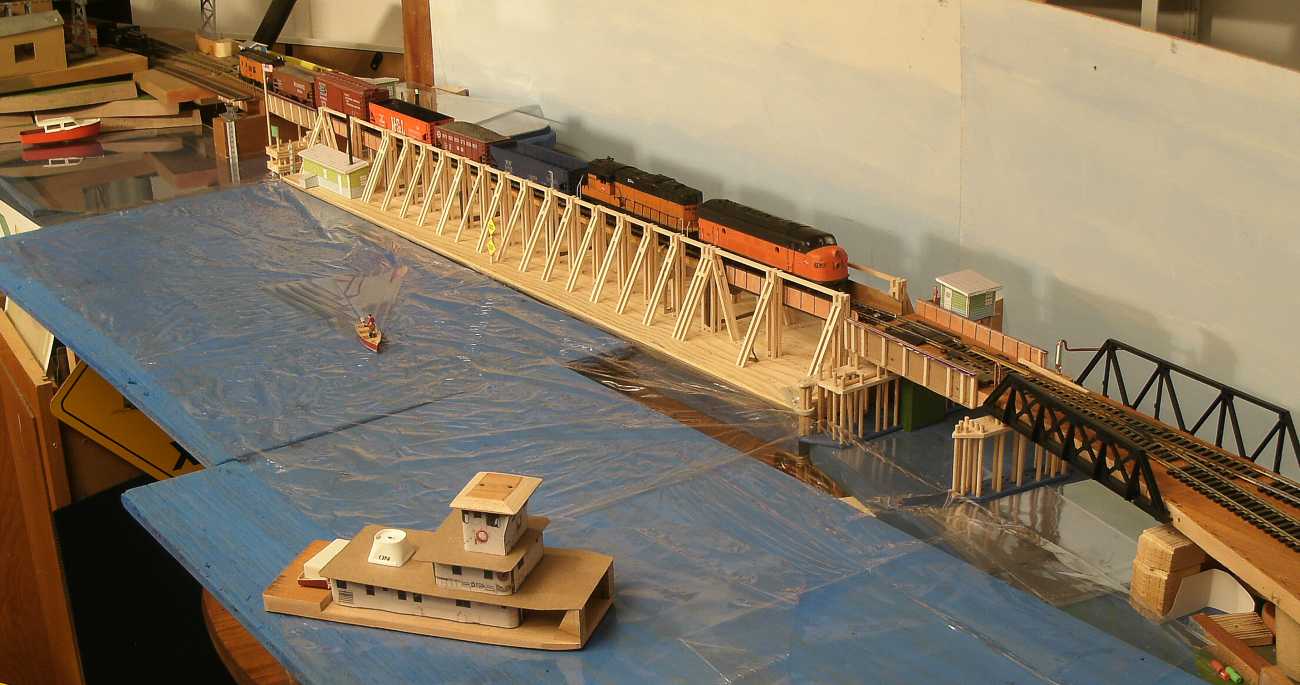
| The 'new' pontoon has been floated into place and the tracks, beams, blocks, and hinge girders have been installed so that trains can run again across the Mississippi River. |

.
| The span is swung open and inspected by Al and Harry from water level. |
.
|
The pontoon barge floats. And when the weight of a train rolls onto it, the real one would 'sink' down about 4 feet, that's water displacement. The transition from the fixed pier to the bridge was made with a 49-foot long hing girder, like a ramp. (this is a bridge going onto a bridge). |

|
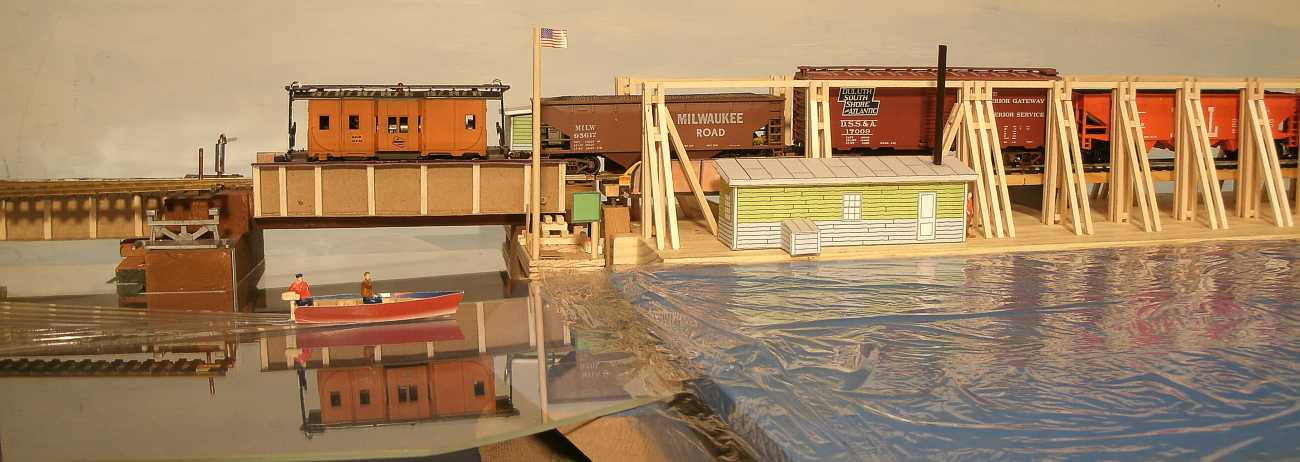
The track on the pontoon is laid on wood beam stringers. That had wood blocks under it, to shim it up. The track was set 4 feet high, that's the long level track on the pontoon and that was the (height) Adjustable Floor. When the train's weight was on the pontoon, the track and pontoon barge was pushed down and the track ended up being level. That helps the couplers stay together. On a real pontoon, the train speed limit was about 10 mile per hour. All that weight and mass and water needs time to move as a train comes across. I have read a bit about the Milwaukee Road pontoon drawbridges, but never saw mention of the size of a water wave that could squish out from underneath. I could guess a 1- to 2- foot high wave. And since the pontoon barge and track support is made of flexible wood, I would guess the planks and nails and bolts could groan from the change. |
.
|
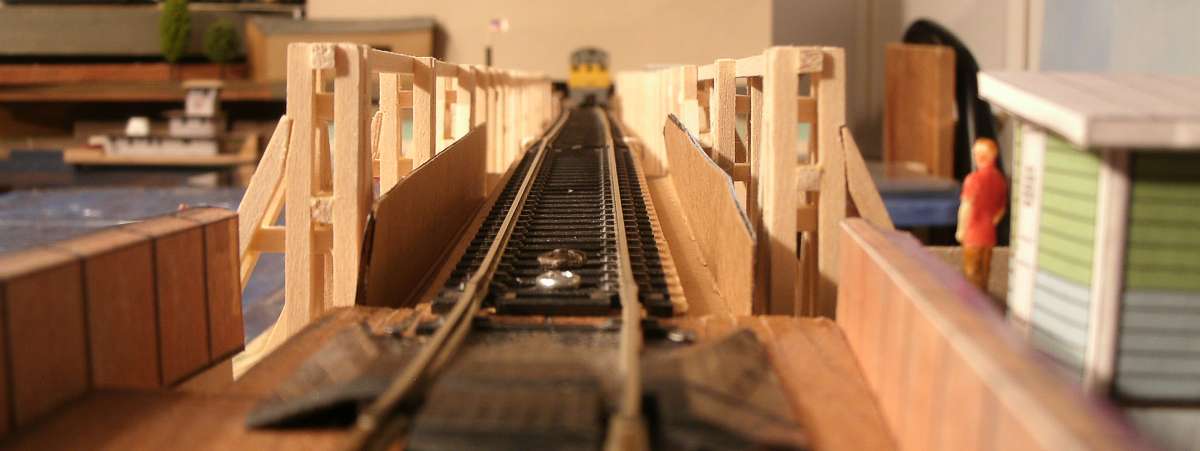
Looking over the bridge, the hinge girder track rises up like a ramp. (On one of the first bridges in the 1870's, they did that in a 20-foot length, twice as steep as my modern version.) |
.
I made a diagram to show the principle of adjusting the track height
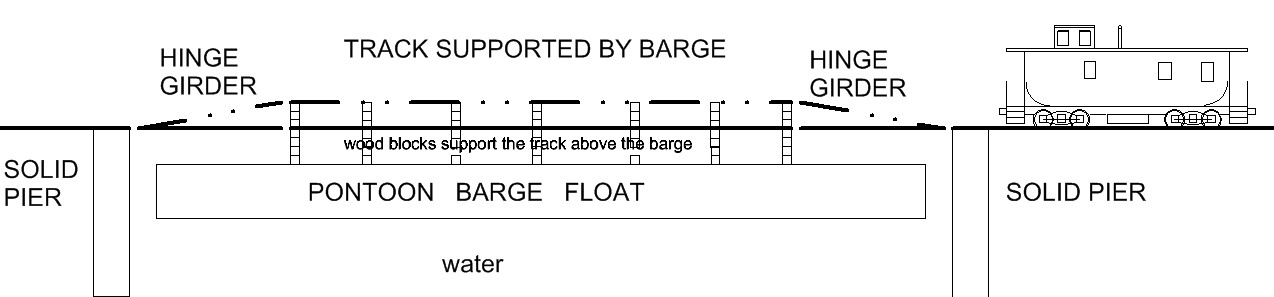
It's easier to jack and block the track on the pontoon barge than if the approach track was adjusted.
That's just 300 feet on the pontoon, versus a half mile on the approaches to the river.
The approaches are permanently built high enough for the height of flood water.
|
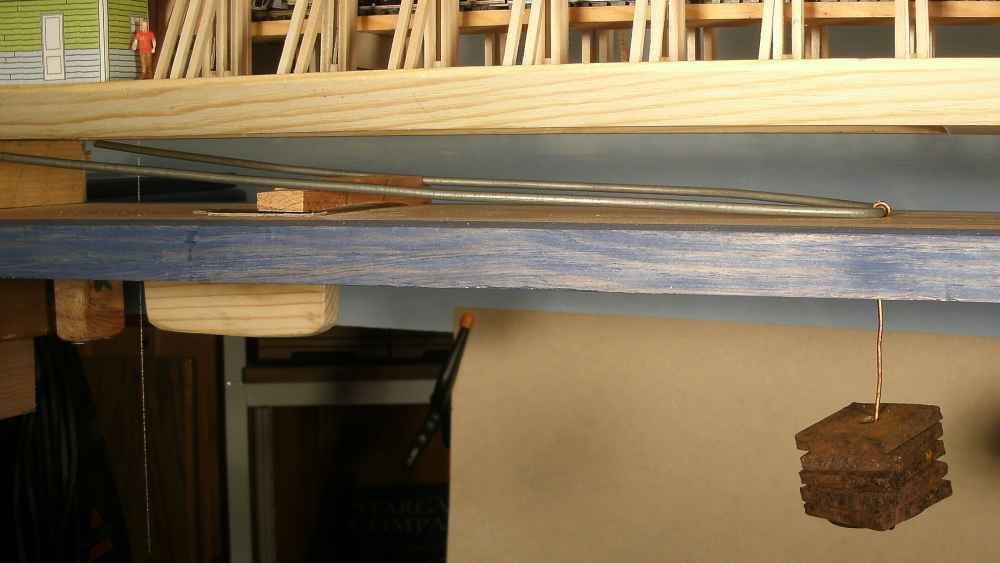
A real pontoon barge floats on water. That would be too messy for my model railroad. I 'float' mine with gravity, a counter weight, a steel wire beam, and a fulcrum. On each end.
It goes down a scale 4 feet (1/2 inch in HO scale) as the train comes over, and as the caboose leaves, it floats back up. This model bridge is an 'operating accessory', like the old gadgets such as the highway crossing gates that are activated by the weight of a train. |
|
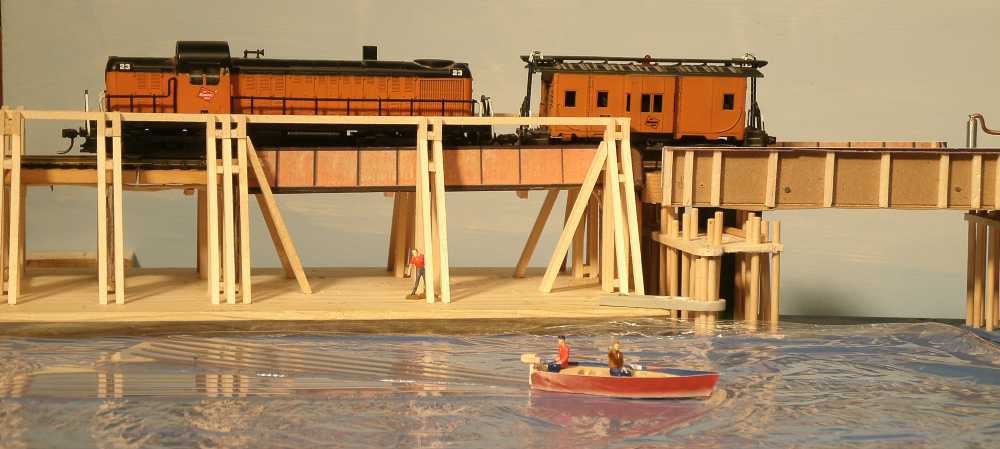
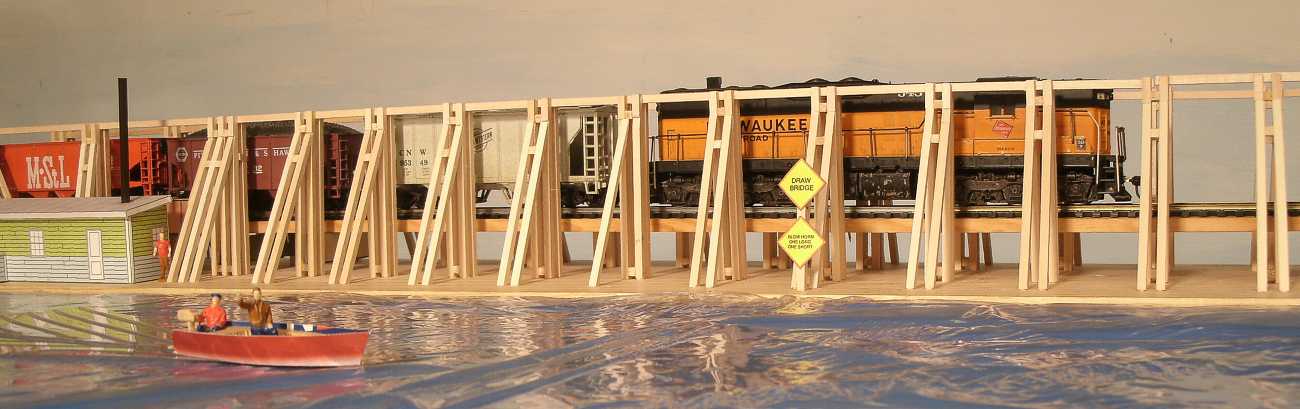
My model shows an era that never existed. The real bridge was gone in the 1960's, and I am still using it on the model railroad in a 1980's time period. It would be proper to limit my motive power to no more than two light engiines at a time. Sometimes, when I run the SD-45 and SD-9 lashup over this, I uncouple the lead locomotive, and run it across the bridge by itself. And then let the second locomotive take the train across. And then couple all the power together so they can continue the journey. The area has a lot of river level running, so often I only need one locomotive on a train. Sometimes I get a train over the river and then put a helper on, either on the front or rear of the train, to climb the hill that gets us west into Iowa, and out of the river valley. |

.
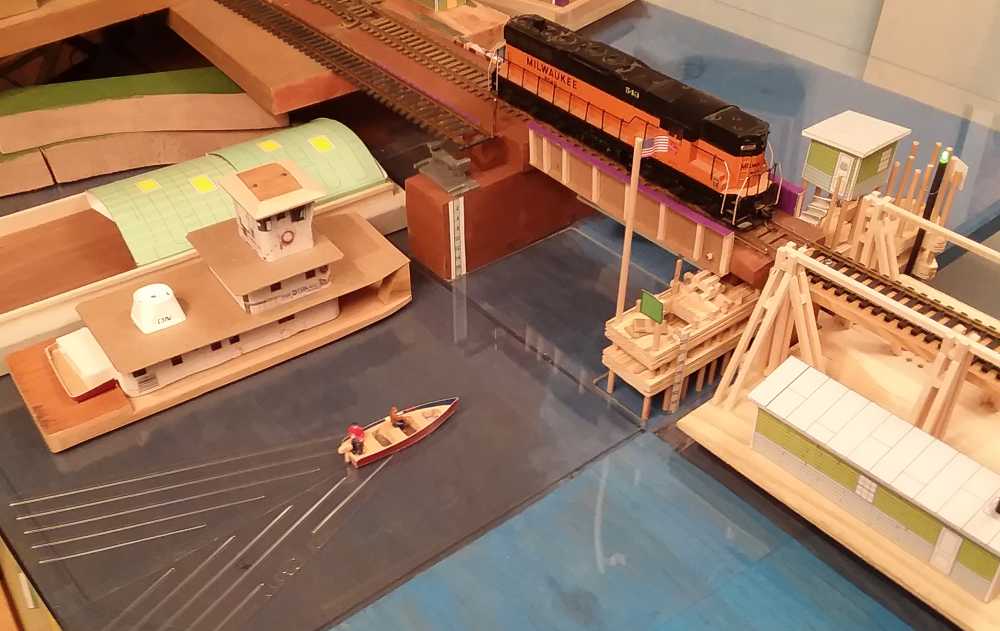
| Looking east across the River, as seen from the Iowa bluff. |
.
|
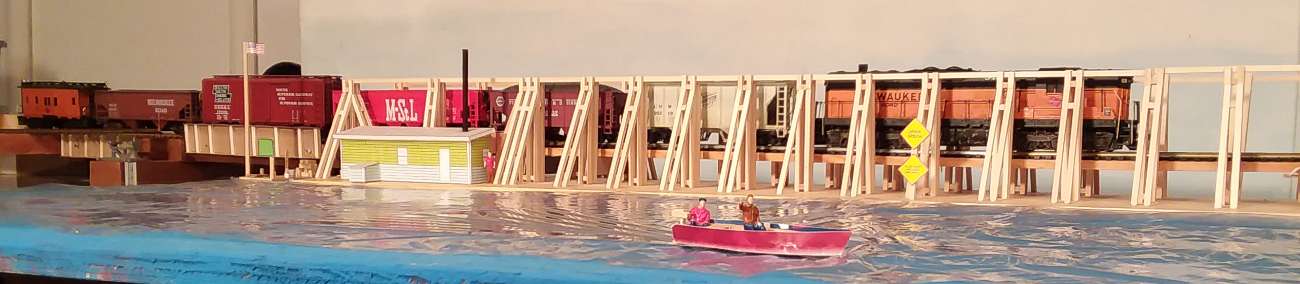
The real river crossing has several bridges and trestles leading to the pontoon, but I don't have a large enough space to model all of that. Here's a list of all the bridges to cross this channel and islands: East Approach ( Pile Trestle ) 1,362 ft 2 Steel Pony Spans, on pile piers 218 ft. C3 Girder, (Hinge , or Swing Girder east end pontoon proper 49 ft ) Pontoon Proper (Adjustable Floor) 180 ft C3 Girder, (Hinge, or Swing Girder west end pontoon proper 49 ft ) Intermediate Pile Trestle 25 ft Twin Deck Girder 55 ft. West Approach (Pile Trestle) 181 ft Total Length 2,119 ft (from the Matthews Collection in Train Magazine, from the Marquette Historical Society) I didn't model the approach bridges 'in order', I needed some plate girders to hide the model railroad support boards that lead up to the river channel, which is also my walkway to enter the room.
If you visit my house, don't expect a river to appear like my pictures show. It takes a half-hour to set up this 'dry water'. |
.
|
I like to set the track for a 12-foot deep river channel. That's typical, and that floats the river barges sufficiently so they can be loaded fully. I have to take care of the river traffic on this model railroad, too. |
.
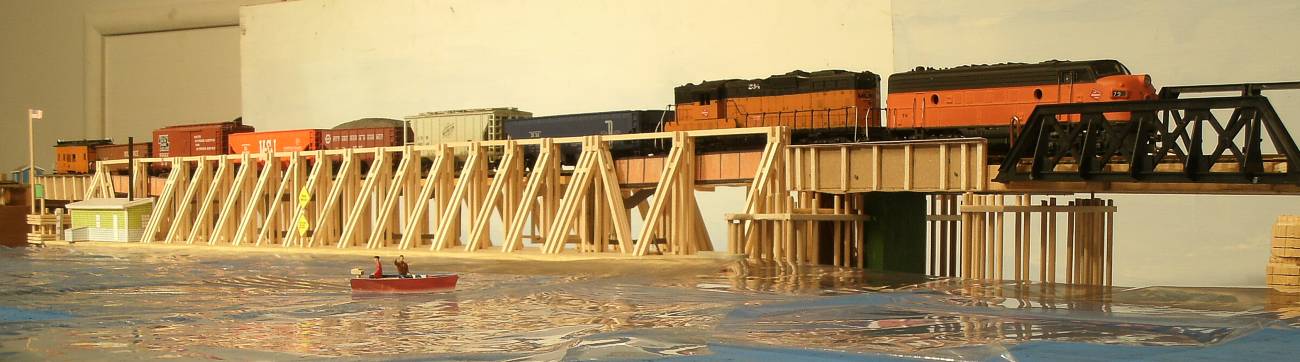
| I can set a deeper river to simulate flood conditions. Here, the water has risen to 20 feet. |
.
|
As the river goes up, the bridge tender and section crew have to lower the Adjustable Floor bridge track by removing some wood support blocks. Notice how the bridge frame is near the top of the boxcar now, compared to normal water levels. Now the train goes 'through' the bridge. |
.
|
On my paper mock-up, a flood setting had the pontoon so high that the train was hidden behind the paper. Now that it's built of wood, I can see through it, just like the real one. |
.
| (64) |
.
|
My pontoon barge is a pine plank. The timbers are 1/8" basswood strips. I left it with it's natural wood color because it brightens up the basement. The real one was a black or creosote color, but that would be too dark in my room. Normally, I don't have all the photo lights turned on like I do with camera sessions. Next summer, I could paint or stain the wood gray, simulating a paint job with linseed oil. That wouldn't be too dark.
I could add some winches and pulleys and jacks that could be used for raising and lowering the track. And hundreds of wood blocks. That's easy, but it takes a lot of time to stack them in place. Most of them would be stacked between the vertical wood columns. Those keep the piles of stacked wood blocks stable under the track timbers.
I might add some cable or steel rod X bracing. I already built in some spaces to hold it. I would add it after painting the wood. I just don't know if it was used on the angle-braced model. The rectangular tower type definitely had cable bracing. |
|
My power house / winch house is still a green paper mock up. I could move it to the Wisconsin channel draw in the future. An old broken jewerly necklace is the chain that is used to pull open and pull shut the drawbridge. That chain is anchored upstream and downstream and goes across the river channel. When the winch isn't pulling on it, then the chain goes slack and lays on the river bottom, below the propellers of river traffic. It took about 15 minutes to pull open or shut the draw. But when I walk through here, I don't wait that long, I just swing it open in 3 seconds (if the river is gone). The first power house had a steam engine on the winch. That's why there's a 24-foot tall smokestack. Later bridges had an electric motor. But a steam boiler was still handy to de-ice things in the winter. |
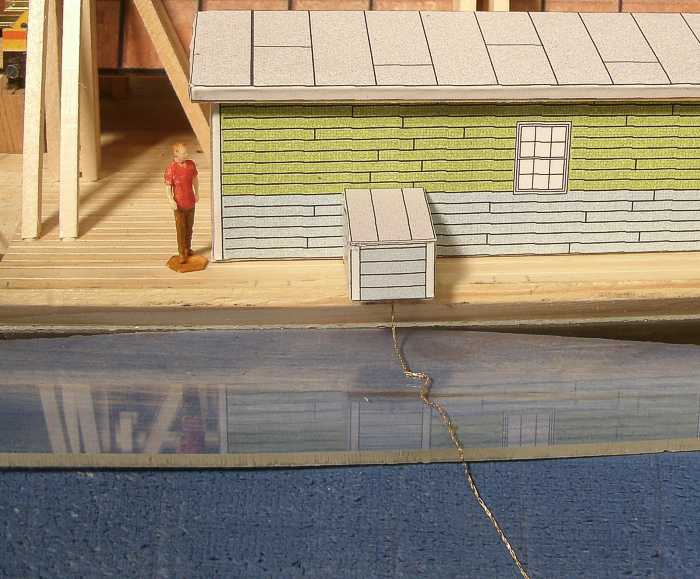
With a chain laying on the river bottom, it's important to NOT anchor a boat here and foul the chain.

|
And I just read that the local towboat 'City of McGregor' might also assist with moving the swing draw. (my photos have a modern towboat, 'Lil Charlie'.)
The pontoon barge draws 3 feet of water when a train isn't on it A tow boat could come in handy to guide the front of long tows so they get lined up with the channel. We wouldn't want steel barges to hit all those wood piles on the approach tracks. |
Here's one more view, from the southeast.
.
Link to Marquette Iowa Historical Society
but I had better luck seeing historical pictures on their facebook page, but I can't seem to make a link that gets you directly to it.
You may go to facebook and search for Marquette Depot Museum Information Center, and then go their tab: More / Photos
Link to the historical records of Bridge Hunter and put Marquette Iowa in the search box.
Here are my previous web pages about my bridge:
A new Pontoon Swing Draw Bridge is floated to Marquette
Modeling the Milwaukee Road Pontoon Swing Bridges in Spring 2020
Scale Model Plans for a Milwaukee Road Pontoon Float Swing Bridge
My scale model of Lil Charley Missisissippi River tow boat posted in June 2020,
with simulated model pictures of the Mississippi River and my Milwaukee Road pontoon floating swing drawbridge.
. . . . . to My Main Index Page on the TrainWeb site.
This page was filmed in November 2020


