


I combined some hardware to make a 'simple' device to hold a camera and rotate it to allow one camera to take a series of pictures that can be digitally stitched later into a panoramic or wide-format view. I made it with parts from a lawn water sprinkler.
The device is much taller than it is wide. Notice that my rig actually rises up through the Picavet sling (the string sling that hangs from the kite line). The center of gravity is about an inch below the string attachment points. This helps keep the rig level in the wind, which is important to keep pictures aligned enough that they can be stitched into a panorama.
As the wind blows and pushes on any rig that is hung by a Picavet, the rig wants to slide up the Picavet string, and can tilt it about 5 degrees, until gravity wins again. I can do some presetting of the Picavet to compensate for a tllt due to the wind.
Picavets have self-leveling abilities, but they are not perfect. (and pendulum rigs can be blown off-level, even worse than Picavets.)
If all of the device is below the string attachment, the wind has even more leverage to twist the entire rig and make it even more out of level. I have a lot of experience with that twisting, I made a panoramic device a few years ago that was 14 inches tall and all of it hung below the Picavet. It worked best when the kite was up in the wind, and the camera rig was hanging in quiet air. That doesn't happen very often.
When I attach my Picavet to the kite line, I set the strings to cross at about 90 degrees like a typical Picavet, and the slip ring or bead can be just an inch above the device. But the strings don't touch it; they can be even closer than shown in this picture.
My cross bars and camera holder is made of copper wire; its easy to solder the parts together. I don't use wheels on the strings, the strings have to slide through the loops. This is tangle resistant and light weight. The rig resists movement at first when the kite line angle changes, by a few degrees, and soon enough there's action from the string and gravity to make it slide back to a level position. Barring strong wind, as mentioned above.
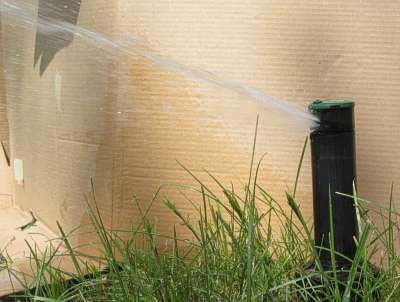 I have a lawn with a dozen Saturn Orbit water sprinklers. I use the 1/2 inch pipe size, its the smallest, and costs about $9 (US)
I decided to build my camera device after studying what is inside of an old broken sprinkler. They have an ingenious device in it that has a miniature gear driven reversing mechanism. The back and forth motion is suitable to rotate a camera.
The Saturn Orbit is a gear-drive unit and rotates slowly back and forth; its not the flapper vane type that goes chucka chucka chucka on the return stroke.
The lawn sprinkler picture shows its normal use. When I use it to rotate the camera, the unit is upside down, the rotating head is on the bottom, and I hang the camera from that. The pivot of the head is strong, I can't pull it apart with my bare hands, and that's more than enough strength to support a camera.
|
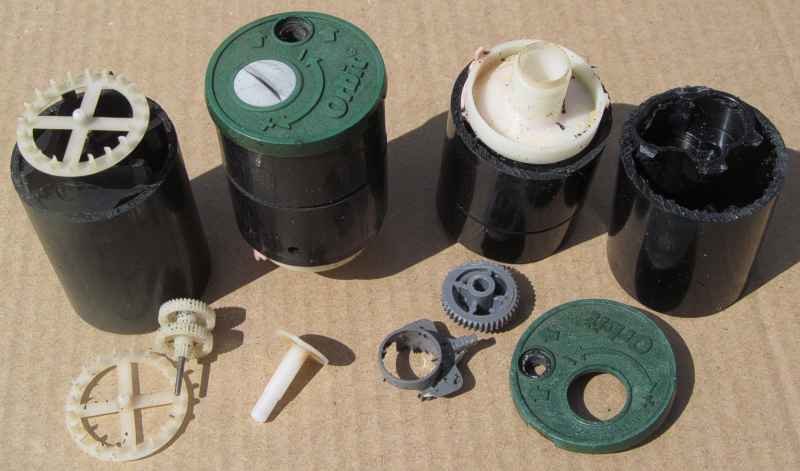
There's many parts inside of a sprinkler, and the key to using it is to not disassemble or cut too much away. This picture shows it disassembled too far. The basic gearbox that I wanted is from the white turbine wheel to the green water spray head. I actually only needed one saw cut to get the factory portion of the gearbox. That weighs only 1-1/2 ounces. |
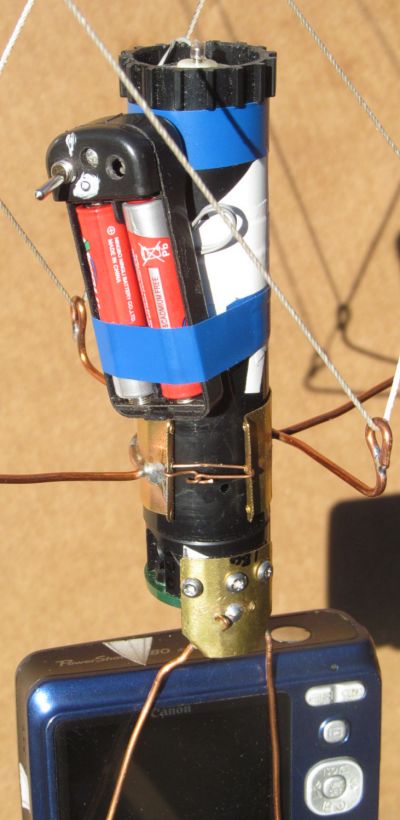 I coupled a 3-volt DC motor to the sprinkler's turbine wheel; so what was once powered by water is now turned by an electric motor and two AAA batteries. The top of the white motor is just visible inside the top of the black tube.
The green rotating head is on the top for a lawn sprinker, but I turned the thing upside; that's what the camera is hanging from.
The whole rotating device and picavet weighs 6 ounces, and adding my camera makes the total rig weigh 12 ounces. That's light enough for an 8-foot delta kite on a moderate wind day, or a Rokaku to easily lift on a low wind day.
The Orbit sprinkler can be adjusted to rotate between 10 degrees and 355 degrees. I like about 90 degrees, it allows the camera to take about 4 pictures before it reverses in about 15 seconds. That gives me many pictures that often line up to make a stitch.
I don't miss my subject when the camera sweeps or rotates across the scene several times and gets a lot of pictures. And the overlap is about 40%, making it easy to stitch them together.
And often I get a picture that by itself will frame the main subject, with no need for me to create a panoramic. I don't need a very precise aim with my pre-sets. Once it leaves my hands at ground level, it just keeps on taking pictures and I don't know what the camera sees until I recover it. I don't have a remote downlink viewer, that would be more weight and batteries.
I don't use any synchronization between the camera shutter timer and the rotation, but after several cycles of back and forth, the camera sees most everything within the range of rotation that I set.
This is like fishing, cast a line and see what you catch.
|
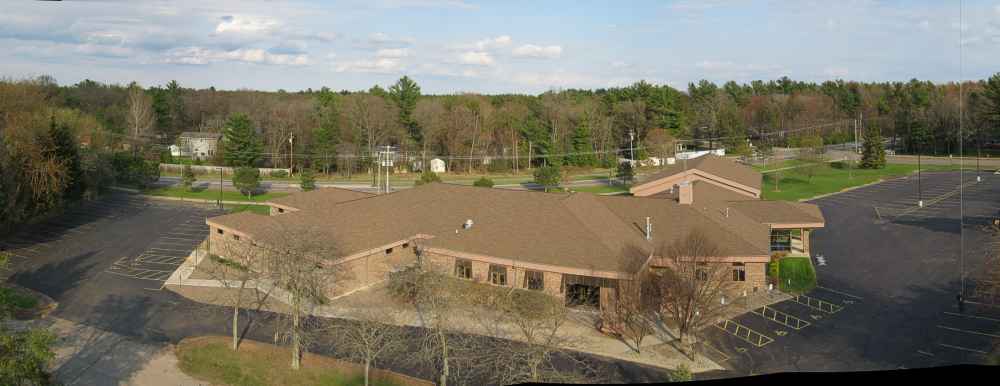
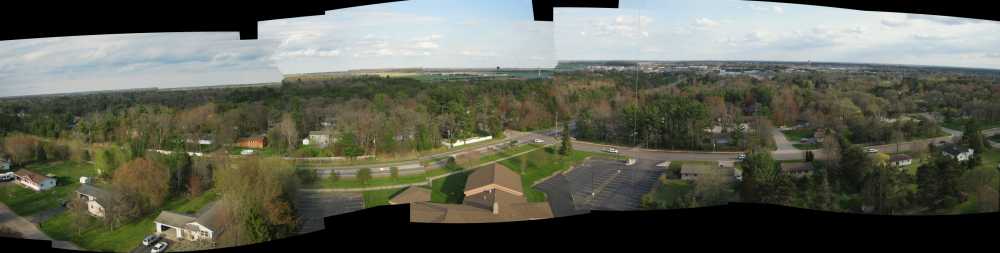
This church was on 3 pictures, stitched together by a photo program. The camera is a Canon running on CHDK for automatic timing to take a picture every 5 seconds. That gives me a series of 3 pictures within 10 seconds, taken as the camera is rotated. It just runs and rotates and I sort the pictures afterwards. Often, the camera hangs steady enough in the sky for 10 seconds to allow me to get a 3-picture panoramic. And sometimes I try 4 or 5 picture panoramics. The speed of the camera shutter is fast enough to avoid a blurry picture from the rotation; the device doesn't stop rotating while the picture is being taken. |
.
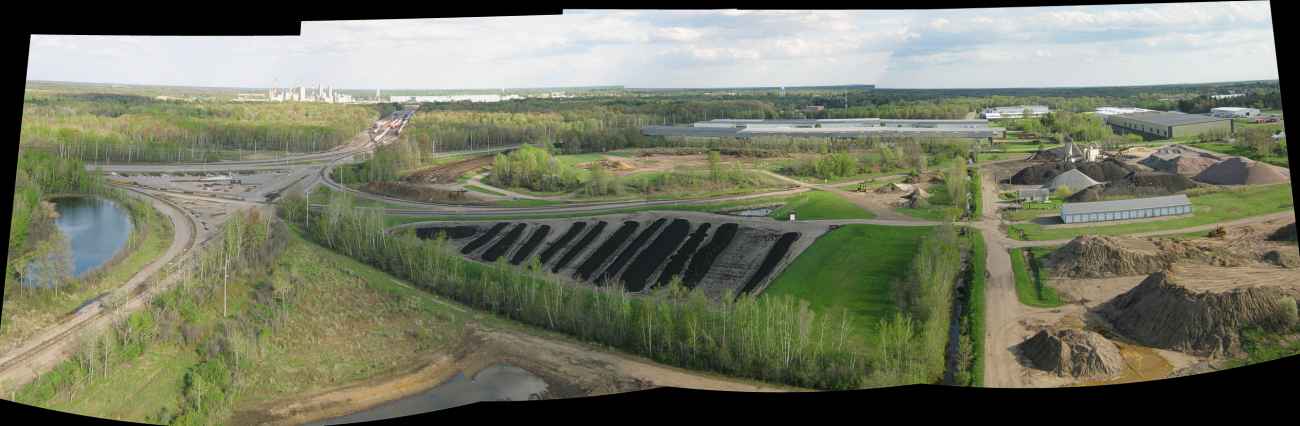
| This is a 7-picture pan, about 160 degrees, that's 35 seconds and a long time to expect a camera to stay level while hanging under a kite. I left the outer edges on this stitched picture so you can see how misligned the stitch can be if the wind swings the camera, and the wind did shift direction during this. Sometimes I get good alignment at mid height in the picture AND at the horizon, but this time only the right side worked ok. The two streets meet at a 90-degree intersection, and the photo program did stitch it well at that height in the pictures. |
|
.
(I tested these links and I see somedays and with some old browsers, you might get to these old pictures or at least to my Flickr photostream.) spring wound clock timer detail view , start here and use the arrows to go through these three pictures. the spring wound timer device as used in the home before you disassemble it to get at what's inside. . to My Main Index Page for my railroad hobby on the TrainWeb site. This page was wrote in May 2019 


|