The PRR K-4s #1361
Steam Locomotive Restoration Project
Page 2
(This site is provided as a courtesy of the Altoona Railway Museum Club)
June 9, 2000
On 6/9/00 Bob Lamorte (Museum Board President), Jim Logrando (Vice President), Gary Price (Secretary), Board Members Dick Charlesworth, Andy Mulhollen, Frank and Karin Givler (Chapter Members & V.P. and Secretary of the Keystone Restoration and Preservation) as well as Cummins McNitt, ventured to Steamtown to check out the K4. Andy reported it was a beautiful day. They met Chris Ahrens and Jeff Miller and had lunch at the Ground Round in the Mall. "It was mostly a Q&A session. Then Cummins met with the Director of Steamtown to begin to talk about future plans and getting her home. The rest of us got an up close look at what they are doing. Looks like everything is on track so far for completion fall 2001." Photos are available on the K-4 photo page. (Submitted by Andy Mulhollen 6/20/00; posted 6/20/00)
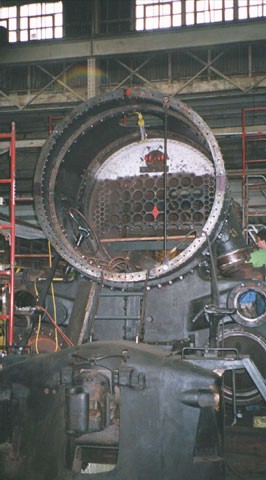
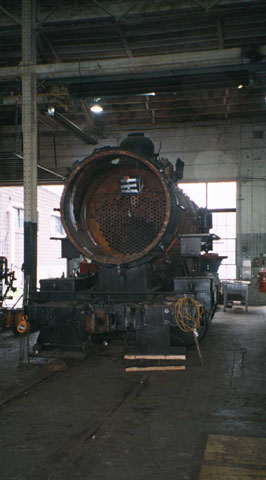
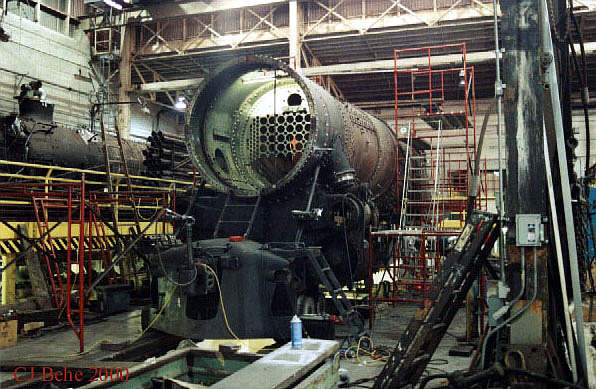
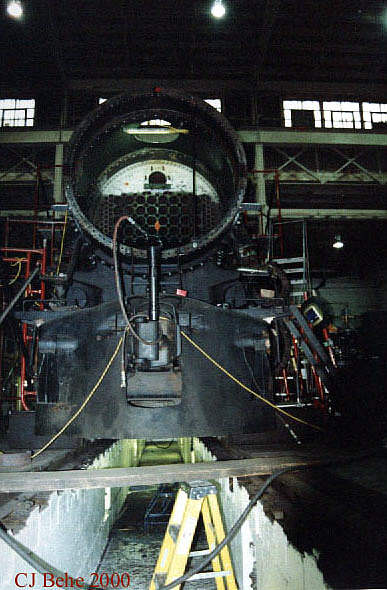
Front end. New smokebox as well as the steam chest and drop coupler are in place. Jeff Miller is seen working off to the right of the photo. Photo by Andy Mulhollen. 6/9/00
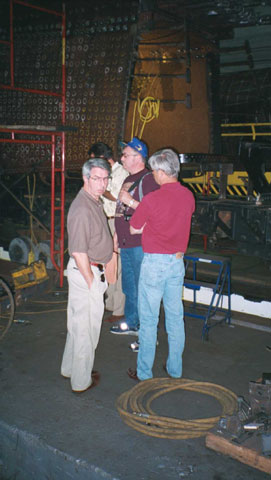
Front end. New smokebox as well as the steam chest and drop coupler are in place. Jeff Miller is seen working off to the right of the photo. Photo by Andy Mulhollen. 6/9/00 L-R: Logrando, Price, Charlesworth, and LaMorte. Photo by Andy Mulhollen. 6/9/00
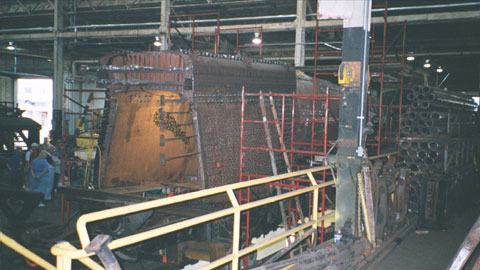
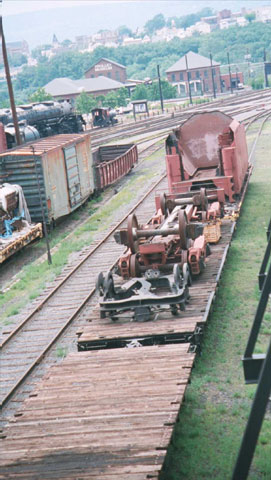
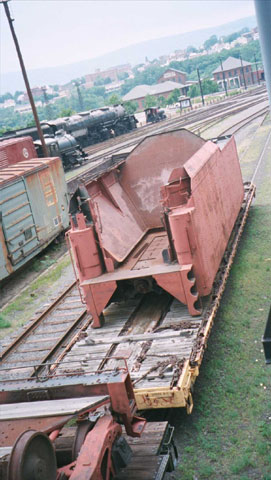
Rear view minus the backhead. Photo by Andy Mulhollen. 6/9/00 Tender shell and undercarriage and locomotive trailing truck on flatbeds outside along the mall ramp. Photo by Andy Mulhollen. 6/9/00
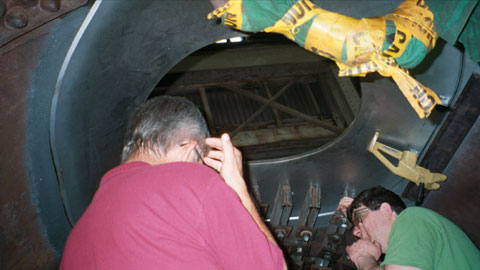
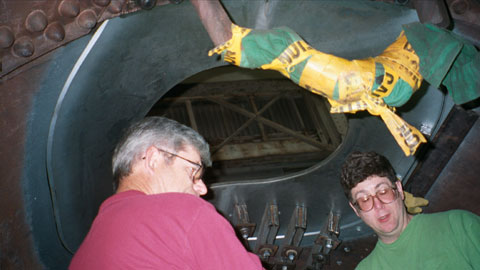
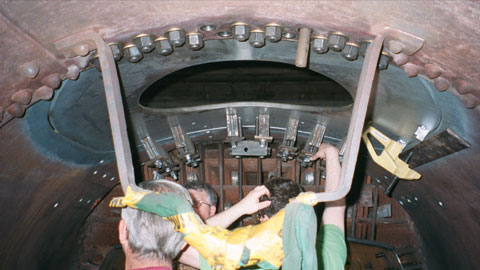
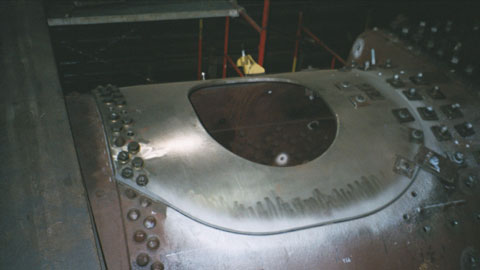
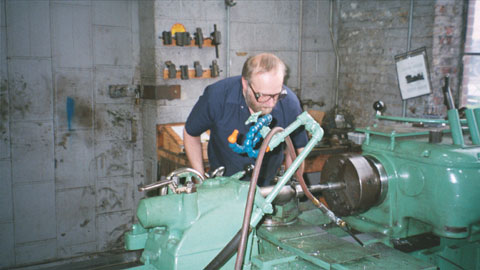
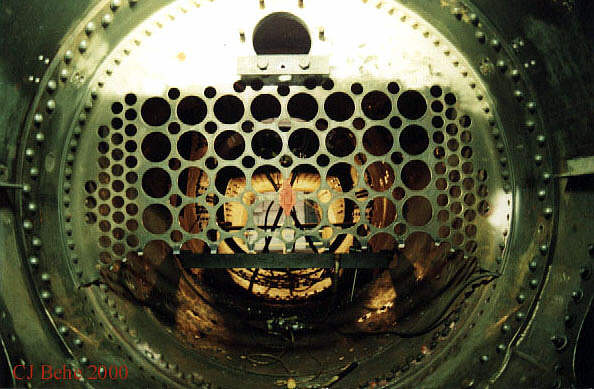
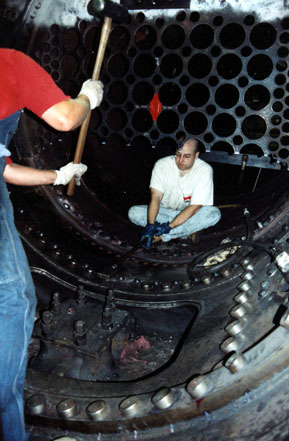
Tender shell and undercarriage and locomotive trailing truck on flatbeds outside along the mall ramp. Photo by Andy Mulhollen. 6/9/00 Tender shell and undercarriage and locomotive trailing truck on flatbeds outside along the mall ramp. Photo by Andy Mulhollen. 6/9/00 Front end view. Photo by Andy Mulhollen. 6/9/00 Inside the boiler looking up and back at the steam-dome patch that everybody is talking about. It is ready to be welded in place. Right now they have to send welding samples out to be tested to...I believe to the FRA. If they pass, Jeff can begin welding in the patch. I am in the front of the boiler looking back toward the backhead. that is Jeff miller in the green and also Dick charlesworth. Photo by Andy Mulhollen. 6/9/00 Inside the boiler looking up and back at the steam-dome patch that everybody is talking about. It is ready to be welded in place. Right now they have to send welding samples out to be tested to...I believe to the FRA. If they pass, Jeff can begin welding in the patch. I am in the front of the boiler looking back toward the backhead. that is Jeff miller in the green and also Dick Charlesworth. Photo by Andy Mulhollen. 6/9/00 Same. Photo by Andy Mulhollen. 6/9/00 Steam-dome patch from above the boiler. Andy was way up on the scaffold. Anything for the betterment of the chapter you know. Photo by Andy Mulhollen. 6/9/00 Machinist making studs for the boiler. They will hold on the external sheeting as well as the ash-pan and other appliances. Photo by Andy Mulhollen. 6/9/00
August 18 and 19, 2000
On August 18 and 19, 2000, my brother (Brian Behe) and I (your editor) traveled to the Steamtown National Historic Site. Our purpose was to help with the work on the K-4 project. We left State College, PA at about 5:30 am. We met with Jeff Miller at about 8 am. Currently, he is the only person working on the K-4 as he lost his full time assistant to another project. (Note that there are two persons who occasionally volunteer to work on weekends.) All of the staff we met at Steamtown was very friendly and helpful. After some preliminary paperwork, we were soon in our work clothes and surveying the K-4. Let me first bring you up to speed on the project itself.
Work on the left "mud ring" is complete. The right one is half done. The steam dome patch is installed and ready to be welded. The front tube sheet is patched but needs installed. The backhead is drilled and riveted but has not yet been installed (due to the steam dome patch not being welded). The boiler check pads have been manufactured. Regarding the flexible stay bolts, the caps are on but there are a few that need more work. Both piston valves have been pulled however the pistons have not yet been pulled. Nothing has yet been done regarding the axles or driving mechanism. Many new rivets, bolts, and studs have been manufactured, cut, threaded, and installed. The following still needs done (as reported in February 2000):
The shell is close to being finalized (for proposal to the Federal Railway Administration) for the installation of the dome patch. They need FRA approval.
They do have a source from which to rent thermal heating pads to the pre-heat and post weld stress relief on the stress patch. Ahrens described this as very precise and important work. The patch is "a big patch...60 x 60...a truncated tear drop design" which needs double beveled flush weld (welded inside and outside). Ahrens did not know of anyone who has done a patch this big before. They need to ensure quality control throughout the entire process. After the weld is complete, the patch will need x-rayed (radiographed) to check for defects. If any defects are found, they will then be repaired before this part of the project is complete.
The pistons will be pulled. The reason for this is that, due to sandblasting, sand found its way into the passageways. Ahrens said that they basically only want to clean the passageways out, "mike" everything, and then re-install. Ahrens does not anticipate anything further.
The backhead joint will also need x-rayed (after installation), then the door sheet.
Regarding the axles/driving mechanism, one driving axle needs replaced. One crank pin is also in poor shape...they hope to be able to machine this. They are trying to find someone to do the "quartering" for the driving mechanism/axles. As I understand it, the crank pins on each side are exactly 90 degrees offset. Quartering sets the stroke for all crankpins. If the stroke is off, even a little bit, overheating, journal problems, etc could result. A factor in trying to find someone to do the work is that the K-4 has a "left hand lead". Most steam engines are "right hand lead." As a result, most machinery is set up for "right hand lead." After the axle is done, and they find a contractor, the wheels/axles will be shipped.
There was a lot of erosion to the super-heater (from cinders passing through). The cast iron had eroded to 7/8 to 3/8 of an inch in spots.
Obviously, in a project such as this, work must be done properly. This equates to tedious attention to detail. Another factor is that many tools are not available (even at Steamtown), and some need to be manufactured as work progresses.
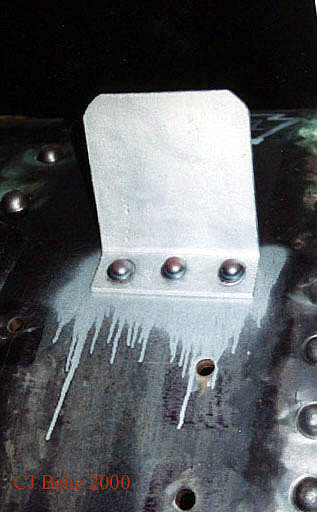
Jeff indicated that he wanted the studs for the T-irons installed. Let me explain. The frame is not as rigid as the boiler. To add rigidity, there are several supports/fasteners which connect the frame to the boiler. The studs I mentioned are threaded into the boiler. The "T-irons" (these large steel T shaped plates) are secured to the boiler via these studs and washers/nuts. A "waist plate" is then fastened to both the vertical portion of the "T" as well as to the frame of the locomotive.
{Sometime prior to our arrival, the old studs had been removed. Originally these studs would have all been the same diameter, however due to age, condition, etc, many holes in the boiler (for the T irons) had to be tapped and threaded. Every hole is now sized differently, requiring different diameter size studs (only very small differences in diameter). This meant that the studs needed manufactured and threaded. Each hole and stud was numbered for proper installation. The metal where both the boiler and the t-iron join was painted with a rust resistant paint. Every stud and hole needed to be free from oil/residue. The holes had been cleaned prior to our arrival but the studs had not been.}
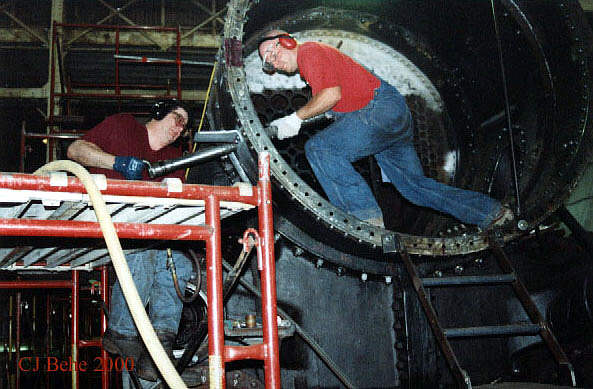
My first task was to take the studs (about 40) to a parts cleaner to get the oil off. A second cleaner was then sprayed on them afterwards. While I was doing this, Brian had to brush high temperature sealant into all 40 holes on the boiler that we would be working with. A messy and sticky job. We then took eight studs (four for each T-iron), brushed more sealant on their threads, and installed them in the boiler. Brian and I lifted the T-irons into place while Jeff aligned them with the studs and secured them in place. Afterwards, Brian and I finished placing sealant on the remaining studs, installing them and securing the T-iron to them. This took most of the day and we quit work at around 5 pm. Jeff planned to do riveting on Saturday.
We met at the shop around 8 am Saturday and got back into our work clothes. The regular volunteers must have had other plans that day as Jeff, Brian, and I were the only ones working again. Roger ( ) had driven down from Long Island to assist but a clerical error prevented him from being able to participate (liability reasons). {Roger is thinking about filling the vacant position left when Jeff's assistant went to work on the other project. He was able to see what was occurring with the project and did take some photographs with both his and my camera.} Brian and I first removed the studs (which had been installed for a test-fit) for T-irons located at the front left and right of the boiler. These were also numbered and had to be boxed separately. Jeff then said he wanted to secure the step plates to the firebox (one on the left and one on the right side), then explained the riveting process, let us practice with the air hammers, and fired up the oven (which heats the rivets). Brian climbed up in the smoke box with one hammer. Jeff was on scaffolding on the exterior of the smokebox with another hammer. My task was to measure, cut, grind, and then heat the rivets in the oven until they were yellow in color. Taking tongs, I then picked up the rivets (one at a time), climbed up the ladder over the locomotive's pilot, knocked the slag off of them, and inserted the rivets into holes drilled through the boiler and front step plates. Brian immediately started hammering away at the rivet, followed by Jeff. After about 30 seconds of hammering, the rivet installation was complete. Each step plate took 3 rivets. We installed two more rivets in the firebox itself and then had to quit that project for the day. The reason for this was because to work on the other rivets, two more people would have been required to help.
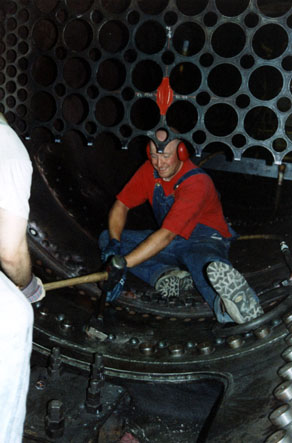
We then went to work tightening the cylinder saddle bolts. These are located under the smokebox (where the boiler/smokebox secures to the frame). The bolts do not thread into the frame, smokebox, or saddle. They are fitted through those sections and then secured with large nuts on the exterior. Most bolts were already in and tight but some were not. Brian and I climbed up to into the smokebox with a sledge hammer and a homemade tool. {This tool had a 2 foot long handle attached to a 1 inch thick piece of steel block. The steel block had a metal ring on the bottom. Each saddle bolt has an approximately 3 inch in diameter size head. There is no way use a wrench on the inside portion of the bolt. We had to place the homemade tool on top of the bolt. The ring surrounds the bolt. The metal block on the tool is used to prevent damage to the bolt.} Brian and I then took turns hitting the tool with the sledge hammer. As we did so, Jeff was outside tightening the nuts. About 8 bolts were tightened. We quit work for the day at about 4:30 pm. Brian and I then left for our 2.5 hour trip home.
It may seem that not much was done. When looking at the entire project, I guess much wasn't. However this wasn't due to sitting around. Parts need cleaned. Scaffolding and tools need moved from side to side. The oven needs time to get up to temperature. The rivets need to heat to the correct temperature. Sometimes tools need to be made or repaired. I would say that the most deciding factor is staffing. Almost every task needs at least 2-3 people to complete it. If there is no one to help, those projects get put aside until there is sufficient help.
While we were working on the locomotive, the Park Service's tour guides would bring groups of tourists through the shop. This did not interfere with the work. Again, the biggest problem that I forsee is a lack of workers. One person alone could not have installed the T-irons. There about three left to install yet. Jeff does not recall any volunteers from the Altoona area going up to assist with the work. Most of Steamtown's volunteers are from the area surrounding Scranton. You do not have to have prior locomotive restoration experience to help. Just have a set of old clothes, a little bit of strength, some mechanical ability, and the ability to follow directions. Brian and I figured that it would be best to stay overnight and work at least two days...to justify the driving time. That is exactly what we did. It also allowed us to an extra day of work. I would have liked to have stayed another day but there were no vacancies in the hotels Saturday night due to students arriving at the local universities. If you wish to volunteer, either contact Steamtown directly or email me an I can get you in touch with the appropriate persons. (by Chris Behe, posted 8-21-00)
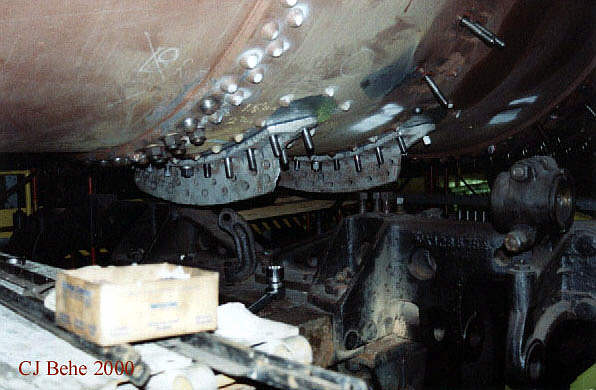
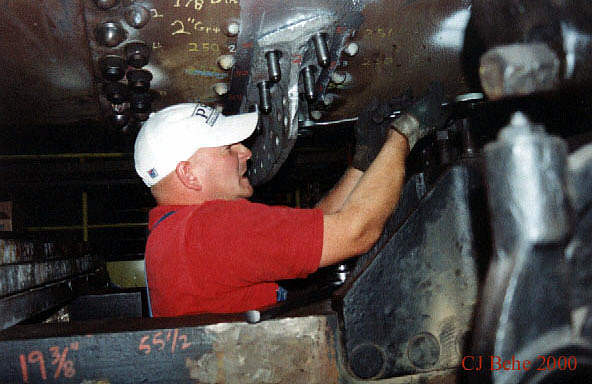
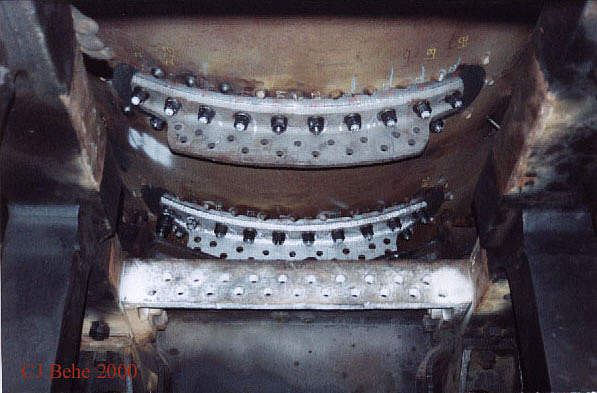
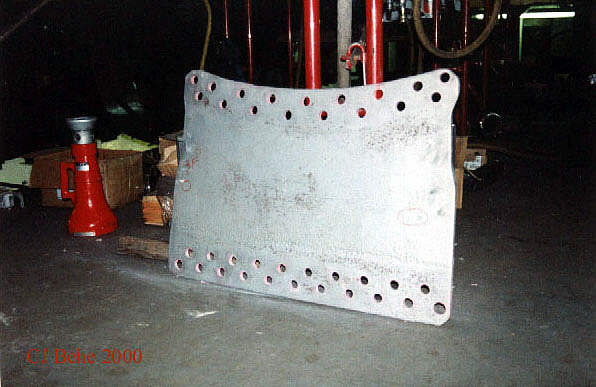
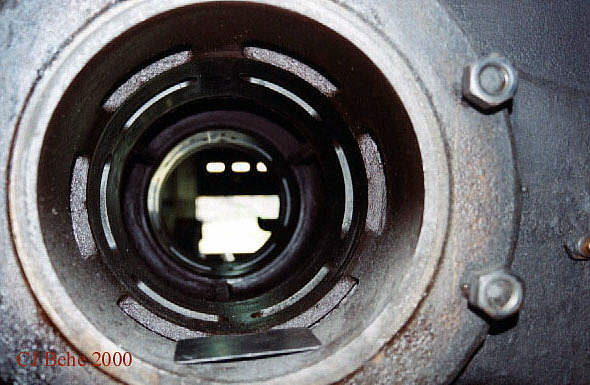
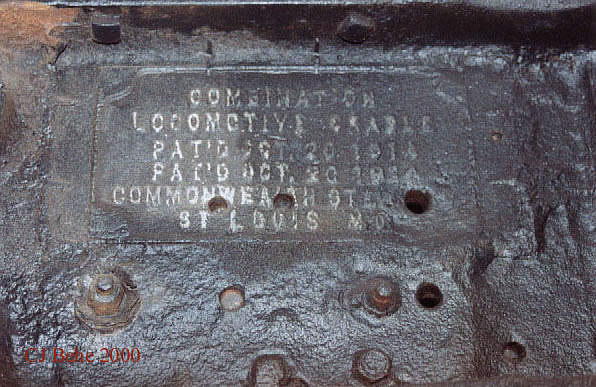
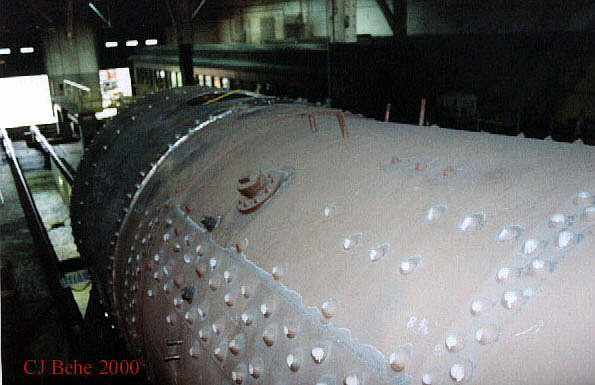
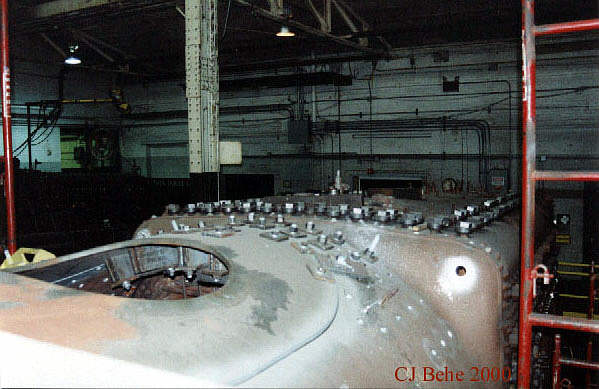
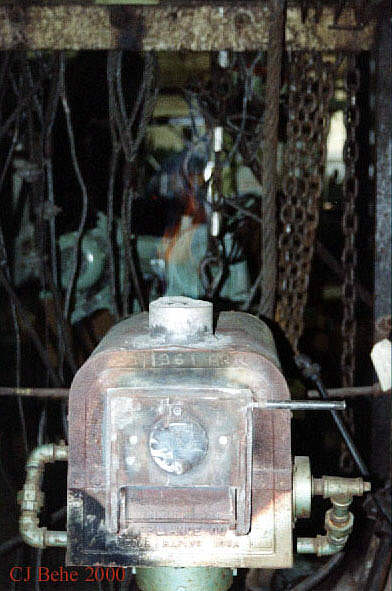
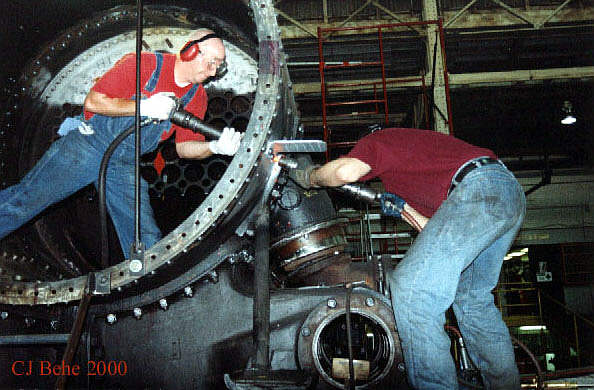
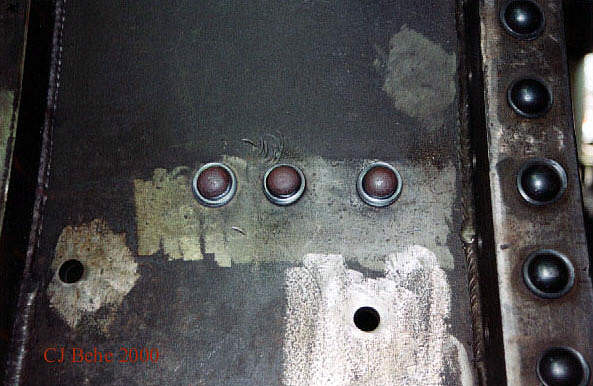
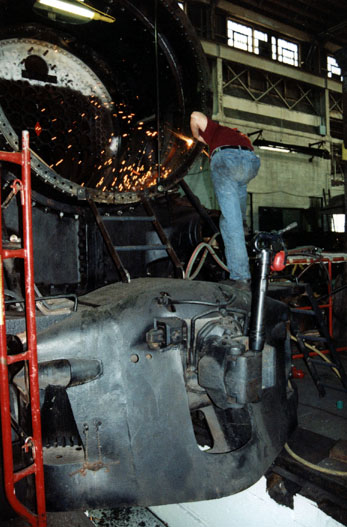
View of the K-4 on 8-18-2000. View of the K-4 on 8-18-2000. These are two of the T-irons that my brother Brian (Behe) and I installed on 8-18-2000. They are used in conjunction with the waist plate to stiffen the frame. Here, we have all the studs in but the nuts are not on yet. My brother Brian (Behe) is tightening a nut on the T-iron stud. (8-18-2000) These are two of the T-irons that my brother Brian (Behe) and I installed on 8-18-2000. Viewed from under the locomotive. The waist plate bolts to the vertical portion of the T-iron. You can also see the holes in the frame. The waist plate bolts into the frame there. The waist plate (8-18-2000) A view of the left cylinder valve chamber. 8-19-2000 The stamp on the inside right rear portion of the frame. 8-19-2000 A view looking towards the front top of the locomotive. Visible is the smokestack hole in the smokebox. 8-18-2000 A view of the steam-dome patch. Looking toward the rear of the locomotive. 8-18-2000. A view of the flame on the furnace we used to heat rivets. 8-18-2000. Brian Behe (L) and Jeff Miller (R) using air hammers to install "red hot" rivets in the left front step plate. 8-19-2000. An interior (smokebox) view of the rivets that Brian installed for the left step plate. 8-19-2000. Brian Behe (R) and Jeff Miller (L) using air hammers to install "red hot" rivets in the right front step plate. 8-19-2000. The riveted right side step plate. 8-19-2000 A view towards the rear of the locomotive from inside the smokebox. 8-19-2000. Volunteer Roger Hahn. 8-19-2000. Brian and Chris (seated) Behe tightening saddle bolts. (8-19-00) Brian and Chris (seated) Behe tightening saddle bolts. (8-19-00) Jeff Miller cutting out a step plate rivet that was not up to standards. (8-19-00) A view of the cab of the K-4. (8-19-00) A view of the cab of the K-4. (8-19-00)


(Railfest is a trademark of Railroaders Memorial Museum, Inc
. The logos for the Altoona Railroaders Memorial Museum is a trademark of the Railroaders Memorial Museum, Inc.
Photographs are by Chris Behe unless otherwise noted)