Modelling Your Own Railroad
It's easy to be prototypical when your prototype is in your yard!
Jump to :
The
Wally Short Line
Virtual
Kitbashing
I have been planning away at my drawings for an On18 model railroad for about five years to test out projects before getting out the 'big tools' for the big train outside. Inspired by the arrival of my On18 'teakettle' conversion kit which need running in before work could begin I decided, 'I think I'll build a model railroad tonight'.
The 'High Valley and Smith's Ferry Tram'
| The HV and SF Tram is not really a model of our railroad around the ranch, just the rolling stock and locos will be. Actually they will be what we want on the ranch, someday... Spiffy little Porters and Forneys pulling strings of wagons and well kept passenger cars full of happy patrons. |
I got out my scraps of 1 1/2" gray foam left from an insulation job and a couple of pieces of foamcore board, started drawing and cutting and gluing. That was December 31 and here's what I got after about five hours:
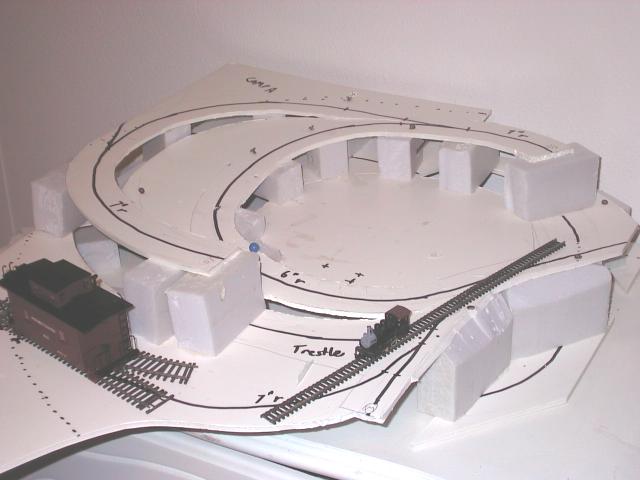
Seen are my Bachmann On30 caboose (just to show size, there is no 30" gauge on this part of the layout) and N-scale Bachmann 0-4-0 shifter donor for my Kennebunk Models On18 conversion kit.
This is the top loop and part of the middle level of my planned three level 2 1/2 x 4' layout. It is about 24x30" and uses mostly 7" radius curves, except for the inner spiral loop which is 6", way to sharp and way too steep, but that's what was required to make it all fit in the rugged terrain. In the back corner you can see 'Camp A', the first shingle bolt cutting camp, supposedly in High Valley, a town just North of Gem County, Idaho, where I live. I am working on a little 8' turntable mounted on a 1/8" phone jack and plug for it! The switch near Camp A is to lead off this layout to section II which will contain the town of High Valley and Camp B.
Behind the caboose is the lead to Mine 2, off the layout also on section II, though I might move it onto this layout as Section II is a long way off.
A couple days and three hours more work with lots of white glue and 8 penny nails, the mountains were starting to take shape:
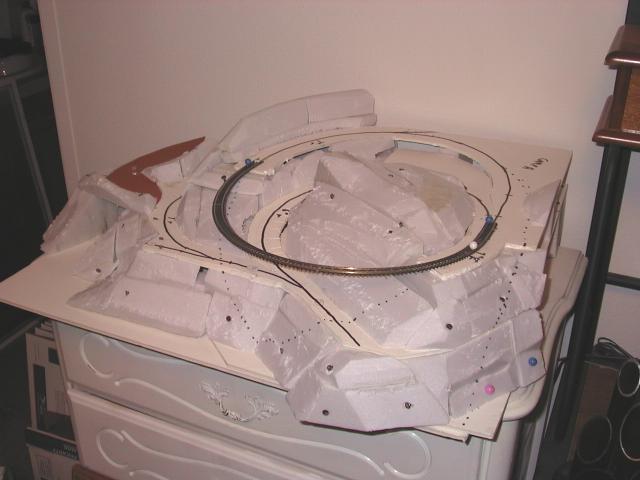
I have a piece of Atlas flex pinned in place to show where the big trestle will go. The dotted line on the right is where the main lower loop will go and a tunnel portal will be cut in the foam (you can see on the far side approximately where the other portal will be). The mid level track on the near side of this photo is on a high fill above the Payette River, so I had to start building the lower loop to figure out how it would all fit. I will take some photos and add them.
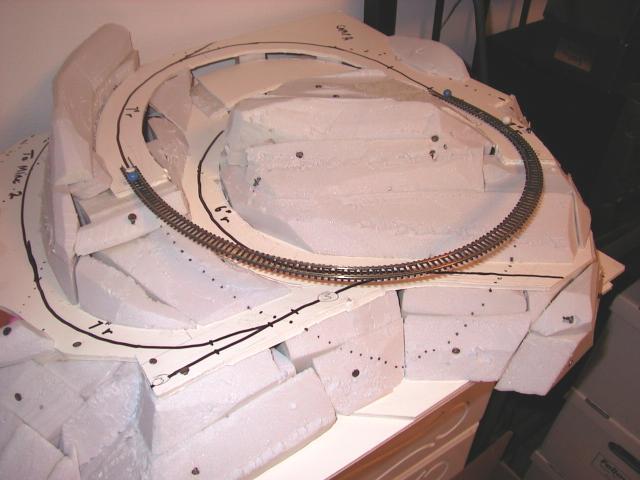
Another view. I have since found that for everything to fit my ideas for the terrain, the mid level track will have to go onto a trestle about four inches sooner than I built it (right foreground), so the styro will simply be cut off and reglued. It will end up being a 'double trestle' like the old Roaring Camp and Big Trees had until 1976 when it burned. Not planned, but it should be interesting.
The funky skinny ridge in the upper middle will be covered with trees and growth to conceal its steep narrow shape. The track that ends in the left foreground goes onto an unloading trestle, across the lower main and to the standard gauge Idaho Northern loading dock at Smith's Ferry. I still have to figure out how I'm going to make it all fit, but it doesn't bother me if it 'grows' a little in spots, I would rather have it true to my original vision than fit perfectly into a rectangle!
1/20/2002 It was snowing pretty heavy today (see the photo on the front page), so I decided to do a little creative engineering indoors.
Here are two photos of the 'high loop' section sitting over the beginnings of the lower loop to see if it will all work. It should fit just fine if left all On18, but if I want to make the lower loop all dual On30/On18 (instead of just the front track which will go off each end of this section to possilby connect with other On30 modules) it is going to be a little difficult to get it all to fit and fit my standards.
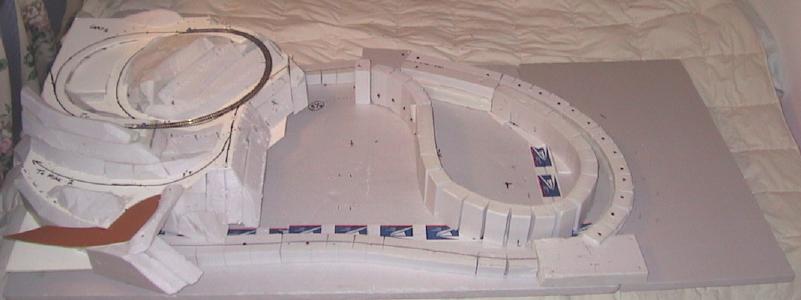
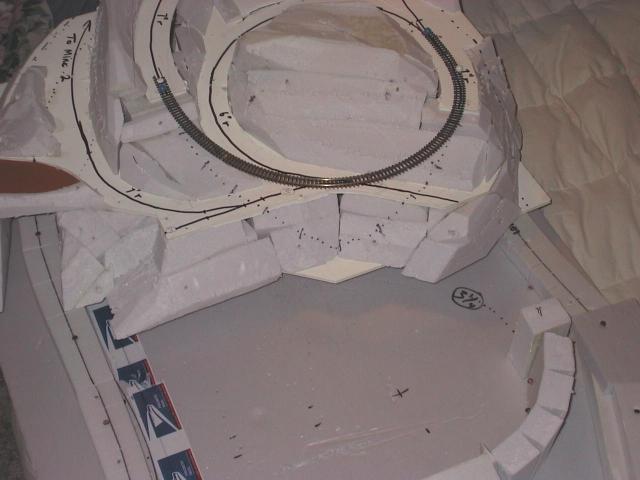
I feel 6" radius is the tightest I want for my On18 tram tracks, 7" is better. For On18 tracks where longer passenger cars will be used, 10 to 12" radius is acceptable. I have found that using a minimum radius about 1.8 times your longest car seems to work about right; the tram will use cars up to about 16' (4" in O-scale) 4x1.8= 7.2" radius. My passenger cars will be up to 24' over the body, 28' (6 1/2" in O-scale) over the end platforms. 6.5x1.8= 11.7" radius. This is about the same relationship of car length to radius on the Bachmann On30 passenger cars on 18" radius track and about the same as the really sharp radius portions of the Uintah Railway in Colorado and Utah (66 degree curves equals about 90' radius, I believe the standard narrow gauge passenger cars they used were about 48' overall length.
For On30 a minimum of 12" radius would work for freight cars and 'shortie' passenger cars, but I planned to have a 10" radius on the curve in the right side of the photo, which is smaller than I want to go (especially because it is in a tunnel!) To rework it to 12" radius and maintain the nice gentle curve above the 10"r. part (compound curve of about 32" radius), I will have to add maybe four inches to the front of that part of the layout. This may alter it too much from my original plan, which I really like. I'll probably put wider roadbed down and try it out with flex track to see how it all works before gluing anything down. Of course I'll have to make sure there is enough vertical clearance too, but that isn't too hard here, just need an extra 1/2" or so. We'll see. I've got about 11 hours of actual building time into it so far, but far more 'imagineering time'...
The Wally Short Line
This is an old HO scale railroad that my brother wanted to build over a desk to run his new MDC Shay about 15 years ago. I helped him with the track plan, then after laying most of the track (Lambert- Shinohara code 70) and fiddling with it for a couple years he gave it to me (probably realized my complicated track plan was way more work than it was worth). I worked on the foam scenery some then got caught up in other things. After we moved to Idaho in 1989, he took it to work on with his kids. They kind of lost interest so the cats got it and liked to sleep on it and stretch on the trestles! Recently I got it back and as I am trying to make the move to O-scale decided to look at possibilities for converting it to On30 as it needed rebuilding anyway.
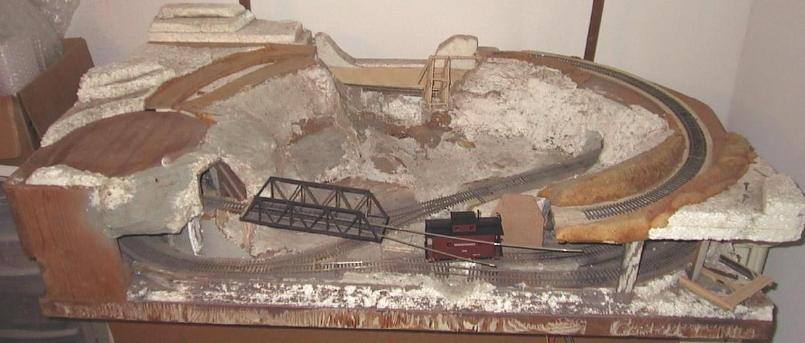
It measures 2 1/2x4' and uses a level lower loop of about 12" radius around the mill and 'other industry' siding, with an inner loop that winds around on about a 4% grade to the upper terminus. Here there is a siding but there wasn't room for a passing siding (none at the bottom either), so we decided to use an Atlas turn table instead of a switch at one end!
Interesting, but complicated to build. I originally suggested corrogated cardboard for the roadbed (big mistake), so most of it was replaced with 'upson board' - a heavy material like photo art framing mat board but about 5/16" thick. This is stiff and holds spikes well, even on tightly curved track. The switch on the bottom left is scratch-built (12 and 18" radius curved switch!), the rest are modified Lambert (now Shinohara) #4s. The upper loops are on 1/8" masonite suspended over the lower tracks on small plywood risers with as much room as possible given for working underneath. The upper terminus can actually be removed by cutting the foam scenery and lifting straight up. Later the cut can be covered with bushes, etc.
The framework is 1x2s under styrofoam beadboard (another bad idea for anything but scenery), But I think I can work with what is there, after all it has survived 15 years, 1000 miles three kids and several litters of kittens! All the scenery is beadboard with some cast in place Mountains in Minutes foam rock castings and hardware store canned foam.
To convert to On30 the main problem is side clearance on the sharp curves. The Bachmann passenger cars will not work well as is (the couplers are about 1/2" outside of the outside rail). The freight cars should work once I replace the trucks. If the wheels were made to NMRA standards (.039"/1mm flanges) they would work just fine, shame on you Bachmann!!! I will remove the HO scale tunnel portals and carve back some of the foam rock castings to make the rest fit but this is definately small Porter and Shay territory.
I am probably going to have to add about 3" to the front of the layout and move the lower track out an inch to make it all work without problems. If I feel like hand-laying some more switches, maybe I can add that missing passing track to the front (with switches in the tunnels? nah!) Before I do anything, I am going to plan it all out. If it is more work than it is worth (again!) I will probably just fix the track and trestles, finish the scenery and sell it at a show or something....
Virtual Kitbaching
I have been working on reviving the WSL, unsuccessfully at present, and found that my Bachmann C&S 2-6-0, fine loco that it is, does not like 12" radius curves on old undulating code 70 track. I could fix the trackwork but that is another story.... I thought instead 'What would a good four-coupled passenger loco look like? What could be done with the Bachmann 2-6-0 to make it more "curve-friendly"?' Here, my friends are the results of those ruminations, done without ever a razor saw coming to plastic, yes I took 15 minutes with Windoze Paint and came up with this little beauty:
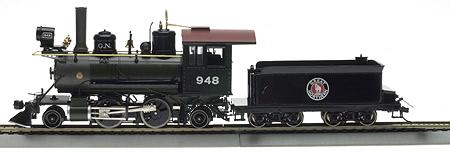
Isn't she cute? I know, I know, trains aren't supposed to be 'cute', but I guess I am influenced by my wife's opinion of them.
I think the trailing truck could be moved back a little, but other than that, she is perfect(I am talking about the loco, not the wife here, though both are pretty nice)! I even shortened the tender and tender trucks a little to make it look right.
After that successful outing, I decided that my 18" gauge passenger coach couldn't wait, so I tried to digitally cut, past and generally 'spindle, fold and mutilate' a photo of the beautiful Bachmann GN car, then put it together with the original for this comparison:

Cute or what? It represents my planned coach for the train around our ranch; 24' long body, 8' tall overall and about 5' wide. I didn't change the truck or wheel size here, but they would have to go down to HOn30 trucks and about 14" wheels to make it sit low enough. It probably is more the height of a two-foot gauge coach, but I didn't measure anything. This is just a quickie from a stock photo and it came out looking good enough. What do you think?
Contact: unknown1@myrealbox.com
Web design by:
10.02.2002