


Fig 17 |
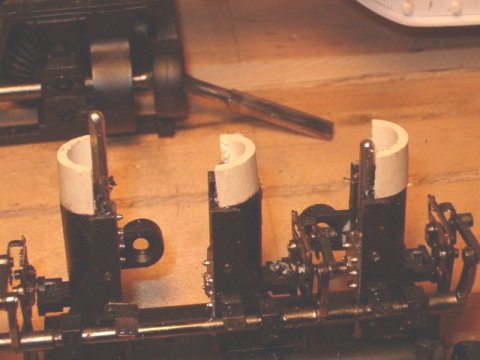
Fig 18 |
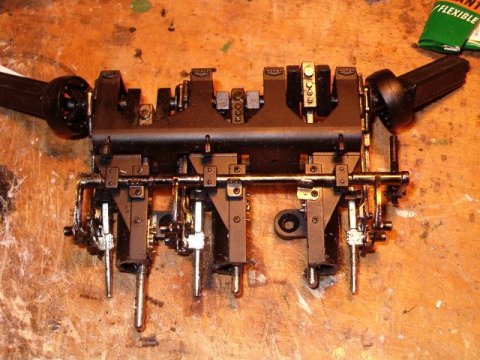
| With the cylinders done, I turned
my attention to the rest of the Bachmann engine assembly. With an
Xacto razor saw I carefuly cut off the old cylinders, a beheading if you
will. Figure 17 Then I extended the barrels that hould the
crsshead guides with appropriate lengths of PVC water pipe. Figure
18. Holes were drilled in the bottom of the cylinders to accept
the valve and piston rods, and the new cylinders secured on top of the
barrels.
Adequate lubrication was applied
to make sure that nothing locked up and the engine was tested by turning
the crank shaft til all the glue was dry.
|
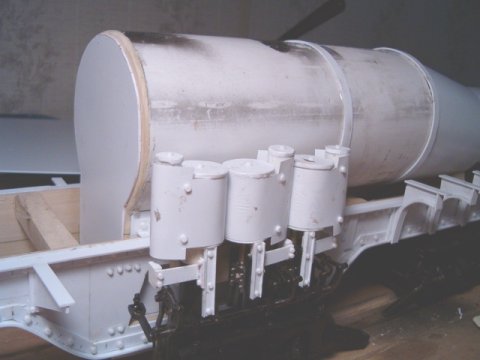
Fig 19 |
Fig 20 |
With the engine securely in
place on the frame I addressthe driveline. the stock drivelines
were way too short. All I can say is thank goodness for K&S square
brass tubing. A piece of telescoping tubing was slid onto the
mal portion of the sliding joint to upsize it and lengthen it. This
is just a friction fit, but is quite tight. The female section took
a bit more work.
First I cutoff the old sleeve almost completely off, then I built up the interior of the brass sliding sleeve so that a brass rod soldered inthe end would fit in the remains of the original sleeve. I then drill though this rod and pinned it in place with a brass nail and a dab of CA. Figure 21 With that much fiddling
accomplished (I had really expected the drivelines to be much harder than
that to accomplish) I applied the cast steel castings to the trucks.
Te result was instantly a completely different look!
|
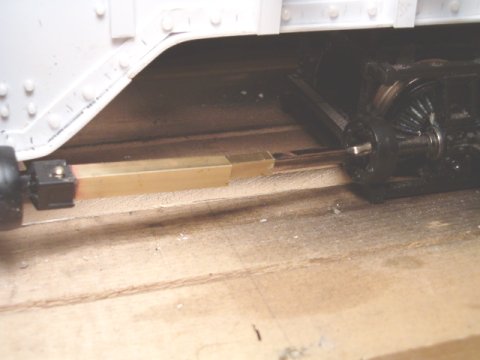
Fig 21 |
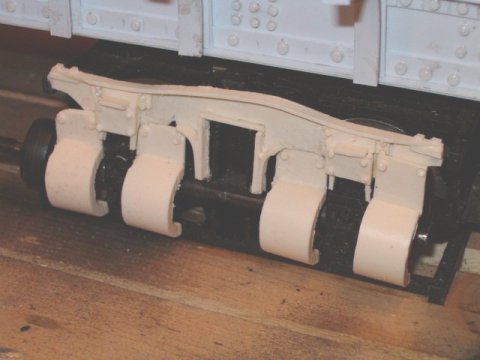
Fig 22 |


