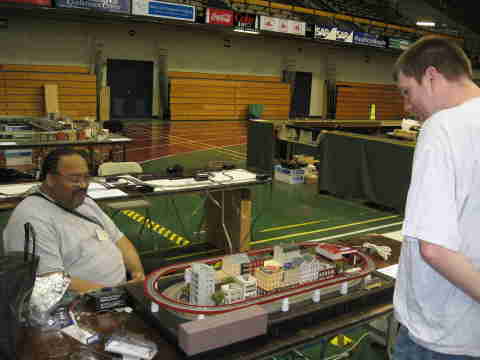
The pictures below present a visual timeline of the development and growth of the EasyTrolley concept. The basic idea is to create a flexible double-track dogbone-style layout, similar to the East Penn Traction Club trolley modules in larger scales. This provides for the operation of multiple trolleys or trams at once, preferably with several branches or routing options to add operational interest. There is no need to have a permanent layout that cannot be changed; with EasyTrolley you just use tabletops and simple, unfixed scenery items. Straight and curved track sections can be assembled into a layout to fit the available spaace using the available resources, and the layout can be modified at any time into a new arrangement. The development of EasyTrolley has raised interest in N-gauge and contemporary traction modeling in our club, and its ease and appeal has made this the fastest-growing aspect of club activities.
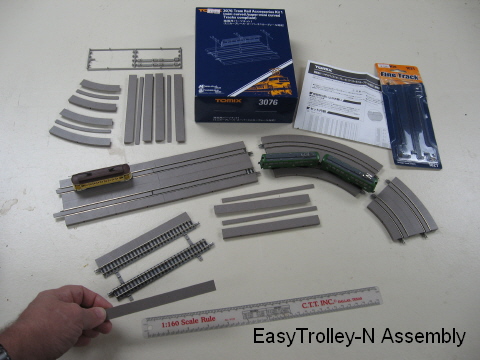 |
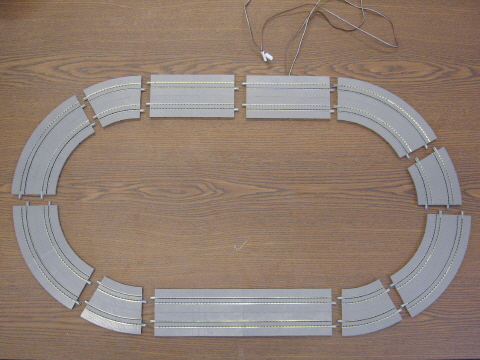
Tomix's 2005 introduction of small-radius curves and turnouts, plus street paving kits in 2006, made it easy to model street railways in N gauge. Here basic pieces are being assembled into straight and curved sections. I used water-based, non-toxic craft store glue that is white, dries clear and somewhat flexible, does not etch or discolor the plastic, and can be undone in warm water. |
| Today Tomix offers ready-to-use paved track sections for straight, curved and 90-degree crossings, so EasyTrolley is now easier than ever. |
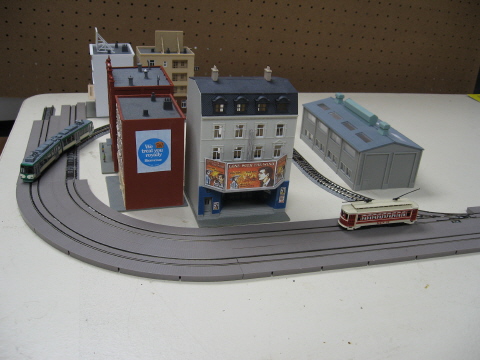 |
Here street pieces and loose track pieces have been assembled to test out a cutback return loop (see the Drawings section for a plan). Cars can continue down the street to the left rear, or turn back to the right on the loop. The possibilities were immediately apparent. |
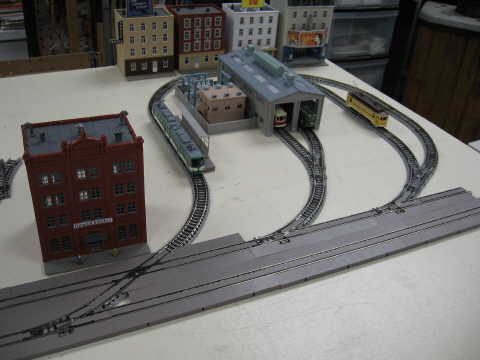 |
This is a rough-assembled loop with carbarn at the other end of my first "proof of concept" layout. It features two departure tracks (see Drawings section for two plan variations). Using the 140 mm (5.5 inch) radius Tomix Mini Curve as the standard curve size makes it easy to substitute a Mini Points turnout for any curved piece. |
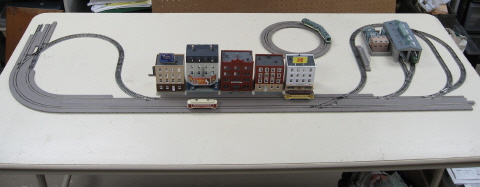 |
5. Here is the basic initial test layout -- two loops with street trackage in between. I also built a loop of the 103 mm (4 inch) radius Super Mini Curve to test various cars on it. The table is 30 inches wide and 5 feet long. |
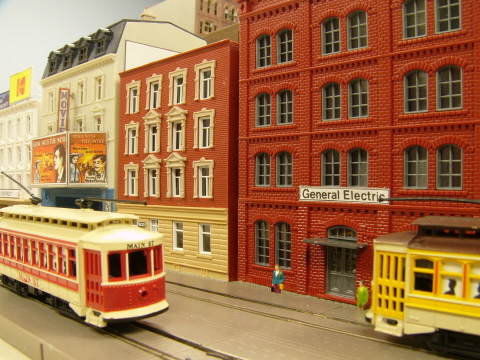 |
A close-in picture of the test layout immediately showed how good a simple EasyTrolley layout can look. The best viewing location is down low and up close, just as if you were on the miniature street. Very little modelmaking skill was needed to get this result, with ready-to-run cars (new Bachmann, then $20 each at my local hobby shop), pre-assembled buildings, and simple street track assembly. (Doug Kerr photo) |
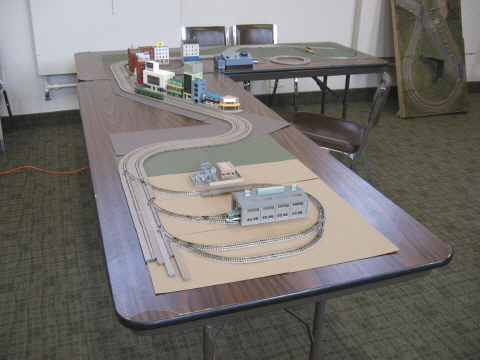 |
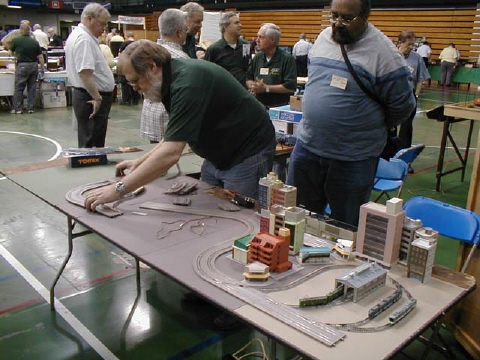
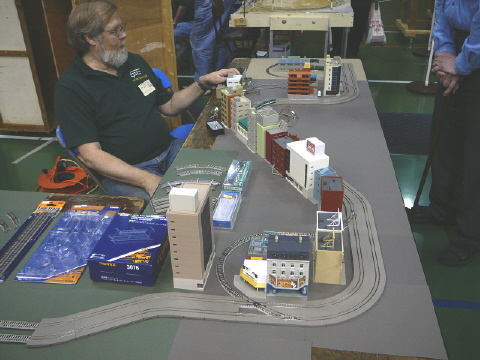
I was very happy with the test layout, so I ordered more track and started gathering city buildings, generally three stories and higher to provide a good urban backdrop for the cars. Here is an early set-up at a 2007 East Penn Traction Club work session. I had started using the colored art supply paper on the table, but did not have nearly enough to cover two eight-foot tables! |
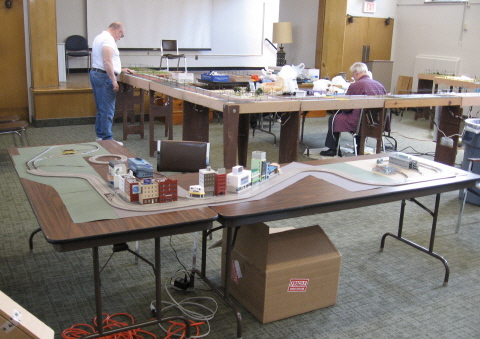 |
The street snakes around for several reasons. One is to make the layout more interesting to see and watch, and the other is to use more curve street sections, since you tend to end up with a lot of curved street! Note that this layout has an intermediate "turn-back" loop element at the front left corner, ducking behind a block of downtown buildings. |
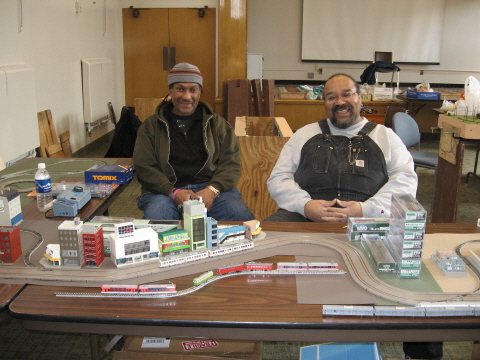 |
The interest began to grow! Here are fellow East Penn club members Bruce and Richard. Bruce, I was surprised to learn, had a bunch of Modemo and Kato electric railway cars and some Tomix track stashed away. Richard was a new member who just wanted to model trolleys in N. He bought a basic double track loop like the one shown above. It became his home layout, and he could also bring along the pieces when we set up a large layout. |
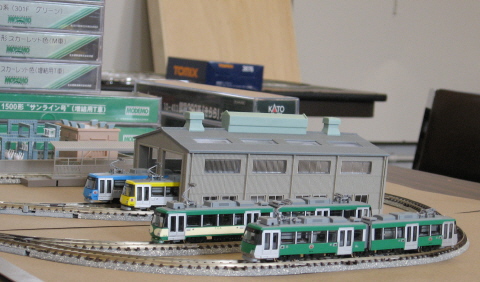 |
Suddenly we had a sizeable trolley system running. This is a display of Tokyu Electric "Setagaya Line" articulated trams, by Modemo, in the carbarn loop. On the real line in suburban Tokyo, each car wears a different paint scheme -- great for modelers! |
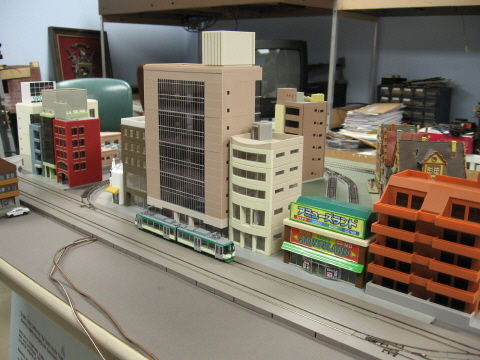 |
After the big national meet, the track and buildings came back home. The number of buildings and model trolleys and trams continued to grow. You can glimpse some of the rear loop in the back, on the green "suburban" paper base. (Doug Kerr photo) |
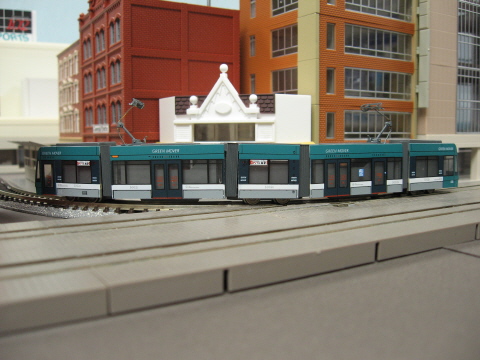 |
The pride of my fleet became this beautiful five-unit Hiroshima "Green Mover." The Siemens Combino low-floor tram model is by Linie8 (Hoedl) of Austria. I love the way it curls around the curves. (Doug Kerr photo) |
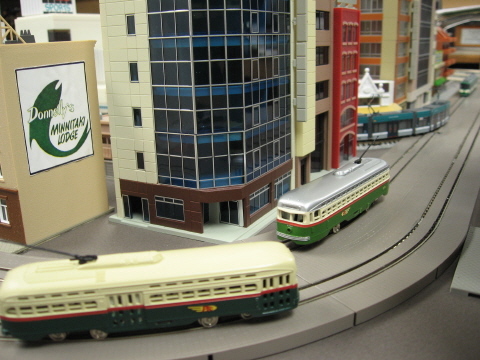 |
Some hometown Philadelphia Transportation Company (PTC) PCC cars are running on the layout. The newer Bachmann trolleys (sold in plastic cases and having black axle gears) have run well for me, unlike their earlier-made "white gear" cousins. (Doug Kerr photo) |
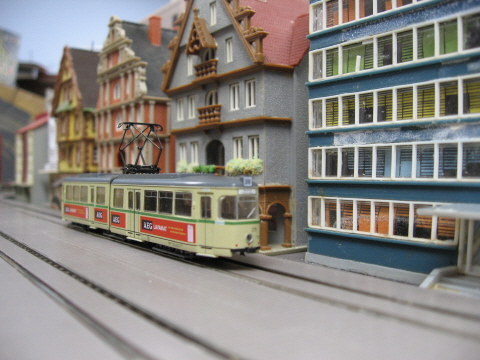 |
Around the back of my home layout was the German section of town. This Rapido Duewag articulated tram looked right at home there, as did my Kato-built single-truck German trams and trailers. The EasyTrolley concept is very flexible -- just swap the trolleys and buildings and you can be halfway around the world! Buildings are by Kibri and Vollmer. |
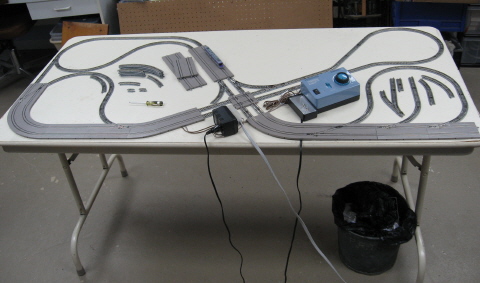 |
Development of the concept continued with some experimental layouts. I bought four 90-degree crossings and "paved" them to create a double-track intersection. This layout was to try out the intersection. You can certainly see the flexibility of the Tomix track system. Today you can buy paved 90-degree crossing pieces. |
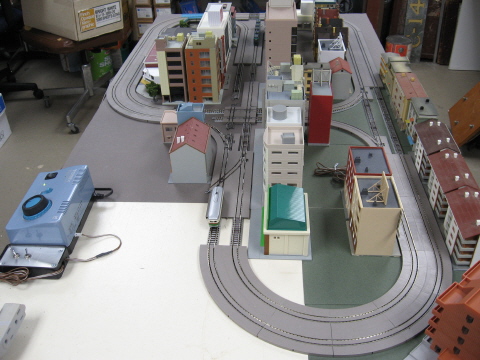 |
The next experiment did away with the open-ended, expandable EasyTrolley concept. It was a self-contained three-block city, with the four-way intersection and two three-way "T" intersections. |
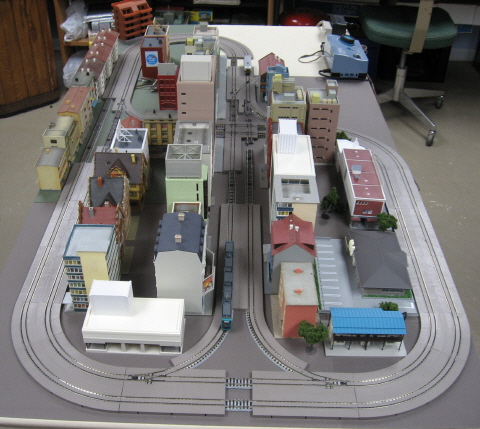 |
The three-block layout offers a variety of operating possibilities, including having one car cover all the streets in both directions (going straight through the four-way and turning at the "T" intersections). I like this layout, even though it is a tight fit getting the narrow buildings on the back edge of a standard 30 inch wide table. |
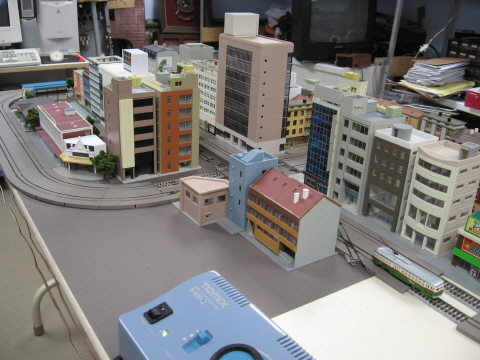 |
More turnouts, track and street paving kits were ordered to complete it. Because the EasyTrolley sections can be rearranged at any time, many more layout possibilities lie ahead. It is a very different and fresh way of thinking, compared to the traditional "permanent" layout or even a modular layout. Each has its place. |
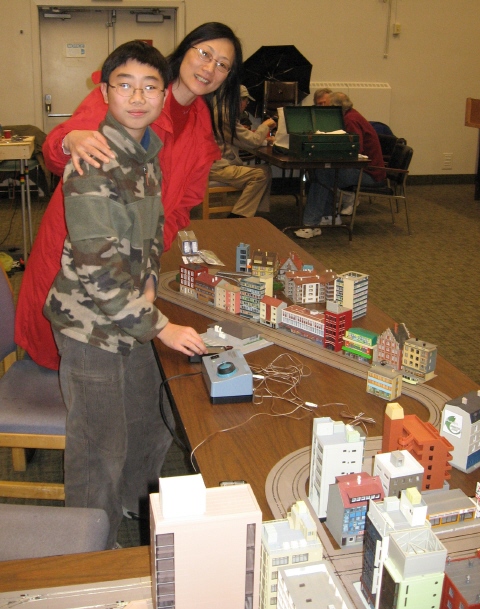 |
Here is N-gauge trolley fan Tyler (and his mother) at the controls at a 2008 "work" session. Since EasyTrolley setup involves no work, we played instead! We were in such a hurry to operate that we forgot to place the colored paper down on the table first. Young Tyler demonstrated the "Easy" part of EasyTrolley by assembling the track, placing the buildings, and selecting and running the trolleys and trams. |
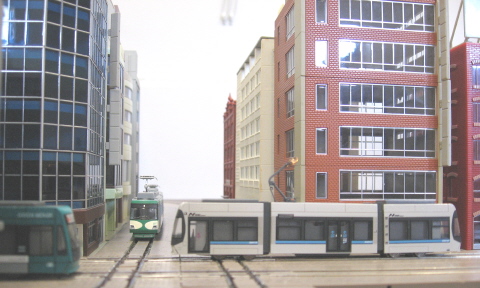 |
The next day I slid the colored paper "scenery" into place and did some "urban renewal" with the buildings before other participants arrived. Here are a Hiroshima "Green Mover" and Nagasaki 3-unit Combino, with a Setagaya car in Tamaden colors in the distance. This was the first time we used the intersection track at a club setup. |
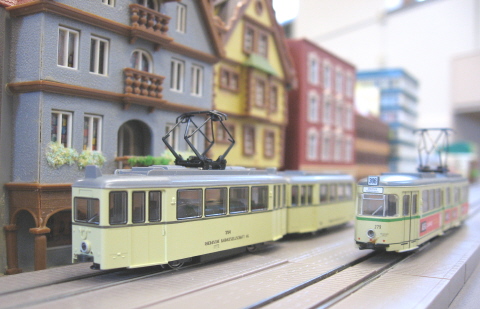 |
The west end of the line served "Germantown." A Kato four-wheel tram, with a trailer in tow, passes an Arnold articulated car. |
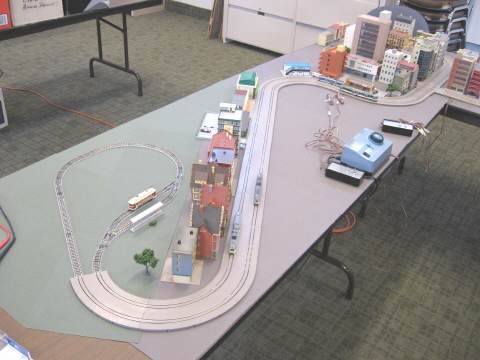 |
After showing how good a temporary setup can look from street level, this overall view showing the suburban leg of the L-shaped layout. We used two 2.5 x 8 foot tables. Two control boxes with On/Off/Reverse toggle switches, spliced into Tomix 5812 DC Power Divergence (Y) Cords, provide four blocks of electrical control. The power routing function of the turnouts provides additional flexibility in turning individual cars on and off. |
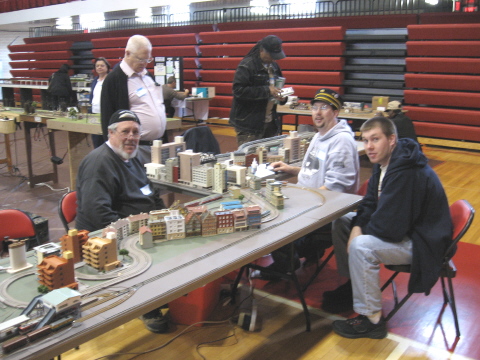 |
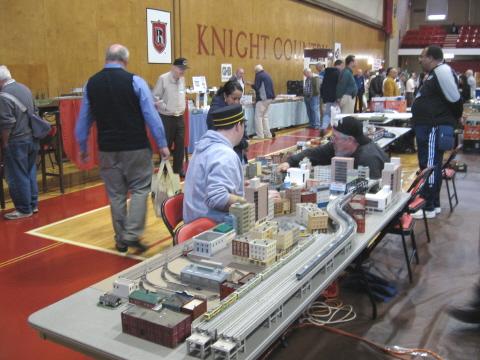
In October, after a trial setup at a club session, we sat up an EasyTrolley layout at the rapid transit and trolley meet held at Rutgers University, New Brunswick, NJ. Here's the left half of the layout, which for most of the day was under the control of the Hylands (Edward, Chris and Patrick). The suburban electric railway, with a three track terminal, ran using Tomix automatic operation. Chris had to stop the streetcars to avoid crossing accidents. |
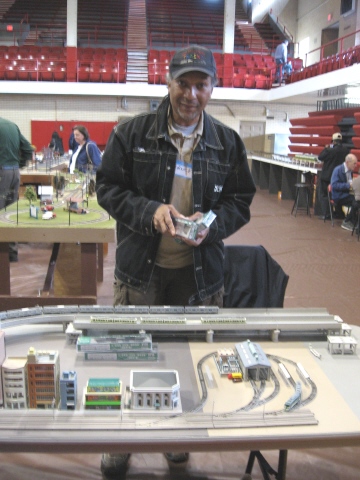 |
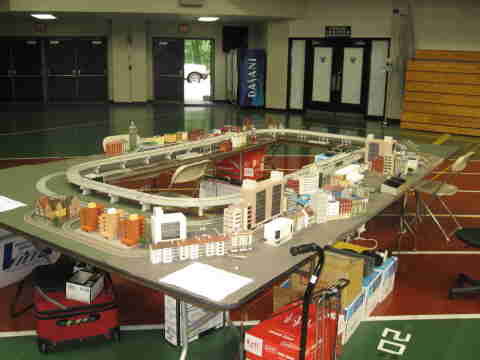
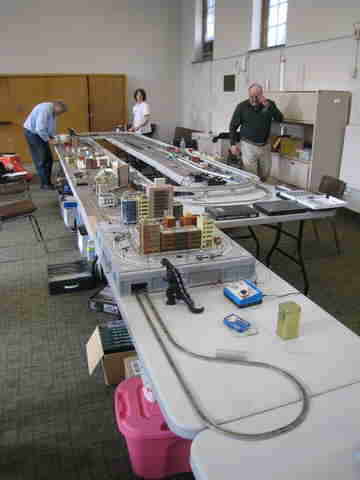
At the right half of the EasyTrolley layout, Bruce H. was adding a double-width double-track Kato viaduct for scenic effect and static display of some of his trains. Between us all, there was a surprisingly large Modemo rolling stock fleet present! Bruce also brought half a city's worth of buildings. |
 |
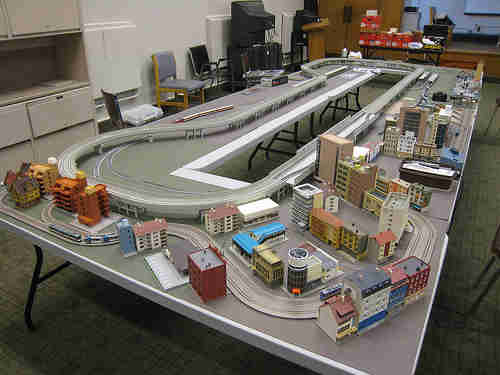
Here is a rear view of the whole N-gauge setup, with all the buildings and the viaduct in place. It formed an active and impressive diaplay of a variety of N-gauge electric railway modeling styles. Since this meet has a focus on rapid transit, the viaduct, Richard J.'s separate micro-layout with elevated line, and the powered Tomytec Railway Collection cars were very popular with attendees. |
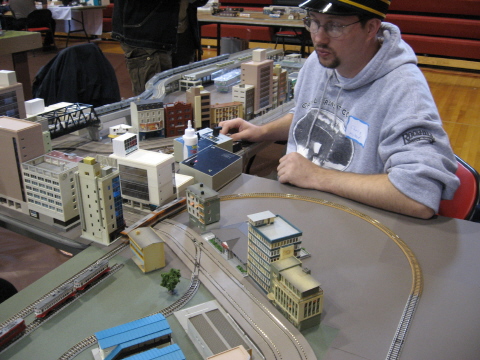 |
Chris H. was at the controls most of the day, and he caught on to how to manage the layout capably with the minimalist wiring and control methods available. We thought he might suffer "air traffic controller breakdown" but he did not and really enjoyed running the layout. The fully automatic "out-and-back" operation of the suburban electric railway, with 3 trains taking turns (using the Tomix 5563 Automatic Operation Unit) helped greatly. |
 |
In our "work sessions" the N-gauge just kept growing and gaining more participants. Tomix Mini Rail and Kato Unitram micro-layouts by Dick B. made their appearance and were incorporated into the large railway and streetcar setups. Dmitry's Unitram-based modules were also grafted in, while Philip C. brought his amazingly sceniced T-Trak modular layout. (Philip Cook photo) |
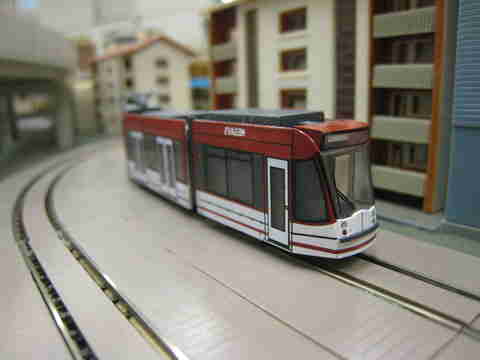 |
Bruce H.'s three-section Combino tram from Erfurt, Germany wends its way along EasyTrolley streets. (Philip Cook photo) |
 |
Dick mounted his Unitram layout on a concrete-looking frame and built a Tomix double-track "subway" through it, so we could connect it to the EasyTrolley setup. (Philip Cook photo) |
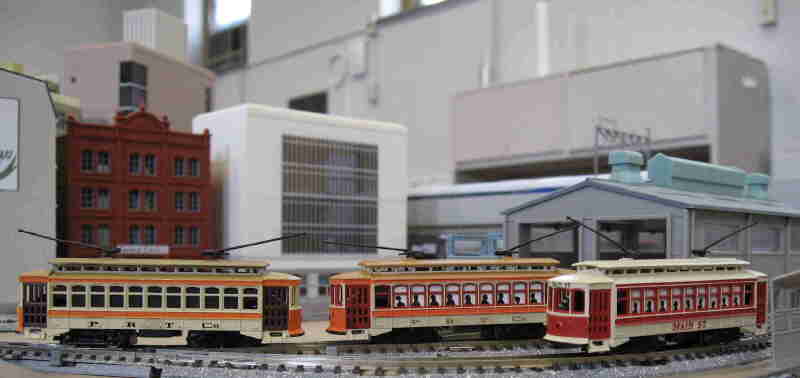 |
The trolley barn and city serves as a backdrop for Rich V.'s Bachmann Brill trolleys. He starts with the "Main St." car, which has red-painted windows and doors, then simply paints the easier areas into a Philadelphia Rapid Transit scheme. Note the benefit of painting out the silhouette passengers. |
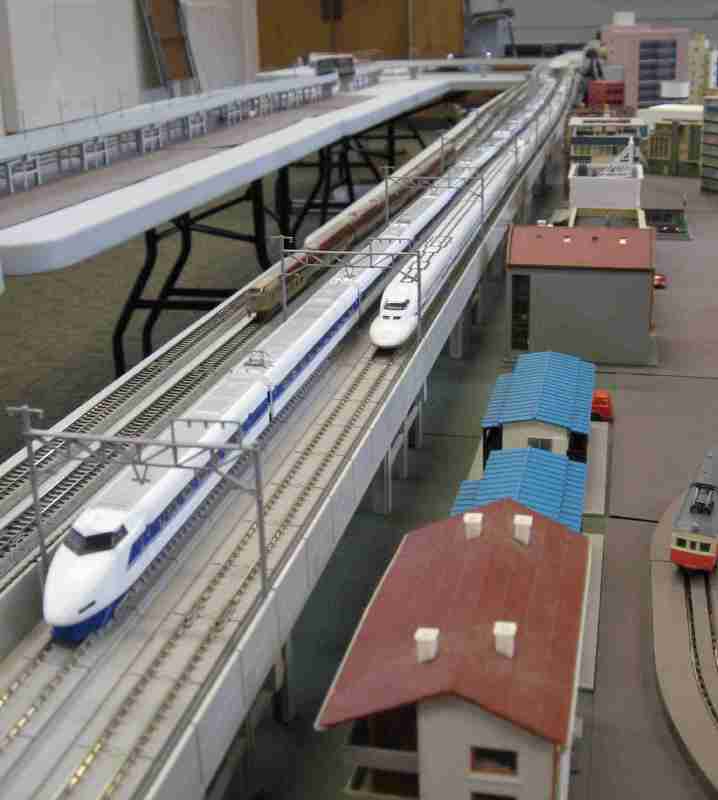 |
As the Sunrise Express sleeper train passes below, Japanese Series 100 and Series 700 trains pass on the viaduct. At the far right, an interurban travels down the street trackage to leave town. |
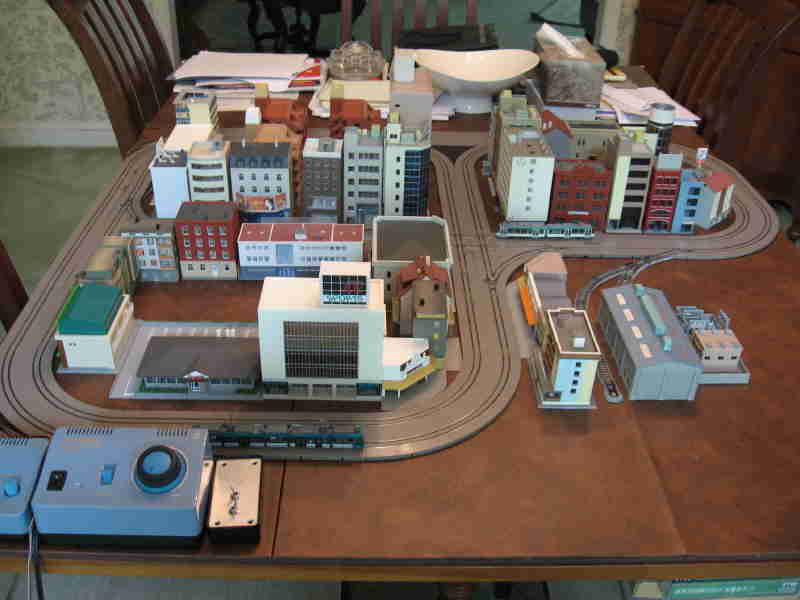 |
For a monthly regular East Penn Traction Club meeting, we were asked to display a small EasyTrolley layout. It was automated and consisted of three city blocks plus the carbarn area. This is a trial setup prior to the meeting. |
To see a video showing this general layout and its automation, see: www.youtube.com/watch?v=39va0tCdod0
|
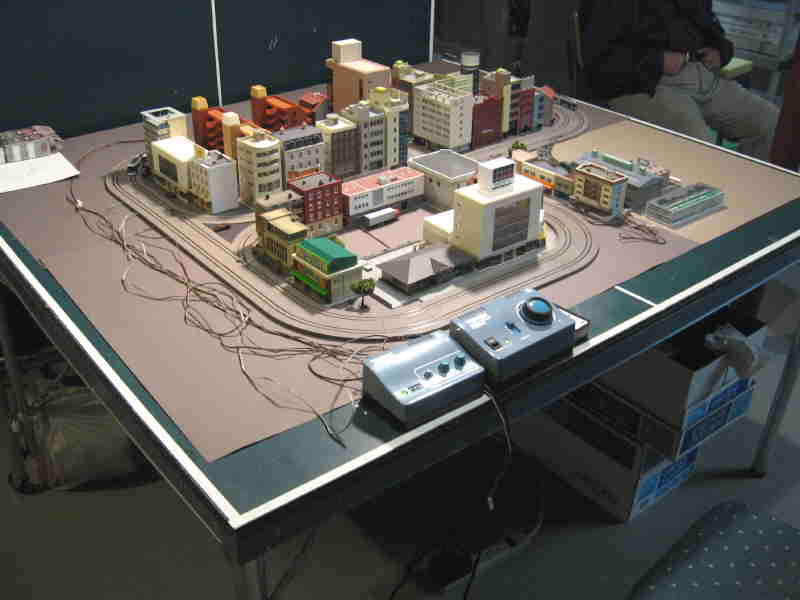 |
Two copy paper boxes carried the whole package to the meeting, where it was assembled on half a ping-pong table. The outer car goes completely around the outside, while the inner car alternates around the two rear city blocks and the two left side city blocks. Tomix TCS track sensors detect the car passing and throw the track switches. |
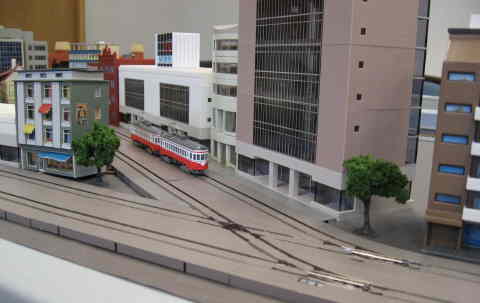 |
New to our EasyTrolley setups in 2010 was this 30-degree "y"-shaped street junction pieced together by Rich K. |
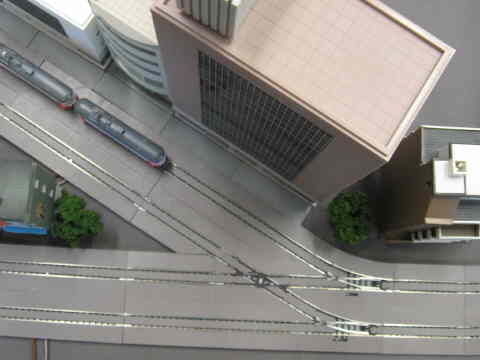 |
Here is an overhead view of the junction. See Figure 7a in the "EasyTrolley Drawings" section of this website to see the track plan for this junction. After fitting and soldering, street paving pieces were carefully cut and fitted. |
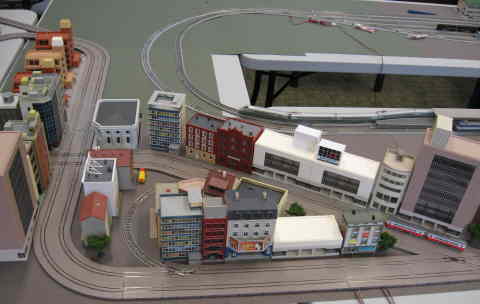 |
The two legs of the junction are basically symmetric. This view shows the versatility of the junction in layout design, with the two routes later crossing in an intersection, plus a turn-back loop in an alley inside of the triangular city block. |
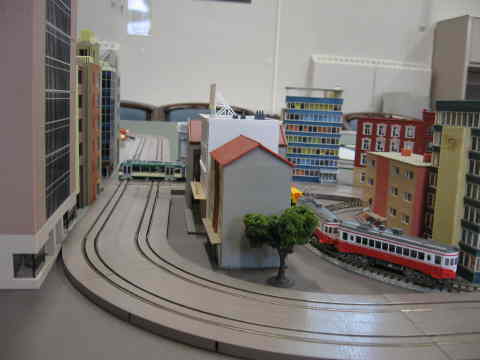 |
A Modemo Meitetsu 510-series interurban train uses the alley turn-back loop, while a Tokyu Electric articulated car crosses the intersection in the background. |
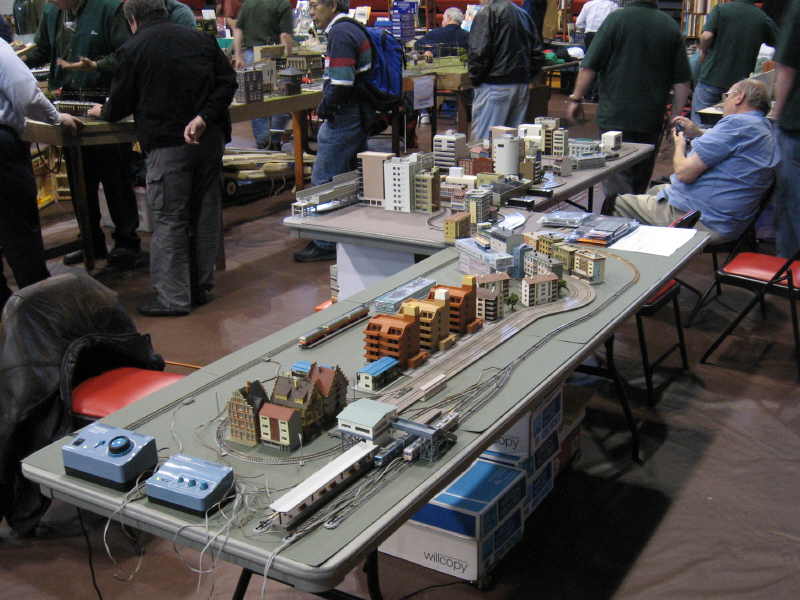 |
At the October 2010 NYC MTA Rapid Transit and Trolley Modeler's Convention in New Brunswick, NJ, a two-table EasyTrolley layout was displayed, along with three T-Trak trolley layouts (see the "T-Trak for Trolleys" section). This end of the EasyTrolley layout featured an automatically-operated electric railway running in a "U" shape, with a three-track terminal, similar to previous shows here. |
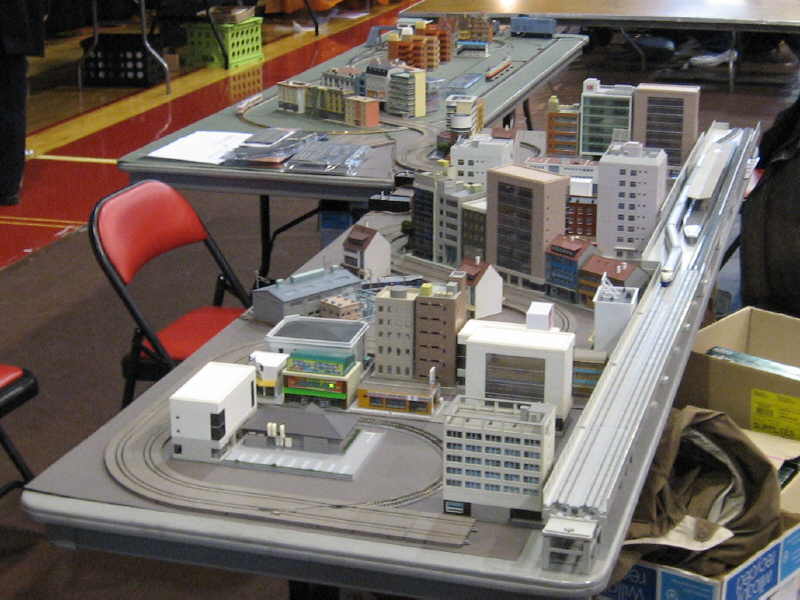 |
The EasyTrolley streetcar line weaved through the city, serving the viaduct station and then passing over a level grade crossing to the terminal station. It dominated this other end of the layout. We had the track plan for the layout (drawn with AnyRail), the new Tomix "Wide Tram" track, and unused street sections and tram road kit pieces on display to educate others about what is possible with Tomix products. There was a lot of interest. |
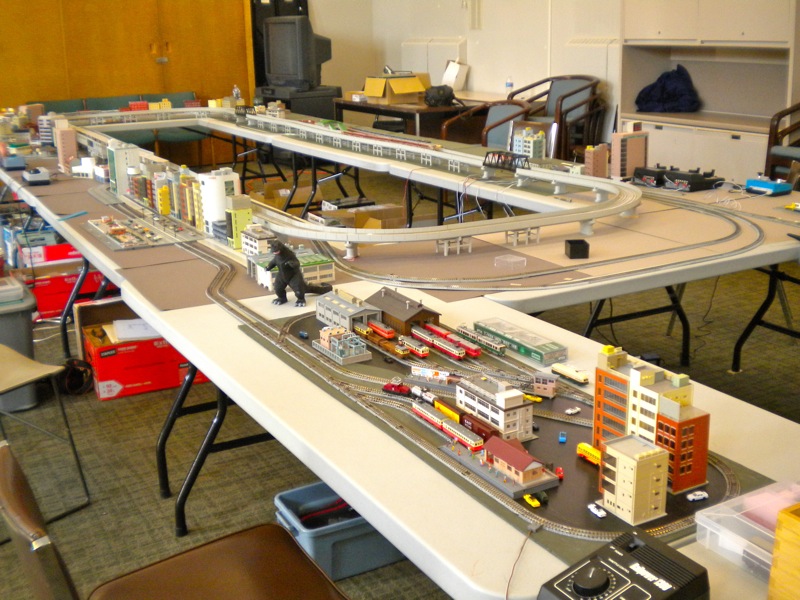 |
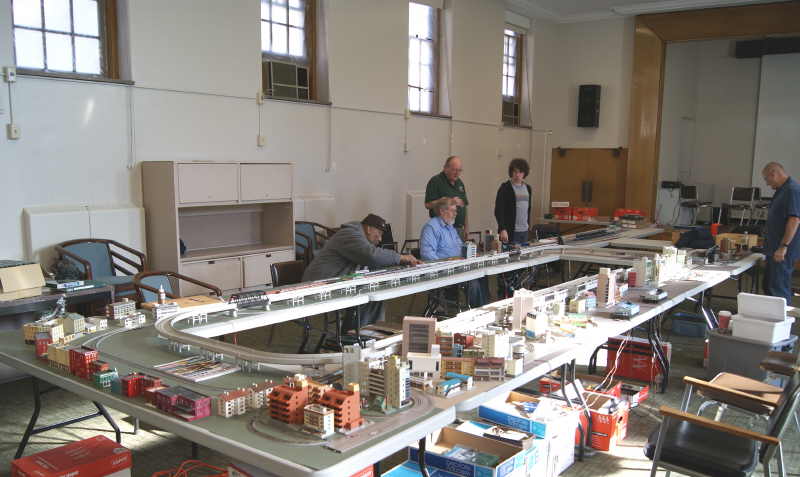
This is an overall view of the late 2010 work session setup, from Dick B.'s Tomix micro-layout, showing the trolley line, high-speed viaduct and two-track regional line. (Richard Bell photo) |
 |
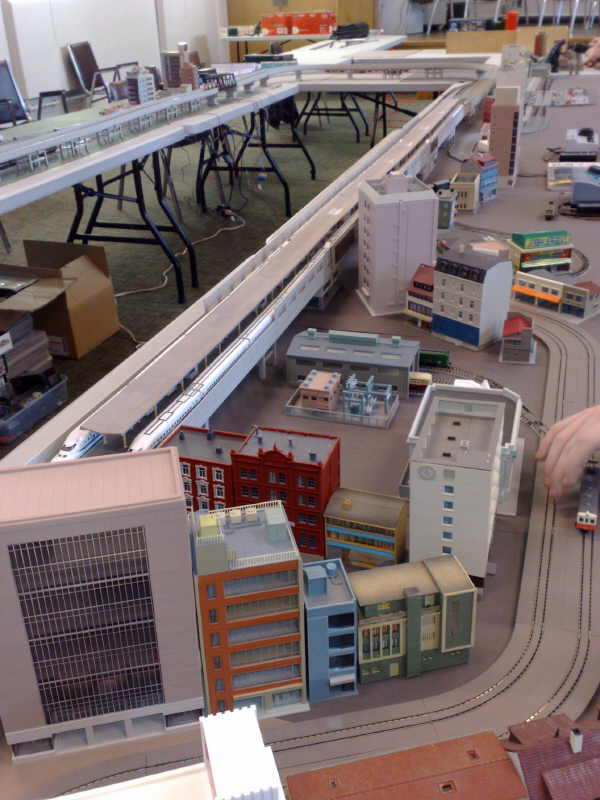
Here is the view from the other end, with the late afternoon sun shining in. (Larry Bak photo) |
 |
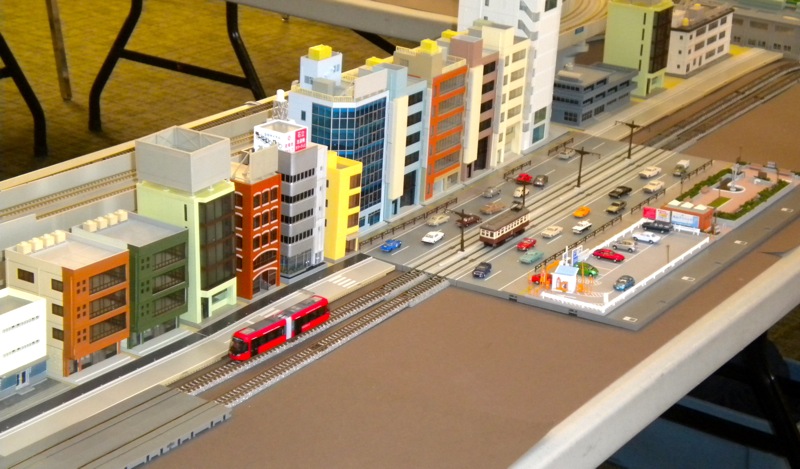
A closer view of the city shows two 16-car Series 700 shinkansen trains in a full-length viaduct station, two first-time events for our sessions. In this setup, the streetcar carbarn has been tucked away in the center of a city block. (Douglas Kerr photo) |
 |
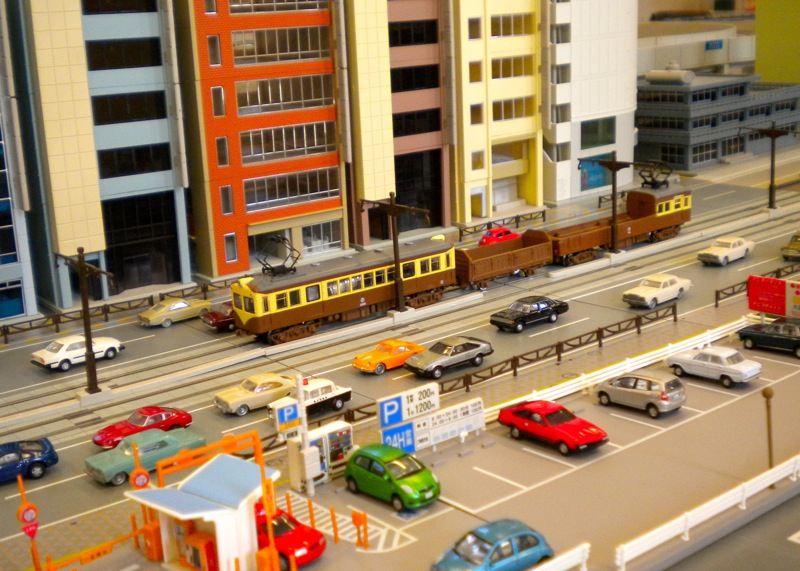
We used Kato conversion tracks and long Tomix straight pieces to bridge from the micro-layout to Larry B.'s Kato Unitram section and then to the Tomix EasyTrolley street. The track spacing goes from 37 mm to 25 mm and back to 37 mm. (Richard Bell photo) |
 |
Here are some shots on Larry's nice Unitram setup. This one shows Dick B.'s Tomytec-based work train. Larry participated for the first time on this weekend, bringing both Kato Unitram and Tomix Wide Tram trackage. Weekend get-togethers like these clearly demonstrate how much can be done with "temporary" layouts and scenery. (Richard Bell photo) |


