
These JPEG files show the basic street sections and samples of more complicated design "elements" needed to build a realistic EasyTrolley street railway. The drawings were originally produced in one-third of actual size. You should be able to click on the images below to get to the large files, download them and print them out in that size on regular letter-size paper. You can make copies, even enlarge them 300% to full size, cut out the pieces and lay out trial arrangements on a tabletop. I did just that, placing model trolleys and buildings around to see how everything would look and what would fit on my layout table at home.
Note that both tracks in the street run the complete length of every element, even the loops. This makes it easy to build the entire street using the Tomix street kits, since there must be two tracks to hold the pieces, to create a full-width street. It also gives an opportunity to attach additional trackage that goes beyond. Without any additional trackage added, it can "suggest" additional trackage that is not modeled, or be an abandoned stretch of track heading out of town. You can park a trolley in the street on this unused track, in a pinch.
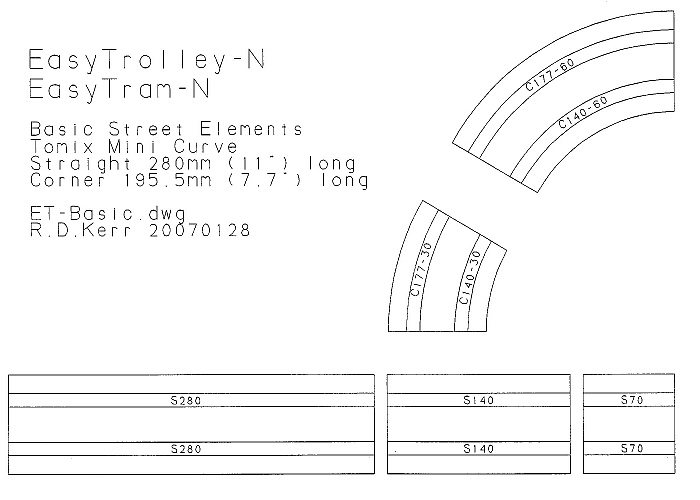
Figure 1: Basic Street Elements - These are the basic straight and curved double-track street sections, showing the Tomix track sizes. If you ever had HO or Scalextric home slot car track, this should all seem very familiar!
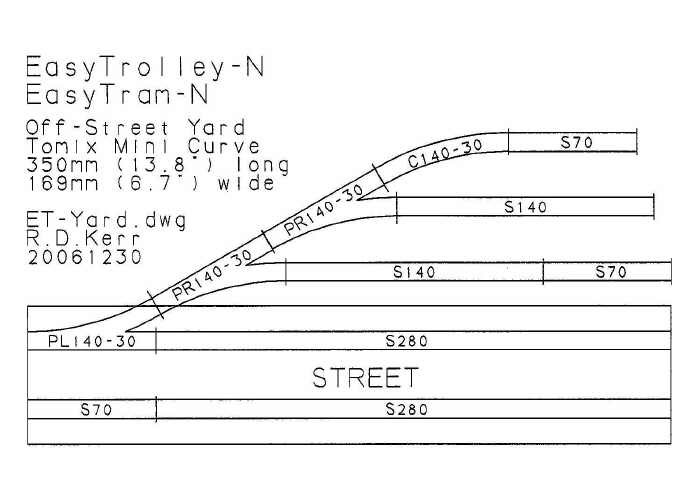
Figure 2: Off-Street Yard - Here is a basic yard along the side of a street. A carbarn wall along the back would provide a great urban backdrop and would suggest a larger facility exists.
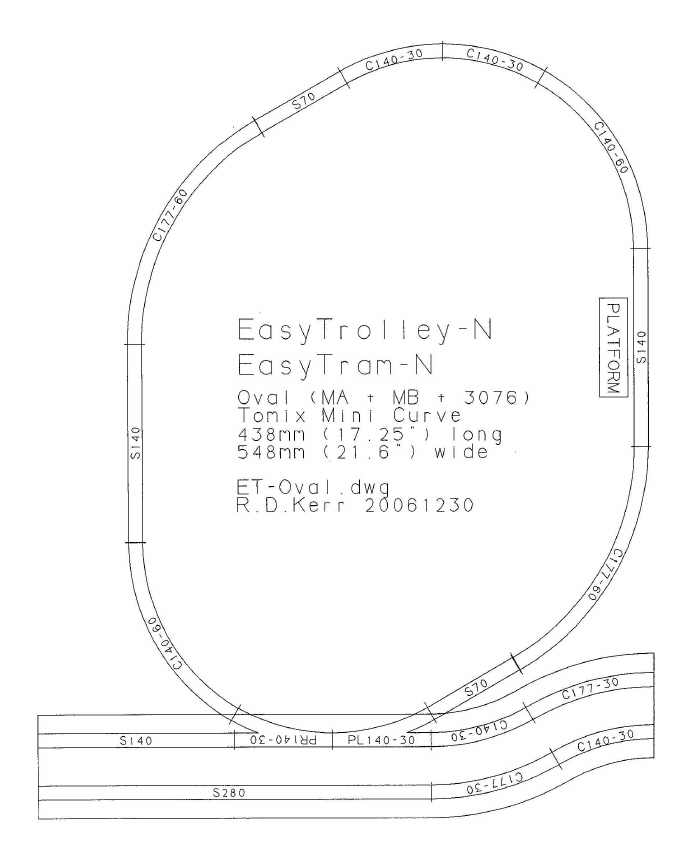
Figure 3: Oval (MA + MB + 3076) - This drawing is an exercise to use a minimal purchase to have an oval or test track for home that can double as an EasyTrolley street element to take to conventions or meets. It uses one Tomix #91081 Mini Rail MA Basic Track Set (loop), one #91082 Mini Rail MB Points set (turnouts), and one #3076 Tram Rail Accessories Kit 1 (I call this the "street kit").
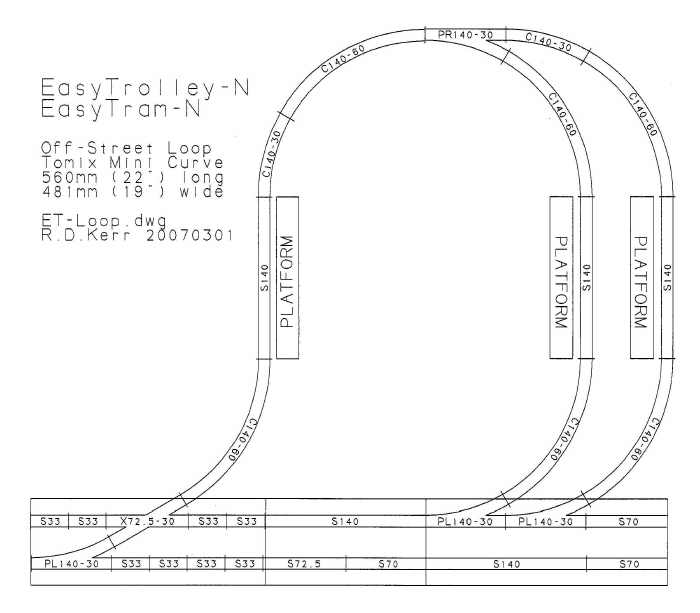
Figure 4: Off-Street Loop - This is a basic urban trolley off-street return loop, as used in many cities worldwide. Crossing over on entry (with right-hand running) locates the doors of single-end cars like the PCC car to the inside of the loop, within the tight urban land parcel. There is an unloading platform on entry, and two loading platforms on the other side can handle cars for two outbound routes, or the outer platform can be used just during rush hours and can hold stored cars at other times of the day.
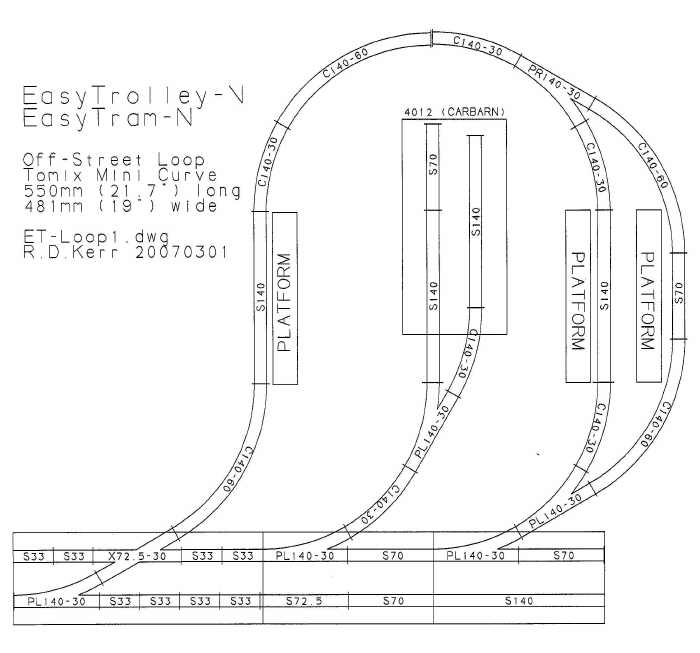
Figure 5: Off-Street Loop with Carbarn - This loop is a refinement of Figure 4. The outbound platform points (turnouts) are at 30 degrees, moving one out of the street paving and also showing the versatility of the Tomix sectional track geometry. (You can put the points at 60 degrees, too, but then the outer track has virtually no straight track.)
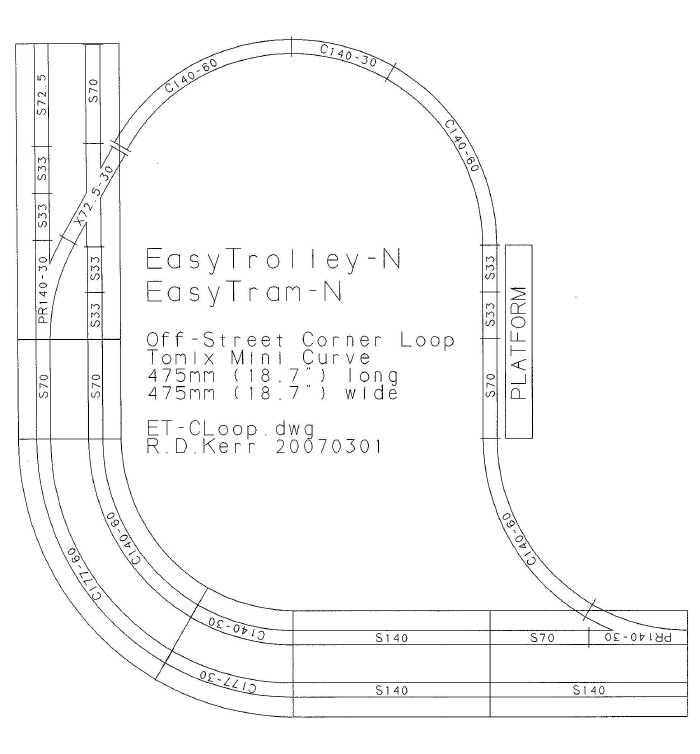
Figure 6: Off-Street Corner Loop - Here is a compact cut-back loop located inside of a corner. This is ideal as a downtown loop, with impressive buildings on the corner, and the trolleys or trams ducking in and out of "urban canyon" alleys or pedestrian areas to load and unload. You can leave out the 70mm straights to shorten this loop. I do this, but I always leave a bit of straight track between left-right curve transitions to prevent coupled two-car trains from trying to derail.
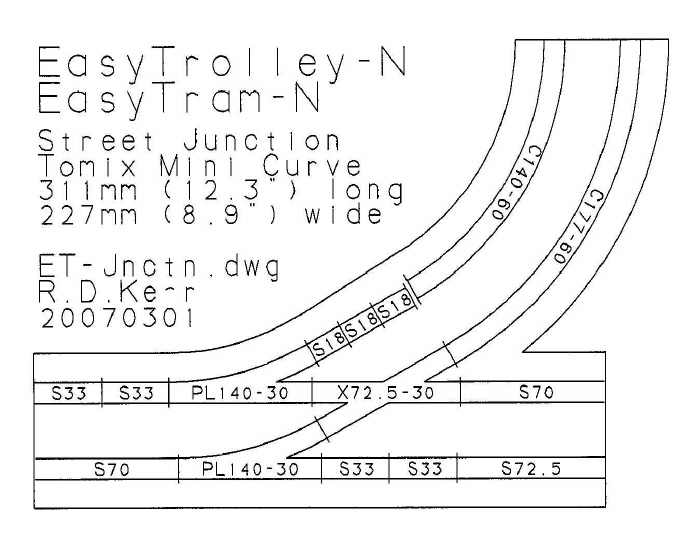
Figure 7: Street Junction - This is an attempt at a street junction. I am not entirely pleased with it, because the crossing track and parallel short straight track pieces keep the curve from being continuous and a tight city corner. (Despite the gaps shown in the accurate CAD drawings, the pieces should fit together just fine.) One option would be to have the diverging tracks continue on at the 30-degree angle from the points and crossing, and build a triangular "flat-iron" building to fit the narrow corner.
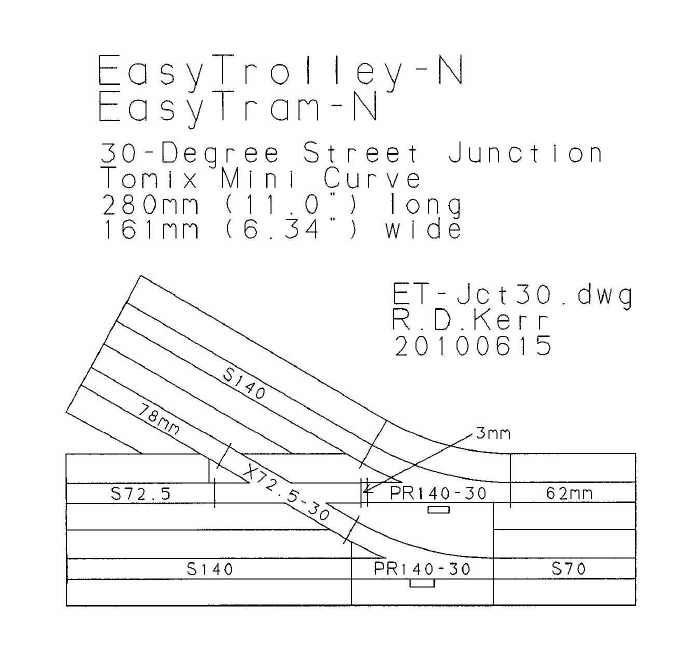
Figure 7a: 30-Degree Street Junction - This is the junction I eventually built, so I guess I will have to make a 30-degree "flat iron" building for it! See the "Photo Gallery" on this website for images of the finished junction. This drawing shows how the street pieces need to be cut to pave the junction. Note that the two odd-length straight track pieces can be cut from one S140 straight track. Also, 3 mm pieces of rail need to be inserted between the crossing and turnout as shown; I used spare Code 80 rail on hand, centered it in the Tomix rail joiners, and carefully soldered everything together. The overall length along the straight street is the Tomix standard 280 mm. The other leg is sized to make layout designs similar to Figure 7b (below) possible:
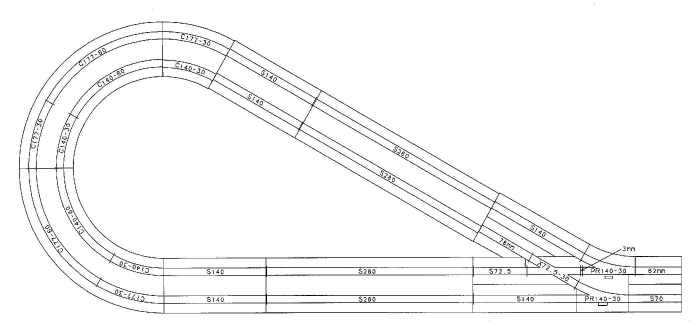
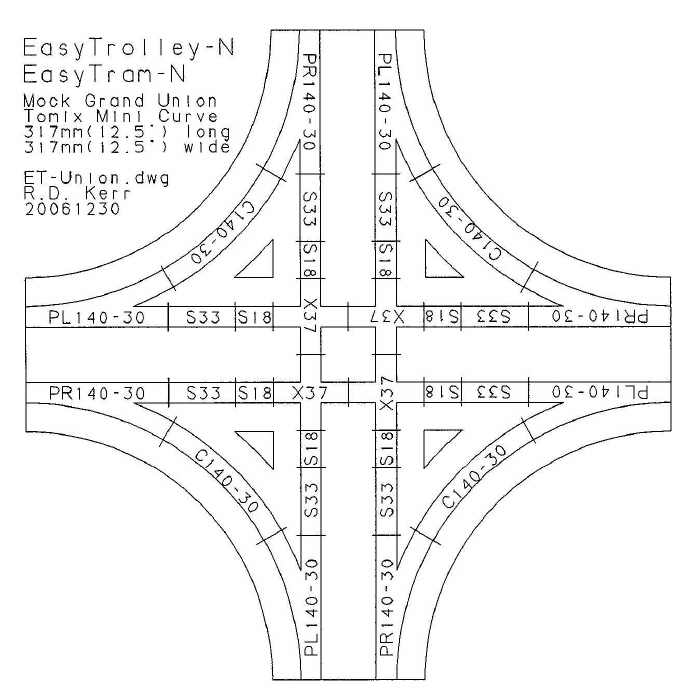
Figure 8: Mock Grand Union - Here is a nice little element. At first glance it looks like a "grand union," where every approach can lead straight ahead, left or right, but in fact it only has the outer diverging routes. So I call it a "mock" grand union. It would make a great downtown focal point on a layout, a busy hub of activity. You will have to fill in the four "triangles" with street surface.
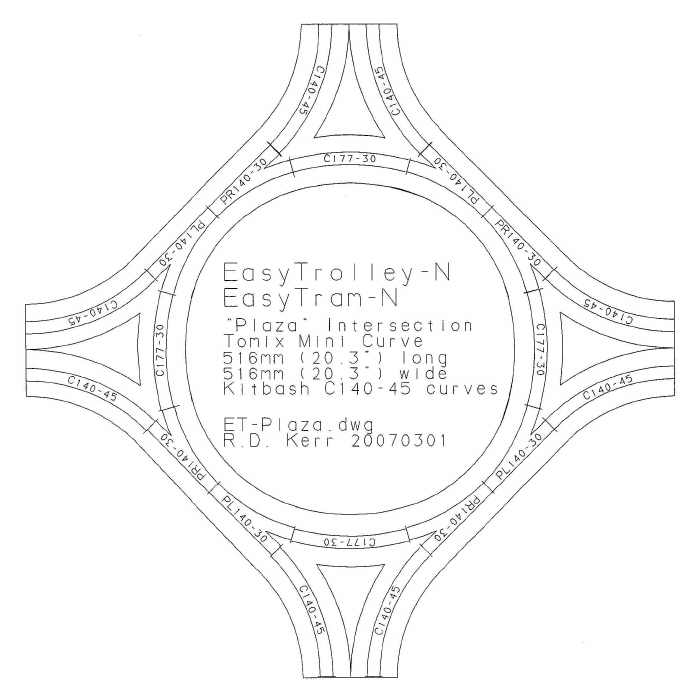
Figure 9: Plaza Intersection - ... and here is another hub of activity, with even more operational flexibility. Trolleys or trams can depart in any possible direction. I imagine this as a traditional European-style plaza with a statue, fountains, flower beds, walkways and so on in the circular center. I would like to build a three-direction version, with a long, imposing major railway station across the back as a scenic backdrop. Note that you have to "kit-bash" the 45-degree 140mm radius curves, since Tomix does not offer them. Since it would all be glued together (perhaps in four sections, splitting between the pairs of points), you could simply shorten 60-degree curves, placing the intact ends toward the outside, to connect with adjacent street sections. Once again, the four "triangles" need to be filled in with street surface.